Stellarium is an exceptional planetarium software that is available for free on the internet. It is a valuable resource for astronomy enthusiasts due to its comprehensive information, visually pleasing design, and user-friendly interface. In addition to its stunning depiction of constellations, star clusters, planetary surfaces, and realistic textures of nebulae, Stellarium features a wide range of star catalogs, data on the orbits of comets and asteroids, and complete catalogs of deep-sky objects such as Messier and NGC.
The program boasts a convenient and ergonomic interface, making it easy to navigate and use for both preparation and actual observations. It also includes a well-designed night mode to protect your eyes from monitor glare, ensuring a comfortable viewing experience. Whether you are preparing for a stargazing session or observing celestial objects in real-time, Stellarium is the ideal tool to enhance your astronomical pursuits.
Due to its captivating terrestrial panoramas and lifelike depiction of constellations, using the planetarium is an incredibly immersive experience. Users have the freedom to select their preferred natural landscape, adjust the atmospheric conditions for a more realistic sky, and even enhance the illumination during lunar observations. Overall, the experience of using this program is truly delightful.
However, there is a drawback – the program’s detailed graphic designs and powerful database require a significant amount of computer resources. In practice, many amateur astronomers rely on compact laptops that may not have high-performance capabilities. This is why we opted to use an older version of Stellarium, version 9.1, for this review, even though the manufacturer’s website already offers the newer version, Stellarium 10.5.
The latest release retains the same catalogs and databases found in version 9.1, with identical menu logic and command options. However, it stands out with improved graphics and enhanced textures for celestial objects, providing even more detail. If you are using a less powerful computer or laptop, we suggest sticking with version 9.1.
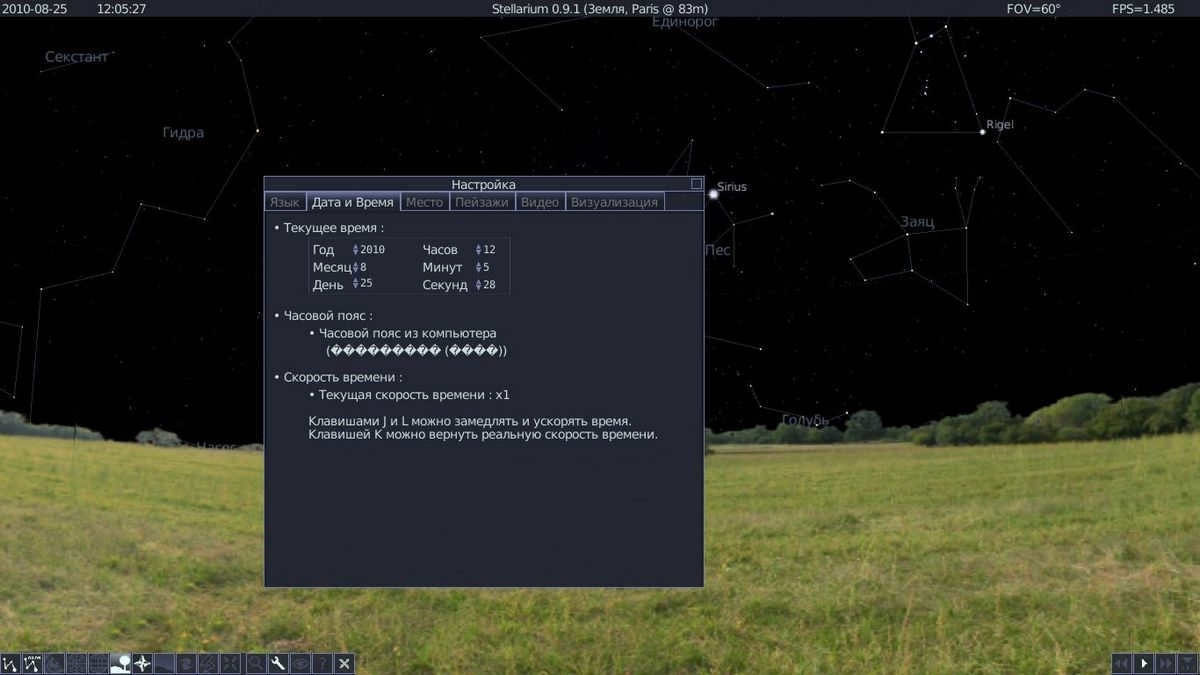
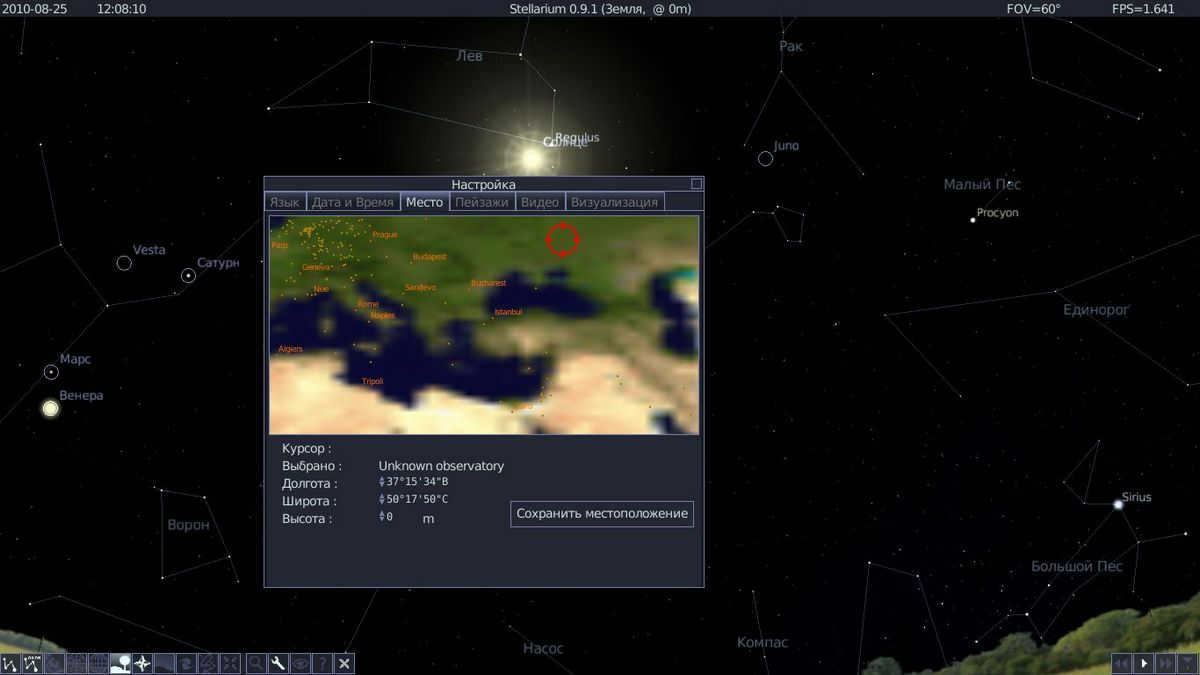
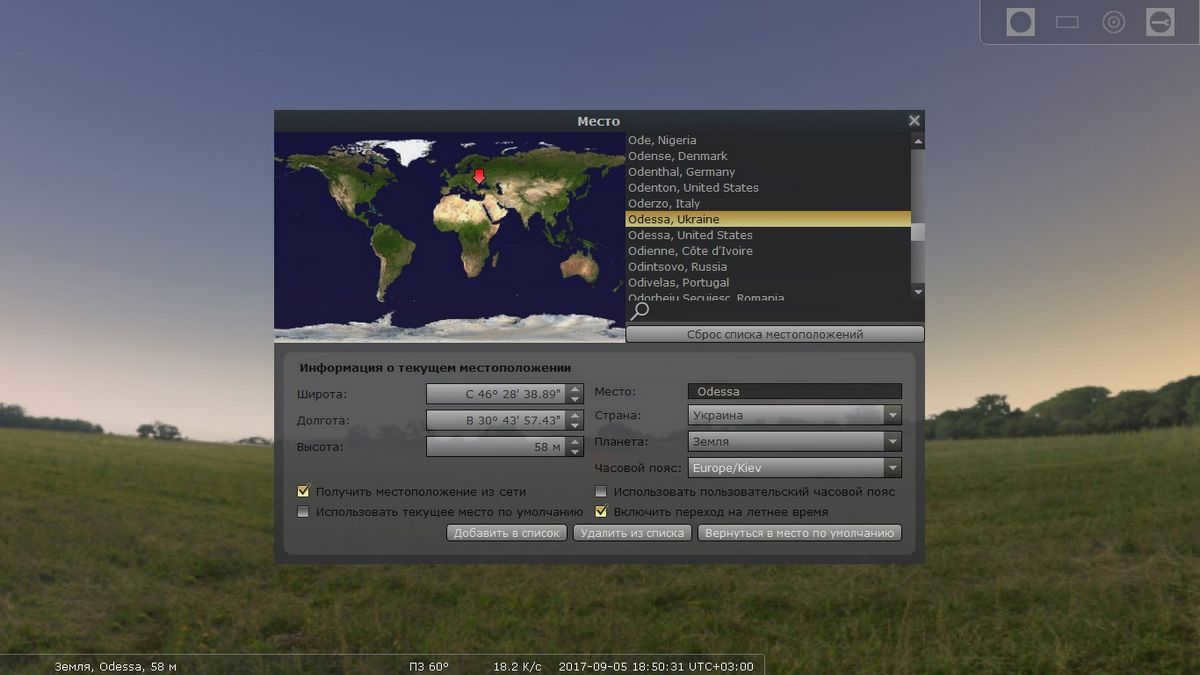
After downloading and installing the Stellarium program on your computer, it’s time to begin the setup process. The initial step is to input the geographical coordinates of the observer and verify the accuracy of the time and date settings. Stellarium obtains this information from the computer’s operating system.
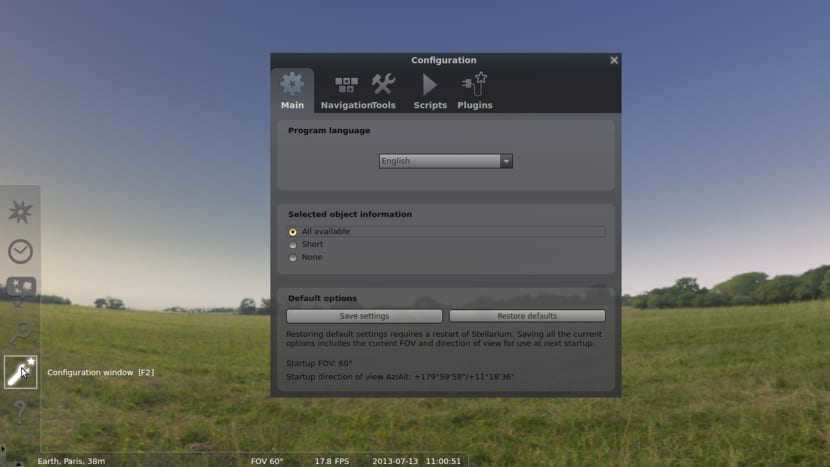
The toolbar at the bottom of the screen is where the actual work with the program takes place. To access the program settings, click on the wrench icon. In the settings window, go to the “Location” tab. Here, you can either use the map to select the area where observations will take place or manually enter the longitude and latitude coordinates. Next, navigate to the “Date and Time” tab to verify the settings or specify the desired date and time for the night of observations. If the program has incorrectly detected the language of your operating system, you can change it in the “Language” tab of the settings window. For example, you can set it to Russian.


Imaging
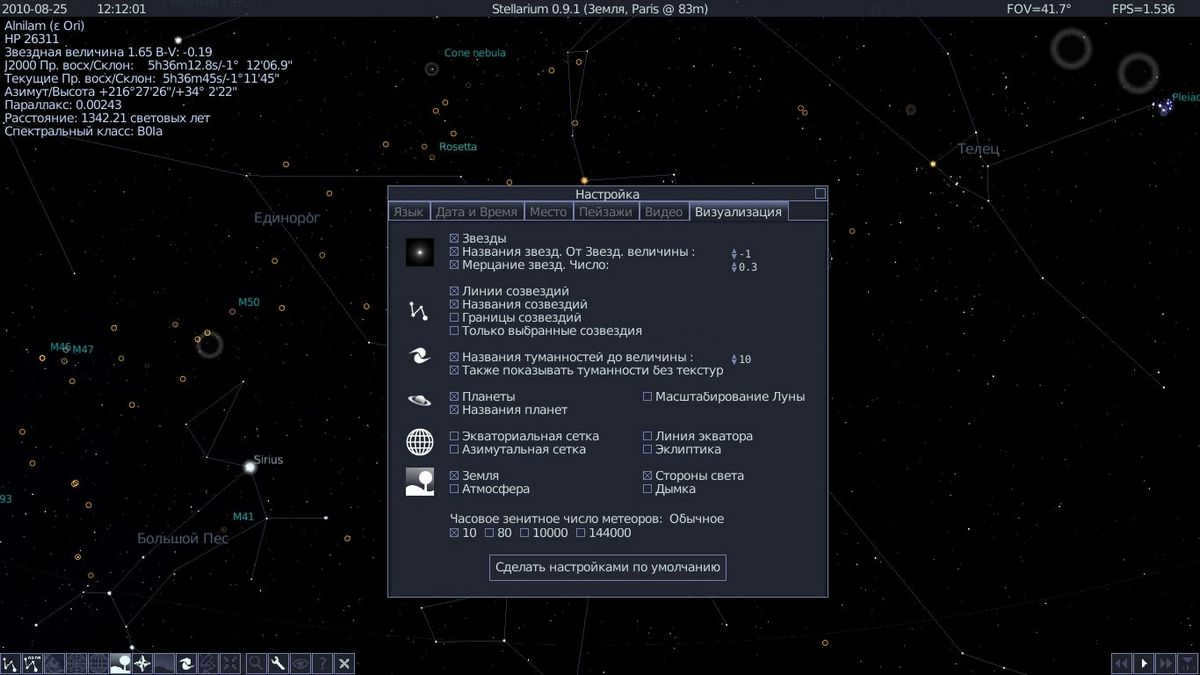
In this tab, we have the option to specify the parameters for displaying constellations, planets, nebulae, and other celestial objects in the program. When specifying the names of nebulae, it is important to consider the limitations of the telescope being used. For example, if using a 200mm telescope under a dark sky, it is recommended to not specify objects above a certain star magnitude, such as 10. While technically the telescope’s capabilities may allow for higher magnitudes, it is important to note that objects like globular clusters and planetary nebulae have a more concentrated brightness. On the other hand, diffuse nebulae and large galaxies can be quite large and their total brightness is indicated in catalogs. This means that a globular cluster with a magnitude of 10 can sometimes be easier to observe than a large nebula with a magnitude of 8. Additionally, by specifying a lower limiting brightness, the view of the night sky will be filled with a multitude of stars and markers, which may overwhelm a beginner trying to navigate the sky.
Once you have configured all the required parameters, you can click the “Make default settings” button. This will allow you to save your settings and retrieve them every time you load the program. You will also have the option to make any necessary adjustments to the settings.
Management panel
The control panel for the program is split into two parts. On the left side, you can adjust various display settings, such as constellation patterns and boundaries, atmospheric illumination, and more. On the right side, you can access the object search window, settings window, help window, or enable night mode.
Night mode app
To safeguard your eyes from the glare of your monitor during nighttime hours, it is advisable to activate the night mode feature. This feature tints the program interface and constellation lines in a red hue, which is considered least detrimental to the eyes’ adjustment to darkness. Simultaneously, it is recommended to select the darkest background landscape available and reduce the brightness of your computer monitor to its minimum level.
Finding and connecting with an object
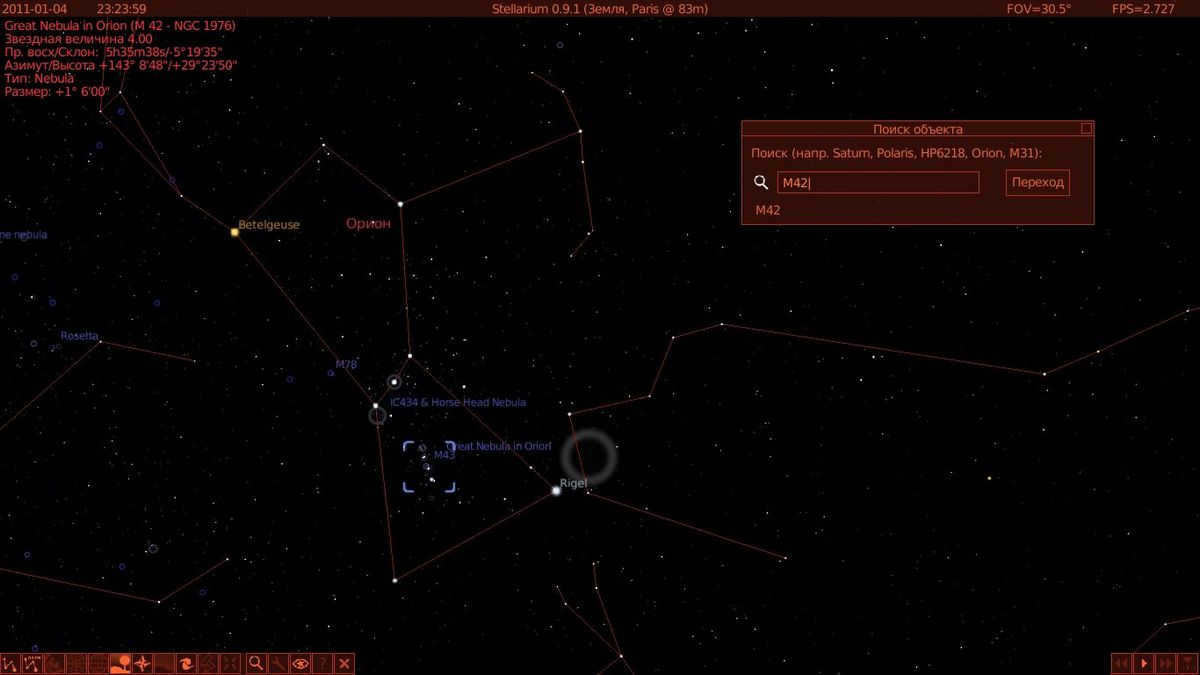
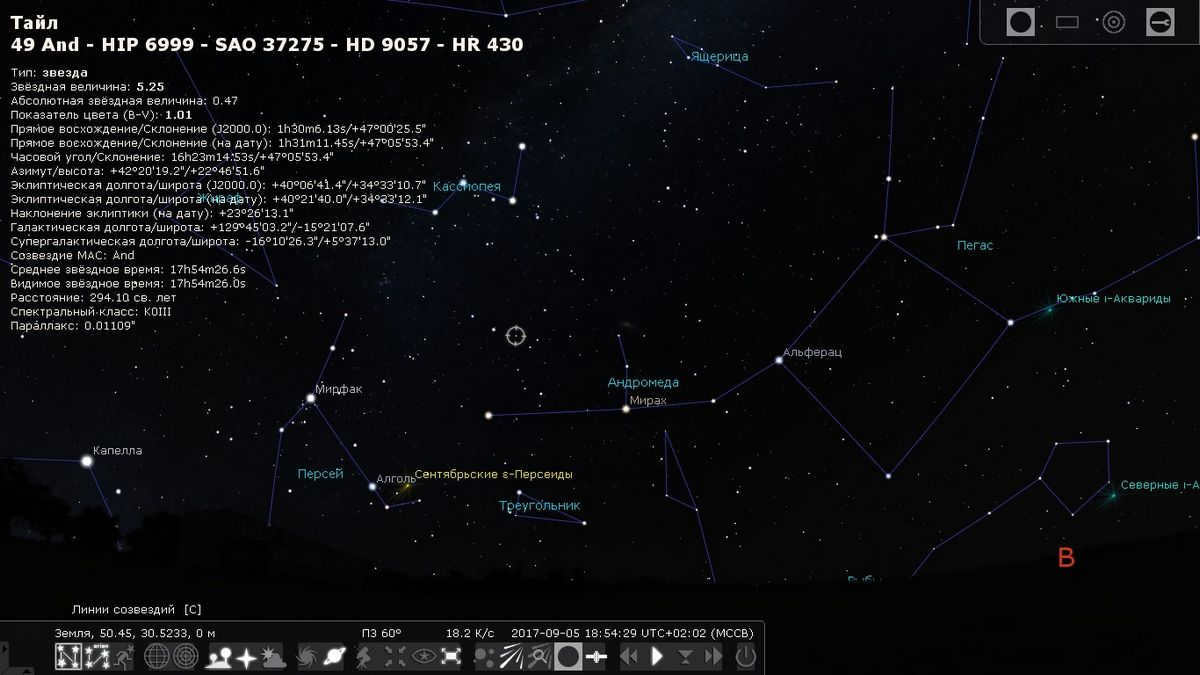
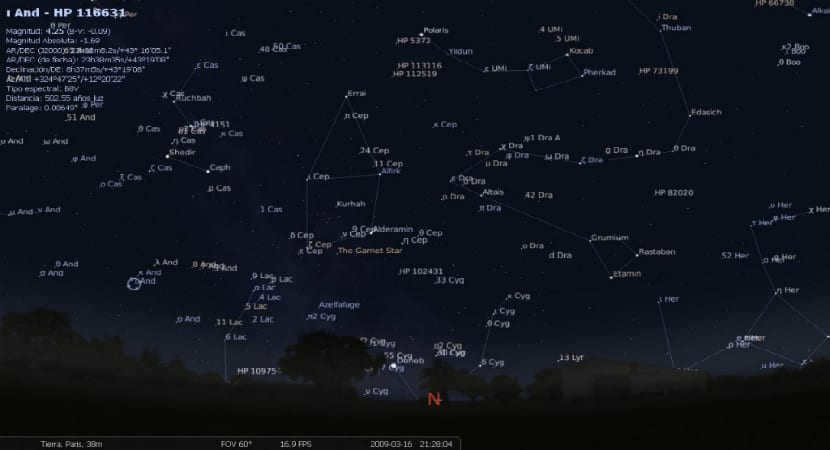
By clicking on the magnifying glass button, we can open the search window, where we can specify the object we are interested in and the program will find it. After pressing Enter, we will be connected to the object and it will be centered in our field of view. From there, we can use the mouse scroll wheel to zoom in or out on the object. Once connected, we can also navigate the starry sky by using the arrow keys. One of the great features is that when we hover over an object, we can see information about it in the upper right corner. The information includes its position, brightness, and a brief description.

Stellarium, a digital planetarium, is available as a free and open-source software application. It offers the opportunity to observe the stars in the night sky in real-time. In addition, it provides comprehensive data on various celestial bodies including planets, moons, and constellations. To begin stargazing on your Linux PC, follow these instructions:
Step-by-Step Guide to Installing Stellarium on Linux
If you’re a Linux user and want to explore the wonders of the night sky using Stellarium, you’ll need to install the application first. Fortunately, it’s a straightforward process that can be easily completed using a terminal window.
Here’s a step-by-step guide on how to install Stellarium on your Linux computer:
- Open a terminal window. You can do this by pressing Ctrl + Alt + T on your keyboard or by searching for “Terminal” in the application menu.
- Once the terminal window is open, you’ll need to enter the following command to install Stellarium:
sudo apt-get install stellarium - Press Enter and enter your password when prompted. This will start the installation process.
- Wait for the installation to complete. This may take a few minutes depending on your internet connection speed.
- Once the installation is finished, you can launch Stellarium by searching for it in the application menu or by typing stellarium in the terminal window and pressing Enter.
That’s it! You now have Stellarium installed on your Linux computer and are ready to start exploring the night sky. Enjoy!
Ubuntu
Stellarium functions flawlessly on Ubuntu Linux. In order to make it operational on your Ubuntu Linux machine, utilize the subsequent appropriate installation directive provided below to deploy the application.
sudo apt install stellarium
Debian
Stellarium operates on Debian, and you will have the ability to activate the application on your machine by utilizing the integrated apt-get package manager. Please be aware that Debian updates packages at a slower pace compared to other Linux operating systems, resulting in potential lag in receiving the most recent Stellarium updates.
sudo apt-get install stellarium
Arch Linux
The Stellarium application is well supported on Arch Linux. To run the application on your Arch Linux computer, you can utilize the following Pacman team:
sudo pacman -S stellarium
Fedora
Users of Fedora Linux can install the Stellarium application on their system by executing the following dnf installation command:
sudo dnf install stellarium
Note: If you are using the KDE version of Fedora, the application may already be installed on your computer.
OpenSUSE
The Stellarium application can be found in the software repositories of your OpenSUSE Linux system. However, in order to install it on your computer, you will need to execute the following install zypper command.
sudo zypper install stellarium
Flatpak
Stellarium is available as a Flatpak in the Flathub app store. To install the application on your computer from the Flathub store, you first need to set up the Flatpak runtime environment in Linux. Follow our guide on how to set up the runtime environment.
Once you have configured the Flatpak runtime environment, you can use the following two commands to install the Stellarium application on your computer.
Snap package
The Stellarium app can be found in the Snap app store. In order for the app to function on your computer, you will need to have the Snap package runtime environment installed. To install the runtime environment, please refer to our guide for instructions.
After successfully setting up the Snap runtime environment on your machine, you can proceed with the installation of Stellarium. Use the command below for an immediate installation and configure the app.
sudo snap install stellarium-daily
How to Utilize Stellarium
Stellarium is quite user-friendly even for those who are unfamiliar with it. To observe the stars in the sky, launch the application. Once the application is open, follow the sequential guidelines provided below.
Step 1: Utilize your mouse to press and hold the left button. By maintaining this button, you can navigate the sky to observe various entities. To locate an object (such as a planet, moon, or celestial body), simply click on it with your mouse.
Step 2: After you have chosen the celestial body in the celestial sphere that you wish to observe in Stellarium, click on the toolbar located at the bottom left corner. Then, click on the pause button. It is advisable to pause Stellarium while it is rotating, as it can be challenging to concentrate on a specific object without pausing the movement.
Step 3: When you pause the playback of Stellarium in the application, you can utilize the scroll wheel on your mouse to zoom in on the particular object. It is important to note that you might have to zoom in for a more detailed observation of the planets.
Step 4: Once you have successfully zoomed in on an object and it is completely visible, locate the “Sky and View Options” button situated on the left sidebar and click on it. From this point, you will be able to customize various viewing settings for the application.
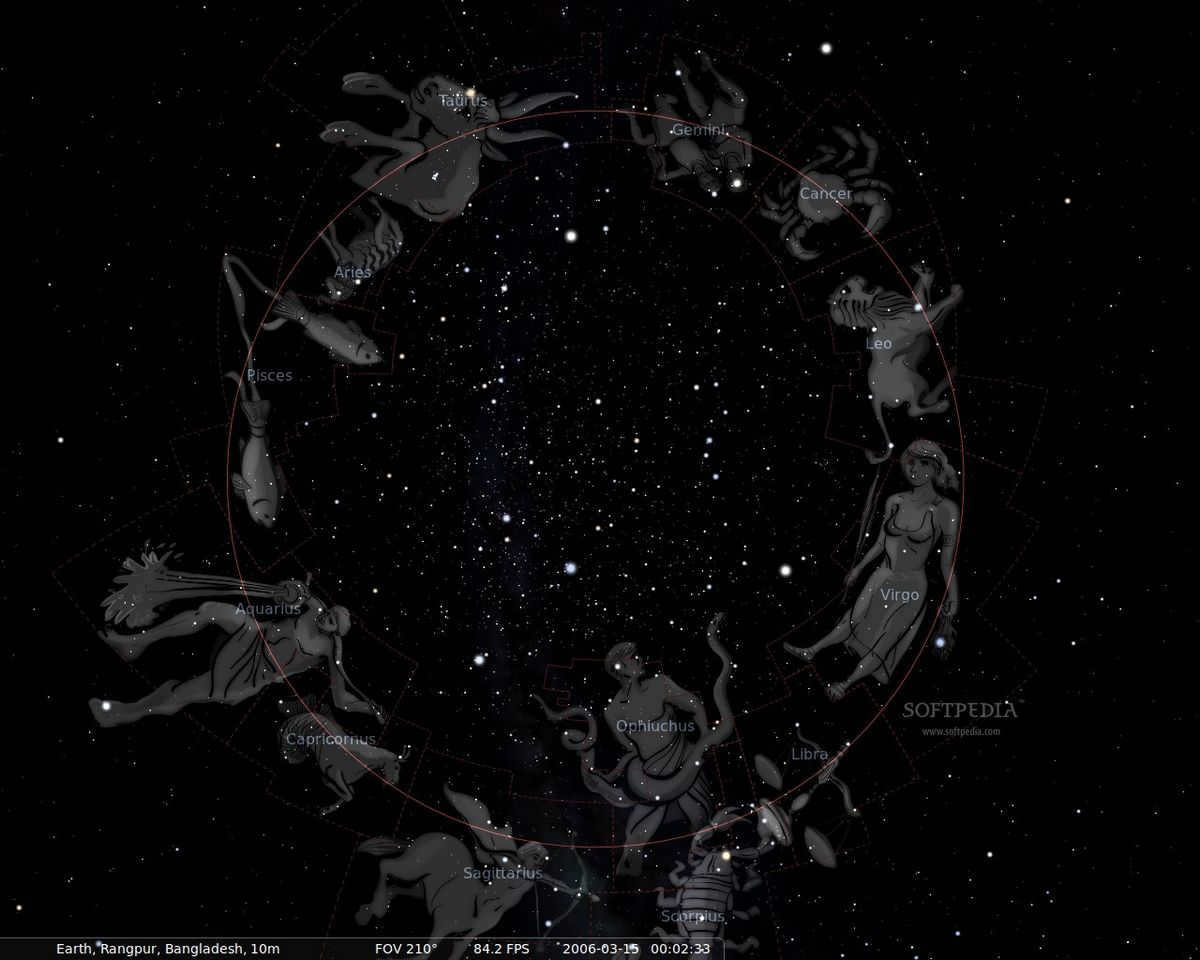
Stellarium is an excellent tool for observing constellations. Here’s a simple guide on how to view them. To begin, locate the bottom toolbar within the application and click on it. Next, find and click on the button labeled “constellation lines”. Enabling this option will display all the constellations visible in the night sky.
Once you tap on the lines button, you can choose the “constellation” labels to see the names of each constellation. In the end, simply click on “Constellation Art” if you prefer a more visual representation of the constellations.
Stellarium serves as an invaluable resource for novice stargazers. It functions as an interactive map of celestial objects, offering a wide range of features to enhance the user experience.
Key Features
Stellarium is an open-source, free planetarium software. It is compatible with various operating systems, including Windows, macOS, GNU/Linux, and UNIX-like operating systems. Since its initial release in 2001, Stellarium has gained support for 136 languages and utilizes the Qt interface.
System Requirements:
- 3D video card with OpenGL0 technology and GLSL 1.3 support
- Minimum of 250 MB hard disk space
- At least 512 MB of RAM
Recommended System Requirements:
- 3D graphics card with OpenGL3 technology and GLSL 1.3 support
- 1.5 GB hard disk space
- 1 GB of RAM
Key features of the program
- The program includes a default catalog with over 600,000 stars and additional catalogs with more than 177 million stars. Users can search for stars by name or visually in the sky. When selecting a star, users can access brief information such as its spectral class, apparent stellar magnitude, and coordinates.
- In addition to the default catalog, the program also includes a catalog with over 80,000 deep-sky objects and an additional catalog with over 1 million deep-sky objects. Similar to stars, brief descriptions of the objects are provided. The program also features built-in images of nebulae. Users can access the complete Messier catalog as well.
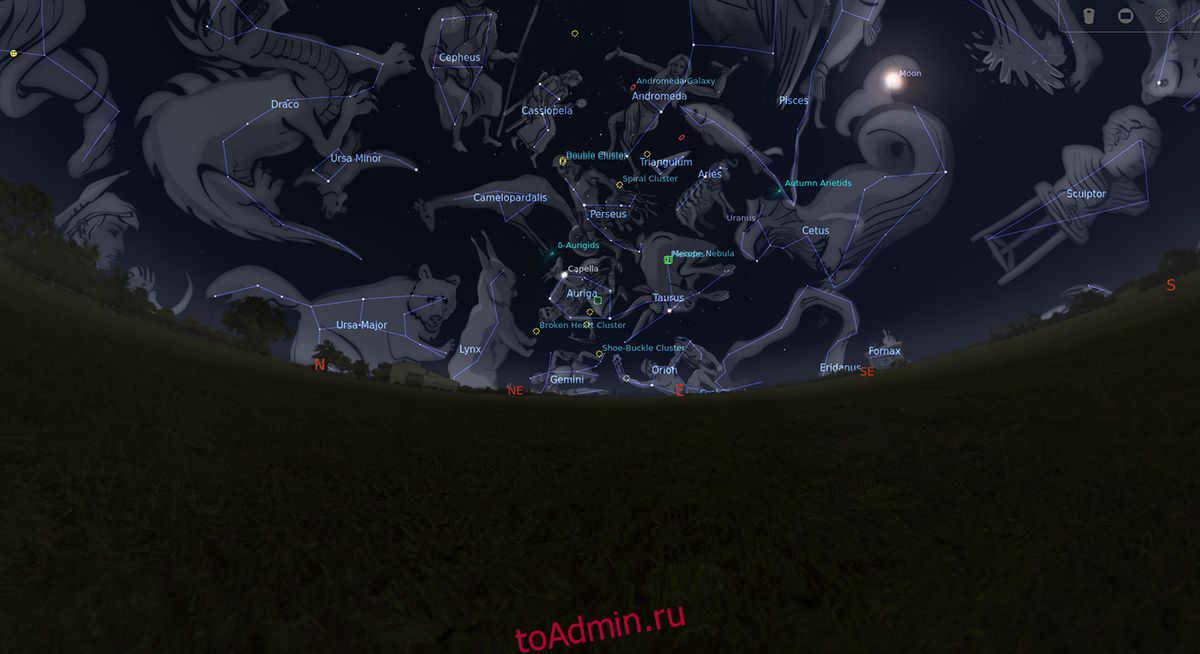
- The program highlights asterisms with lines and provides constellation illustrations, which can be disabled if desired.
Illustrations of constellations in the Stellarium program are available.
- Information about names, descriptions, and historical significance of observed objects from various cultures is provided.
- By disabling the atmospheric effect on the bottom panel (hotkey “A”), it is possible to view the image of the Milky Way galaxy.
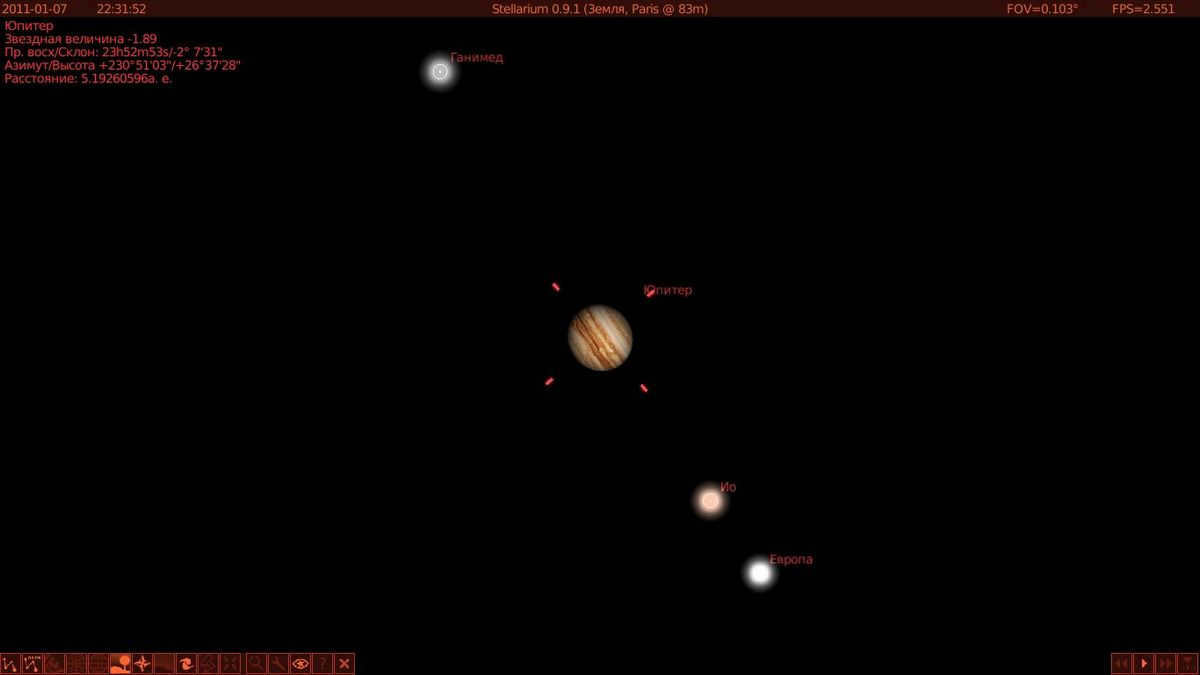
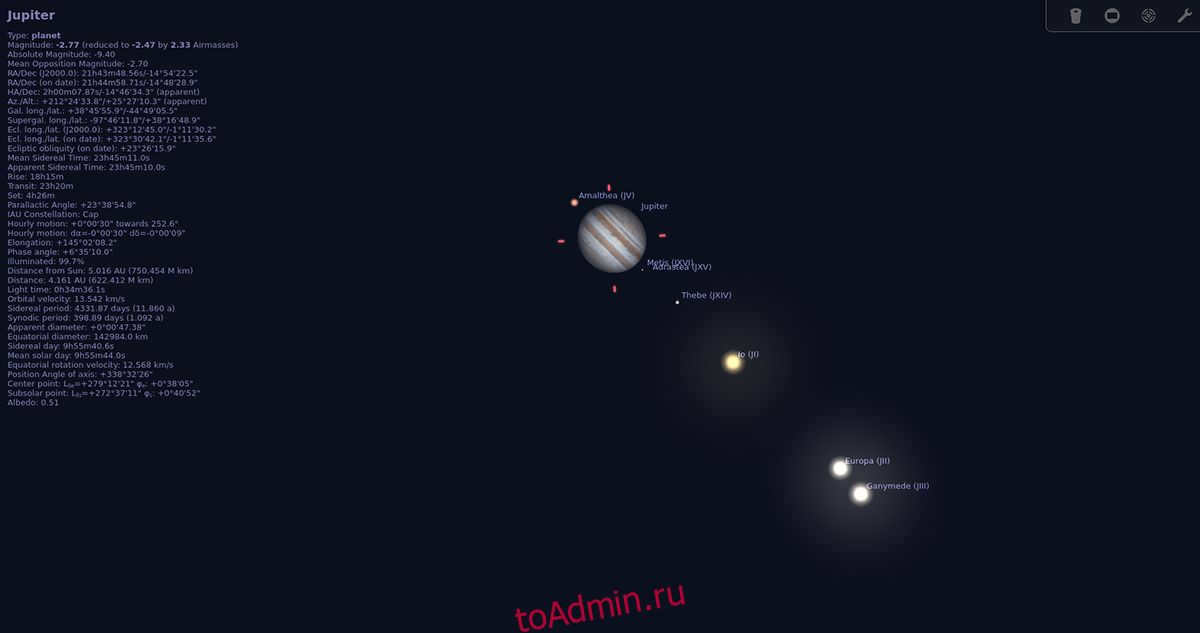
- Zooming in on the planets of the Solar System allows for observation of their satellite motions. It is important to note that due to the Earth’s rotation, which is accurately simulated in the Stellarium program, it is necessary to either “Center the observed object” (using the Spacebar) or pause the flow of time in order to maintain the planet in view. Otherwise, the object will continuously move out of sight.
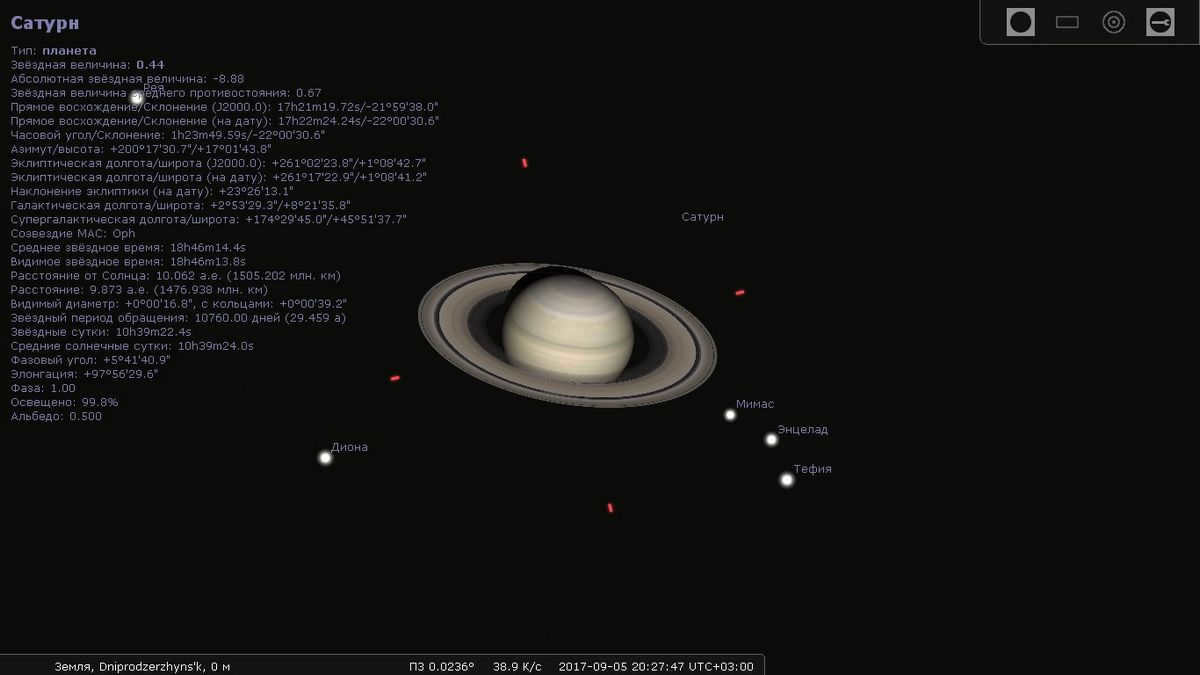
In the Stellarium program, you can get a close-up view of Saturn and explore its fascinating features.
- One of the standout features of this program is the time control function, which allows users to pause, rewind, and fast-forward time. This is extremely useful for predicting the positions of celestial bodies visible from your location at different times.
- Another notable feature is the fisheye effect, which is particularly useful for creating projections on planetarium domes.
- The program also includes a telescope simulator that allows users to observe celestial objects with different eyepieces and lenses.
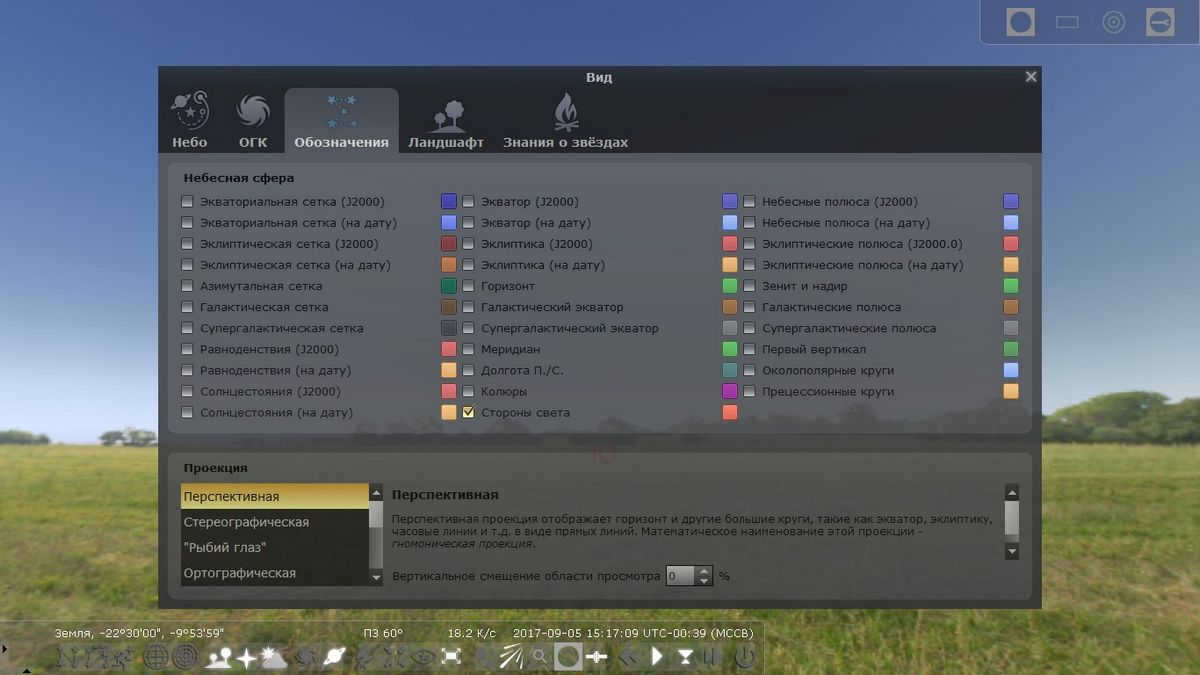
- Additionally, users have the ability to enable or disable equatorial and azimuthal grids for a more tailored viewing experience.
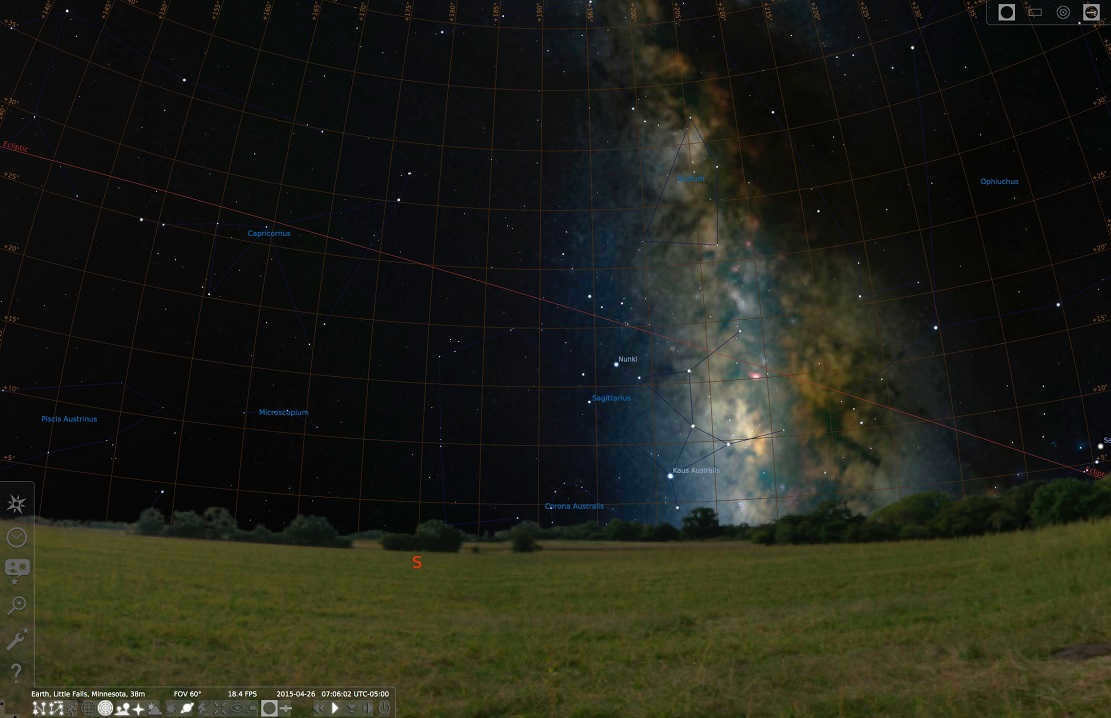
Experience the Grid and Milky Way in the Stellarium program
- View meteor streams in real-time.
- Witness the mesmerizing Iridium flare phenomenon. This extraordinary event occurs when sunlight reflects off the smooth surfaces of the Earth’s artificial satellites, specifically the Iridium network, consisting of 66 spacecraft.
- Simulate eclipses to better understand their occurrences.
- Delve into the simulation of novae and supernovae.
- Explore the simulation of supernovae and the birth of new stars.
- Enjoy the benefits of a plugin system that allows you to incorporate additional features such as artificial satellites, eyepiece simulation, telescope configuration, and more.
- Enhance your experience by adding new solar system objects from online resources. Additionally, you have the ability to include your own deep sky objects, landscapes, constellation images, scripts, and more.
Interface of the Stellarium Program
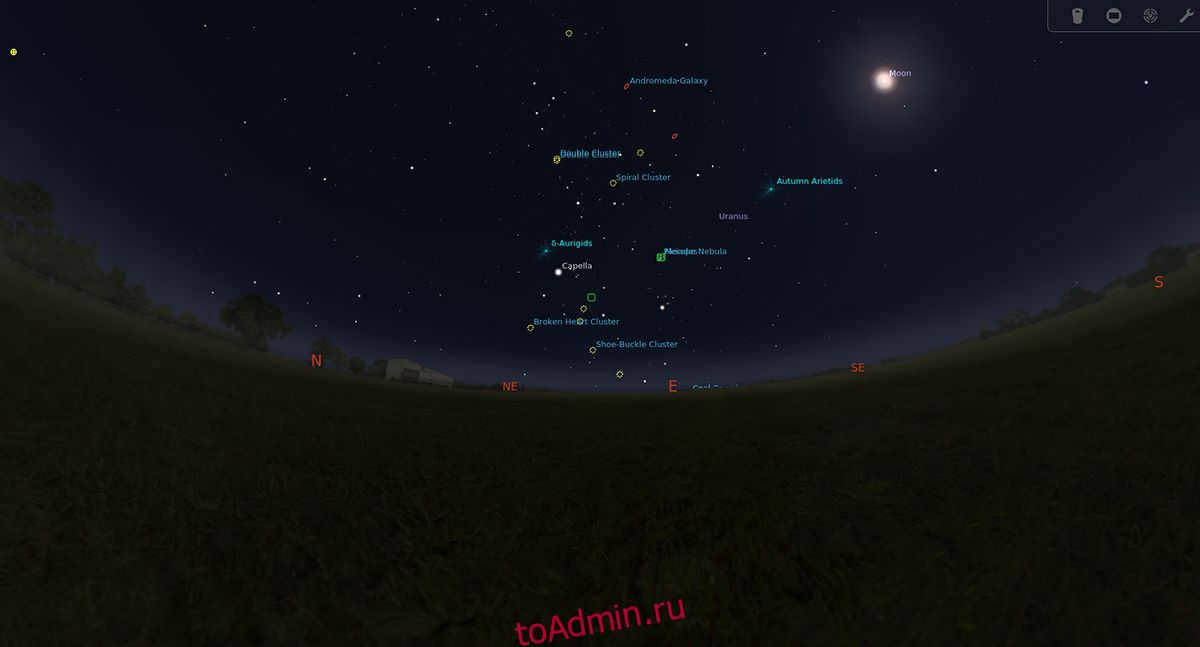
Once you launch the program, you will be greeted with a view of the sky from the Earth’s surface. The position of objects in this view corresponds to their actual positions as seen from your location. An internet connection may be required for the program to automatically determine your coordinates. If your location is not detected, you can manually input your coordinates using the corresponding function on the left panel.
The program’s interface consists of several sliding panels positioned on the sides of the screen.
Left-hand panel
Sky and observation settings window, symbols
- Landscape – gives you the ability to modify the look of the environment around the observer, and personalize its characteristics.
- Star Knowledge – a fascinating feature that lets you view celestial objects through the lens of diverse cultures. It encompasses alternative constellations, names of cosmic entities, and various aspects of astronomy, such as myths, beliefs, and more.
Egyptian designations for the Moon and Sun
Lower panel
The lower panel of the Stellarium application incorporates 24 buttons for management and display:
- Enable/Disable constellation lines [C]
- Show/Hide constellation names [V]
- Show/Hide constellation images [R]
- Show/Hide Equatorial Grid [E]
- Show/Hide azimuth grid [Z]
- Show/Hide Earth Display [G]
- Enable/Disable Light Sides [Q]
- Enable/Disable Atmosphere [A]
The Stellarium program allows you to turn off the atmosphere and view the sky without it. Here are some useful shortcuts and features:
- Toggle Deep Space Objects on/off: [D]
- Toggle planet names on/off: [Alt+P]
- Switch between equatorial and azimuthal ascension: [Ctrl+M]
- Center the selected object: [Spacebar] – this allows you to focus on a specific object
- Night mode: [Ctrl+N]
- Full Screen Mode: [F11]
- Toggle exoplanet display on/off: [Ctrl+Alt+E]
- Toggle meteor streams display on/off: [Ctrl+Alt+E]
- Display meteor shower search window: [Ctrl+Alt+M]
- Telescope eyepiece view: [A] – simulates observing an object through a telescope. There is a window in the upper right corner for selecting the telescope, lens, and eyepiece: [Ctrl+O]
- Toggle the display of artificial satellites [Ctrl+Z]
- Four buttons for time control: rewind [J], pause/start [K], fast forward [8], return to current time [L].
- Exit the program [Ctrl+Q].
Simulation of a Telescope
When you choose a specific object to observe, the telescope setup panel becomes active in the top right corner. Firstly, you have the option to enable eyepiece simulation “View in eyepiece”, which will bring up a dropdown menu for selecting eyepiece, telescope, and lens.
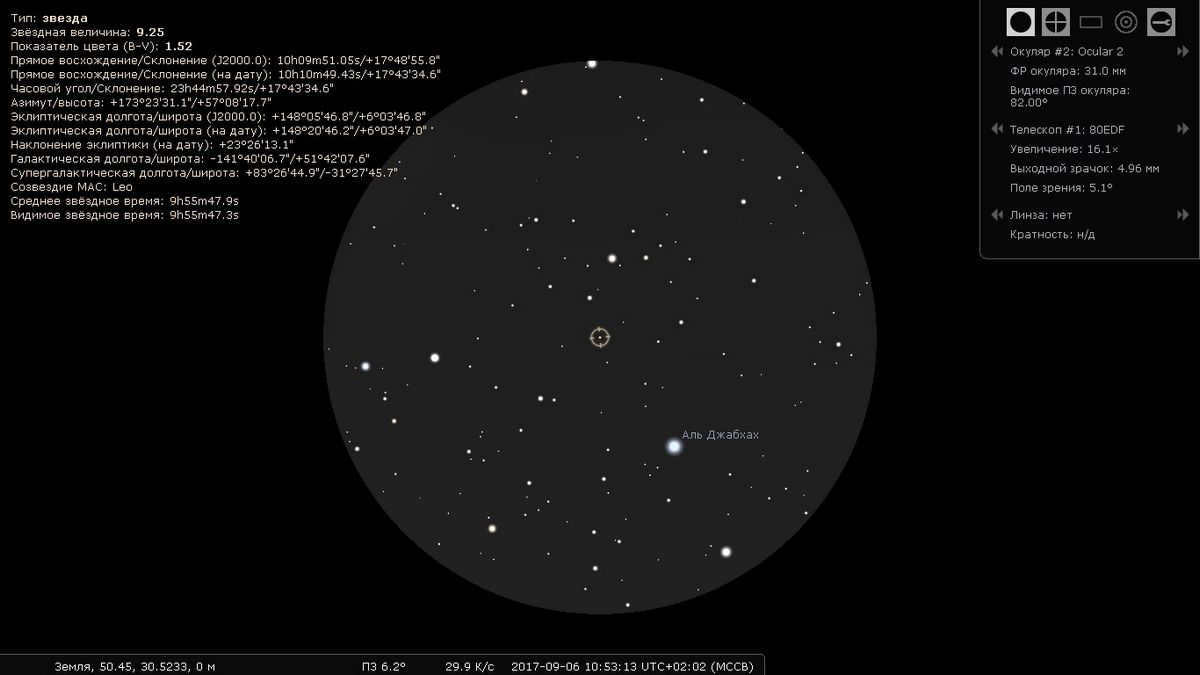

Using the eyepiece in the Stellarium software
Additionally, there is a “Plugin Configuration” button located in the top right corner.
The Stellarium software is a unique virtual planetarium program. It offers a diverse set of features and a comprehensive database of celestial bodies, complete with detailed parameters. With its intuitive interface and modest system requirements, Stellarium is easily accessible to astronomers of all levels. Best of all, it is freely available for download and use, making it an invaluable tool for any stargazer.
The most recent update for the software in the hat was on November 14, 2021.
Unique Description:
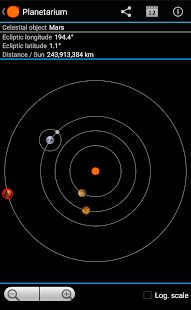
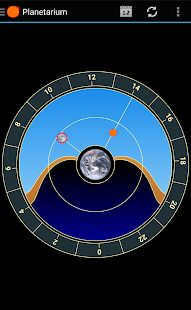
This application offers a realistic representation of the sky and is an unofficial PC port of a program with the same name. It serves as a full-featured planetarium for Android devices, allowing users to view the sky in a realistic manner using the naked eye, binoculars, or a telescope.
Key features of this application include:
- GPS positioning
- Realistic view of the sky using the device’s accelerometer
- Catalog of over 600,000 stars
- Display of constellation shapes from various mythologies
- Realistic representation of the Milky Way
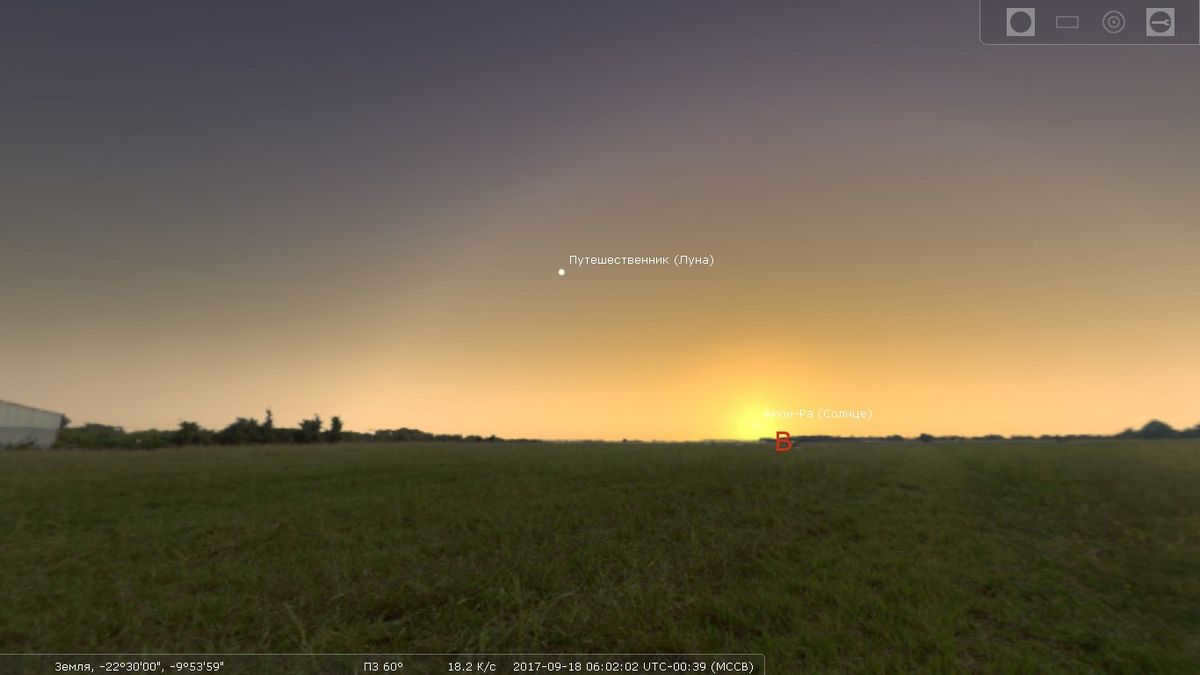
- Realistic scenery, atmosphere, and sunrise/sunset
- 3D rendering of the major planets in the solar system and their satellites
- Night mode
- And much more
This application requires Android 4.4 or higher and does not have a Russian interface.
If you encounter issues with installation, please uninstall any previous versions of the application. Prior to uninstalling, it is recommended to save the cache as it will be lost during the uninstallation process.
For versions up to 1.3.2, you can find the cache here. Simply unzip the file and place it in the Android/obb/ directory.
Really enjoyed using the program, it functions very well
I currently have SkySafari Plus installed. I’m considering whether it would be worth it to purchase Stellarium as well. I highly doubt that Stellarium is in any way superior to SkySafari.
Additionally, I don’t think it can control the mount on Android. Furthermore, its level of detail is significantly worse.
I didn’t even purchase SkySafari Pro because it has some “bad excesses”. I have to download it every time there’s an update
Having 500Mb of stars and planet textures is excessive… 150Mb is more than enough for me. ;o)
P.S. Ended up buying it for my collection ;o)
I was not pleased with the fact that the planetarium has a built-in “backlighting effect” for some reason. This means that when you want to see the stars near the moon or Jupiter, the surrounding stars disappear when you point the image at them. It might be considered a small issue if there was an option to remove this effect in the settings, but unfortunately, it is not available.
I have updated the list of traditional star names specifically for Russian users.
star_names.txt ( 6.5 KB )
I would greatly appreciate your assistance in inserting this into the Stellarium installation file or into an already installed program.
Stellarium Mobile Sky Map v.1.5: com.noctuasoftware.stellarium_1.5.apk ( 19.68 MB )
Here are the latest improvements in this version:
* Fixed the screen orientation issue in sensor mode for certain devices
* Resolved the crash problem at startup for some devices
P.S. kindly update the title in the header and in the topic description (the title has been modified))).
Is the year of the last update in the header actually 2013?
How can one observe the constellation of the swan without knowing the names of gamma or the constellation of the eagle, by reading instead of Tarazed and Alshain, the less significant beta and gamma of the eagle.
I spent a couple of days trying to figure out how to package my apk so that it can be installed on Android. I couldn’t find a solution. Either the file couldn’t pass their checksum (or whatever they have there), or the packaging solution was too complex, like using a project in the SDK.
And yes, the computer version also offers a fantastic feature where you can adjust the number of star names shown per square kilometer on the screen. It’s incredibly convenient, especially considering that screens come in different colors like black, white, and red. For instance, on my 5.3 Galaxy Note screen, the map appears a bit sparsely populated, so I would opt to increase the density of the names.
Due to the absence of appropriate regulations, I am unable to fully eliminate all the names (although I can erase all the grid marks), thus preventing me from creating a more authentic depiction of the night sky (which is a rare sight for me, living in a bustling city).
Therefore, I suggest implementing this functionality and introducing a “realistic sky” button, which would remove all elements except for the stars and planets. Pressing the button again would restore the original view.
The common depiction of a smartphone and tablet user is someone engrossed in their small screen and oblivious to their surroundings. However, in reality, these mobile devices have the power not only to disconnect a person from the real world, but also to reveal new and fascinating dimensions. Today, we would like to introduce you to a collection of Android apps that will unveil the wonders of the celestial realm.
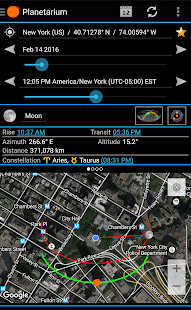
This app provides essential details on the primary astronomical entities, including constellations, planets within the solar system, their moons, and much more. You can access comprehensive information about their characteristics, whereabouts, and visibility based on the observer’s coordinates, date, time, and time zone. The app boasts an exquisite design and a sophisticated interface.
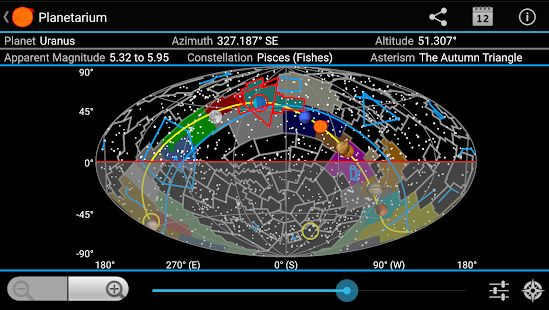
Vortex Planetarium – Astronomy
Vortex Planetarium is an extraordinary astronomy app available on the Google Play store. It offers a wide range of features that make it one of the most comprehensive planetariums in the market. With Vortex Planetarium, you can explore the mesmerizing beauty of the starry sky without even stepping out of your living room.
What sets Vortex Planetarium apart from other similar apps is its unique ability to superimpose a stunning picture of the night sky directly onto your surroundings. This incredible feature is made possible by the app’s advanced augmented reality technology, coupled with its camera lens. No other app in the market provides this level of immersive experience.
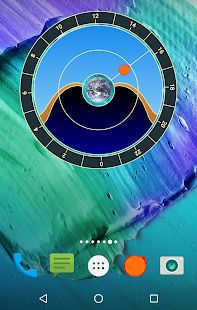
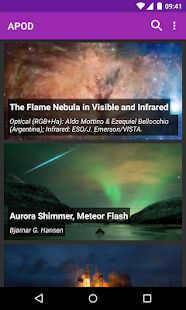
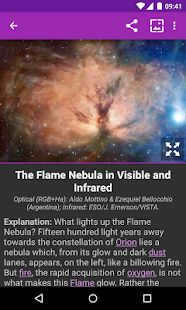
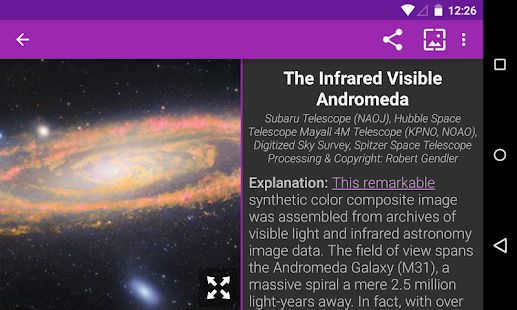
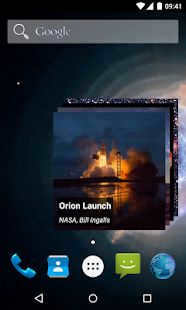
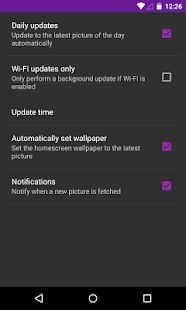
Astronomy Picture of the Day
Experience the wonders of the universe with the Astronomy Picture of the Day. This innovative program effortlessly retrieves and installs a captivating new wallpaper from NASA’s extensive catalog of celestial images as your desktop background each day. Immerse yourself in the beauty of the cosmos while also gaining insight into the fascinating astronomical objects and phenomena featured in each image.
Stellarium Mobile Sky Map
Here’s another comprehensive mobile planetarium application that offers an opportunity to expand your understanding of the stars. By simply directing your phone’s camera towards any celestial body in the sky, you’ll receive instant information including its complete name, image, and precise position. This app is equipped with an extensive database featuring data on over 600,000 stars, as well as real-time sky maps and immersive 3D renderings of the primary planets in our solar system and their respective moons.
This program is included in the “Education” category as one of the most sought-after applications and has been downloaded by over ten million users. Star Chart serves as a portable planetarium, utilizing GPS technology and a 3D representation of the cosmos to provide real-time information on the position of stars and planets visible from Earth. By simply directing your device’s camera towards any celestial object, you can instantly access its name and relevant details.
Stellarium Mobile (planetarium) is an incredible application that serves as a comprehensive planetarium for your smartphone. Stellarium has the ability to generate a lifelike 3D map of the night sky, accurately depicting what can be observed with the naked eye, binoculars, or a telescope. Not only that, but the program is equipped with a monitoring sensor that can quickly identify celestial objects, simply by pointing your phone towards them.
Key Features:
- Presents a realistic 3D representation of the night sky, mirroring what can be seen with the naked eye, binoculars, or a telescope.
- The monitoring sensor enables quick identification of celestial objects by pointing your phone towards the sky;
- User-friendly interface;
- Integration with GPS positioning;
- Utilizes accelerometer to control viewing direction;
- A dynamic sky map that showcases over 600,000 stars in real time with zoom functionality;
- An extensive collection of nebulae and galaxies, some of which are accompanied by stunning images;
- Detailed illustrations of asteroids and constellations;
- A true-to-life depiction of our galaxy, the Milky Way;
- Immersive landscapes and atmospheres that accurately simulate sunrise, sunset, and light pollution;
- 3D renderings of the primary planets in our solar system and their respective moons;
- Includes a night mode and more.
Developer: Noctua Software
Platform: Android (Device-dependent)
Interface Language: Russian (RUS)
Status: [Plus][Mod]
Root: Not required
The latest release of Stellarium has brought about significant improvements, some of which I personally contributed to. It is no secret that this remarkable planetarium is not only popular among astronomy enthusiasts, but also widely used in astronomy classes at schools. While there is an extensive user manual available for Stellarium, it unfortunately faces two major issues. Firstly, the manual is comprehensive but only available in English, which poses a significant barrier for many users in Russia. Secondly, the manual is somewhat outdated, as it only covers the features of version 0.10.2 of the planetarium. The Russian translation of the manual is also very outdated, describing version 0.8, despite the program’s functionality and interface having undergone significant changes since then!
The outcome is a concise illustrated manual highlighting the key functionalities of Stellarium accompanied by practice exercises, which I anticipate will be well-received by a wide audience in Russia. The distribution of my guide is governed by the GNU Free Documentation License 1.3 and it is conveniently available for download in PDF format.
If you have any remarks or suggestions regarding my work, I am open to hearing them. Should anyone be interested in creating a similar guide for other astronomy programs or focusing specifically on Stellarium, I wholeheartedly encourage such initiatives and am prepared to provide assistance.
Stellarium is an open-source software program developed in C and C++ that allows users to experience a virtual planetarium on their personal computers. Compatible with Linux, Mac OS X, and Windows operating systems, Stellarium offers a range of features and capabilities.
One of the standout features of Stellarium is its ability to provide users with a realistic 3D representation of the night sky. Users can explore and observe the positions of the sun, moon, planets, constellations, and stars. With a comprehensive catalog of over 600,000 stars, Stellarium provides a vast array of celestial objects for users to explore.
In addition to the extensive star catalog provided by Stellarium, users also have the option to expand their catalog by adding even more stars. While the official website offers a wide selection of additional stars, users can find even more options elsewhere.
Stellarium is an amazing educational app that allows you to delve into the wonders of the cosmos without even leaving your computer.
To optimize performance, it is recommended to use the app in a dark room. This environmental design enhances the realism of the projections, making the experience even more immersive. This is just one of the tips provided by the creators of Stellarium to ensure the best user experience.
Stellarium 0.18.0
The current version of the application is Stellarium 0.18.0, which comes with numerous features and bug fixes. Some of the notable updates include:
- HiPS support
- Inclusion of patches for TeXLive
- Addition of the star name “Dnoces”
- Inclusion of Battlesteads observatory in the list of locations
- Introduction of tools for selecting label and planetary route colors
- Option to suppress large halo around bright stars
- Addition of Tesla Roadster orbit elements
An application designed for educational environments, Stellarium is often included in the repositories of most distributions, making it highly regarded among Linux users.
To install Stellarium, you need to open a terminal and execute the appropriate commands based on your distribution:
If you are using Ubuntu or its derivatives, you have two options:
1. Install Stellarium from the official repositories. To do this, simply enter the following command (this also applies to Debian):
sudo apt install stellarium
2. Since the applications in the official repositories may not be updated frequently, there is a separate repository that provides access to the latest version. To add this repository, enter the following command:
sudo add-apt-repository ppa:stellarium/stellarium-releases && sudo apt update && sudo apt install stellarium
To install Stellarium on Fedora, Red Hat, Open Suse, Centos, and similar distributions, you can simply enter the following command in the terminal:
For Arch Linux and its derivatives, the installation process is slightly different:
A step-by-step guide to using Stellarium.
The usage of the application is extremely simple, it is highly recommended to utilize the keyboard or alternatively. In order to commence using the application, we must access our application menu and initiate the application.
Upon launching Stellarium, we must begin with a brief customization process of the application.
The initial task is to personalize the position of Stellarium. This can be achieved by pressing F6, where we will input the coordinates to specify the location of the application. Google Maps can be utilized to determine the latitude and longitude of the desired location.
The subsequent step involves setting the time. To accomplish this, we press the F5 key and input the desired date and time.
Once this step is completed, we can commence the process of designing the location. In order to navigate within the application, we have the option to use either the mouse or the navigation keys on the keyboard.
By utilizing the left mouse button, we can select an object, while the right mouse button allows us to deselect it. Additionally, the middle button or the spacebar can be used to center the selected object.
To zoom in, we can make use of the Page Down and Page Up keys.
We have the ability to utilize the program’s features to either hide or activate the atmosphere. This includes accelerating movement, hiding or showing names, and more. To access these options, we simply need to hover the mouse cursor over them. These options can be found at the bottom and left side of the program.
It is worth mentioning that the application is available for download on the Google Play store, should you be interested in installing it. You can find the installation link here.