
The allure of the night sky has always captivated explorers, with many people dreaming of discovering a star or constellation and naming it after a loved one. Here, I present a concise guide that consists of two sections, offering a detailed explanation of how to construct a wooden telescope entirely by hand. Specifically, this section will demonstrate the process of creating the crucial component: the primary mirror.

A high-quality mirror is essential for observing the moon, planets, and other celestial objects with clarity and detail. On the other hand, a low-quality mirror will only provide blurry images and vague outlines.
To achieve the level of precision required for telescope mirrors, hand polishing is often preferred over machine polishing. Many enthusiasts choose to make their own mirrors instead of purchasing cheaper, mass-produced alternatives. This not only allows them to save money but also gives them the opportunity to gain valuable knowledge and skills in producing high-quality optical instruments. After all, knowledge is something that cannot be easily obtained or replicated.
Step 1: Necessary Items
- The glass blank is composed of materials with a low coefficient of expansion such as pyrex, borosilicate glass, Duran 50, Cerodur, etc;
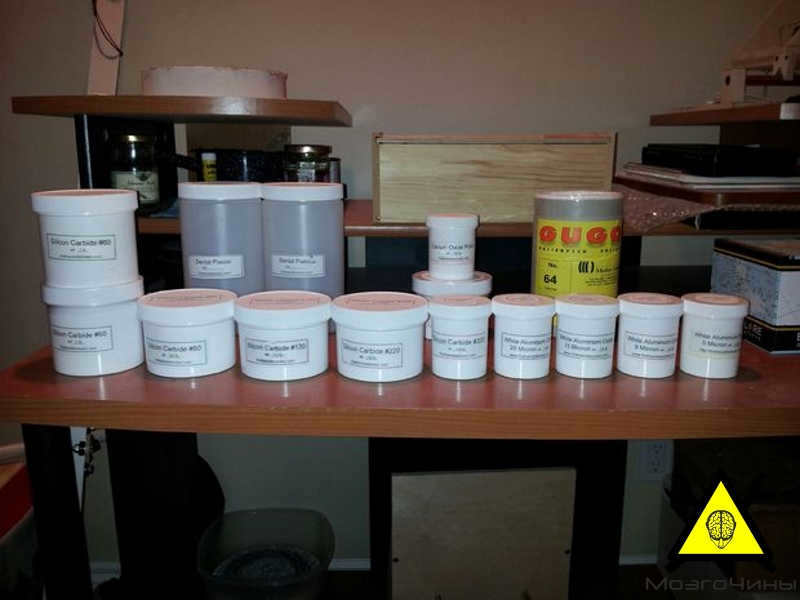
- Various grades of silicon carbide (60, 80, 120, 220, 320 units);
- Aluminum oxide with different microns (25, 15, 9, and 5);
- Cerium oxide;
- Resin;
- Sharpening stone;
- Waterproof plaster, also known as dental plaster;
- Ceramic tile;
- Epoxy adhesive.
Step 2: Getting the blank ready
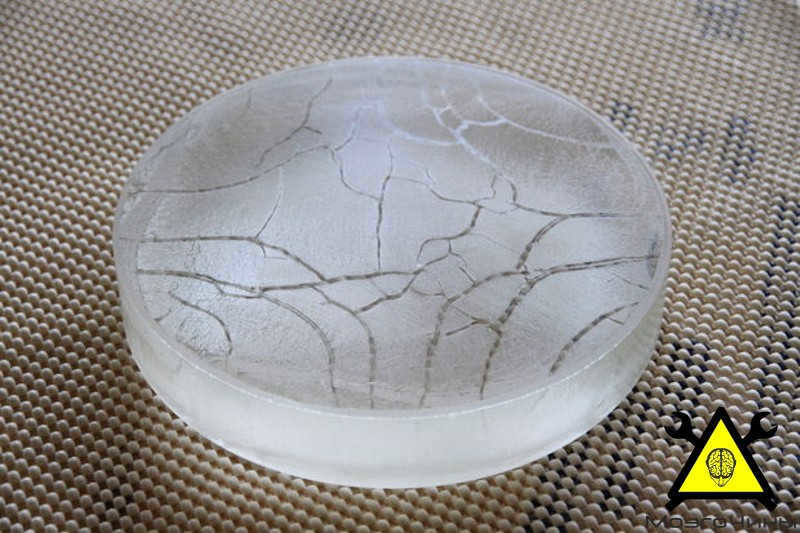
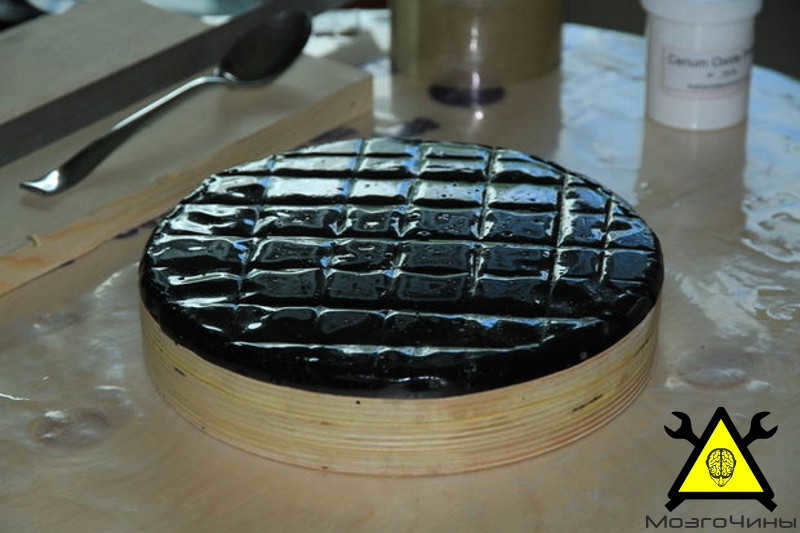
Surface imperfections are commonly found on glass blanks. The “round mark” located at the bottom is a result of the kiln, while the marks on the upper surface are caused by temperature variations during the cooling process.
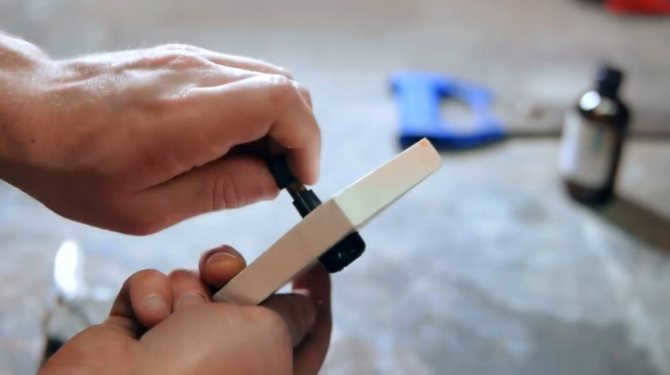
To minimize the chance of chipping, it is advisable to begin by honing the glass edges. Using a sharpening stone is a highly effective method for this task. It is crucial to prioritize personal respiratory safety and keep in mind that both the glass and stone should be moistened with water, as inhaling glass dust can be extremely detrimental to lung health.
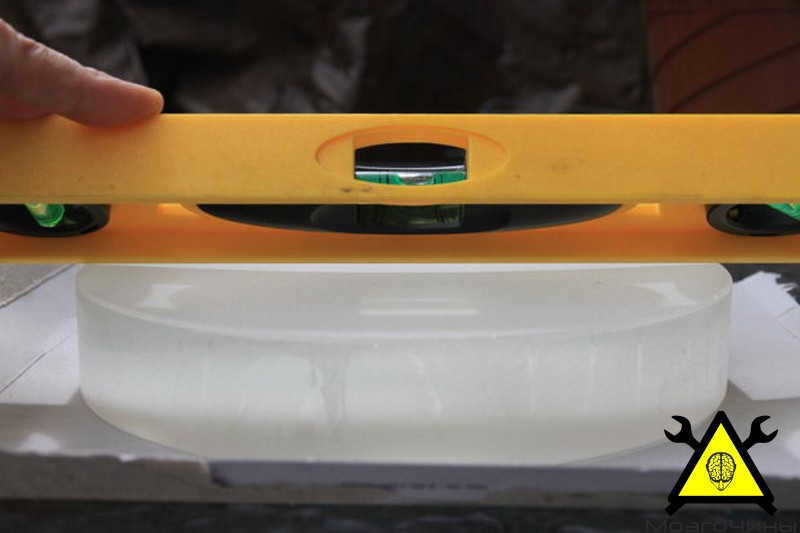
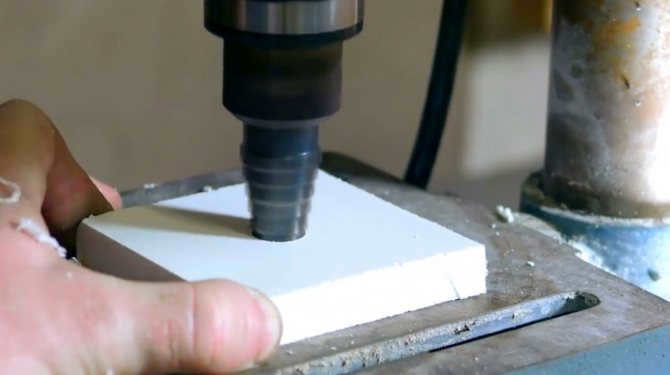
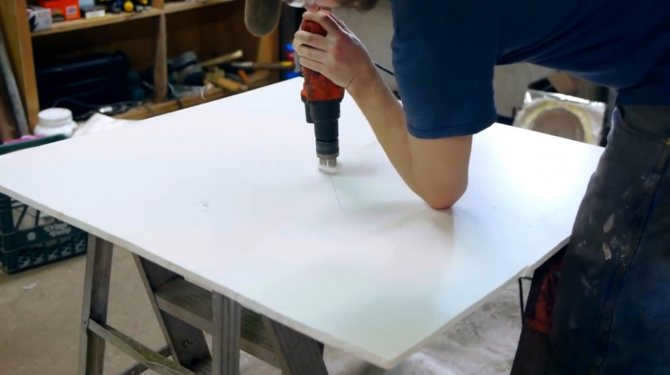
Before beginning work on the mirror, it is important to ensure that the bottom is completely flat. To achieve this, we will utilize coarse carborundum, specifically silicon carbide #60, to smooth the surface. Start by spreading a mixture of the powder and water onto the flat surface, and then gently rub the glass across it. Within a few seconds, you will notice the formation of a gray paste. Rinse this paste away and apply wet sand to the area. Repeat this process until the surface is devoid of any pits or potholes.
Third step:
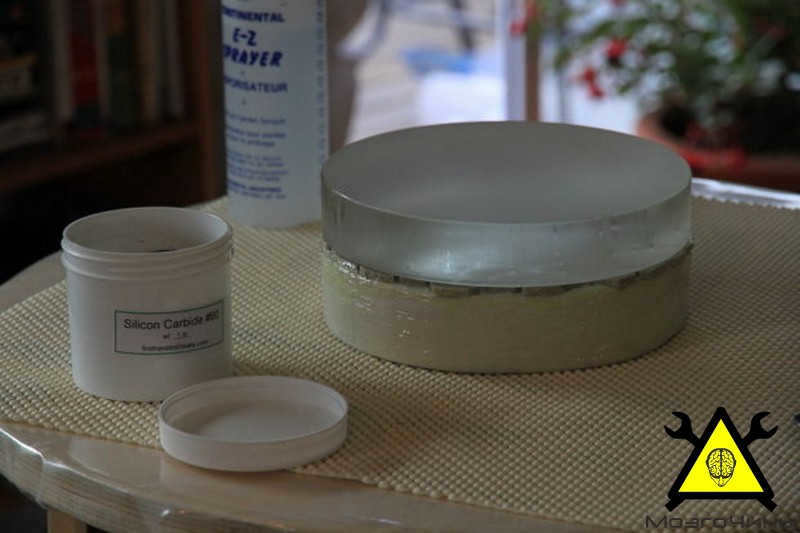
The purpose of this accessory is to form a curved shape on the glass part.
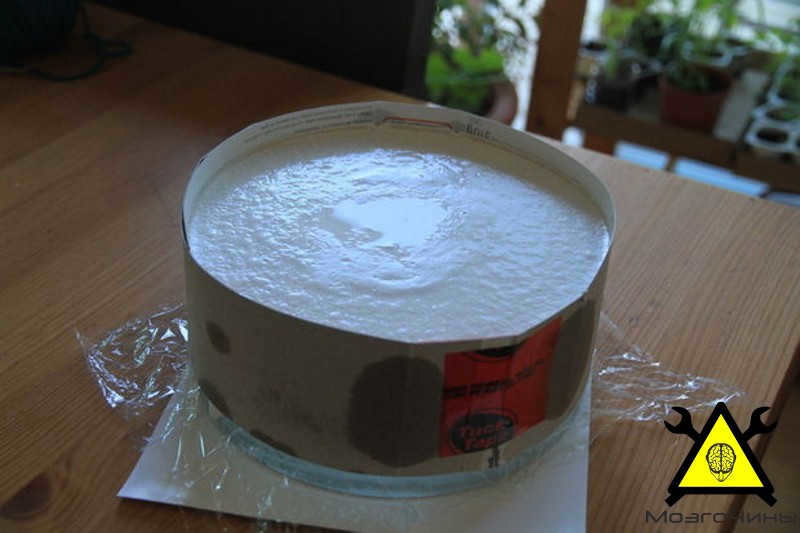
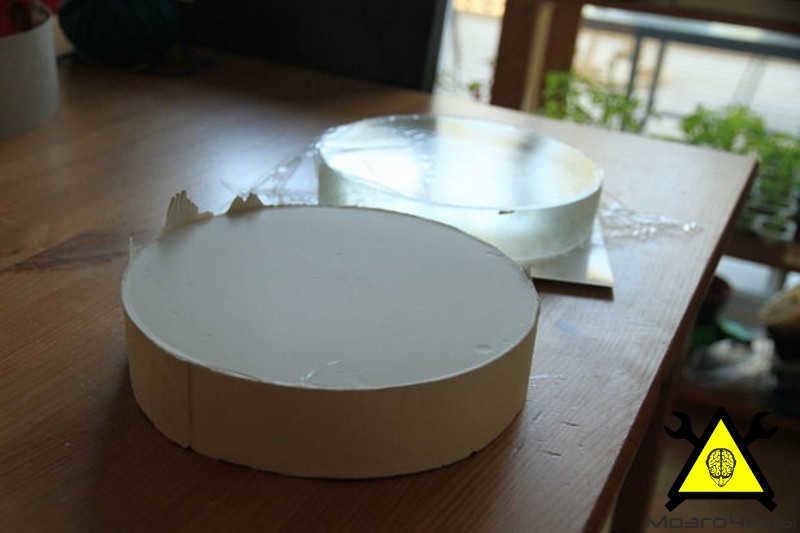
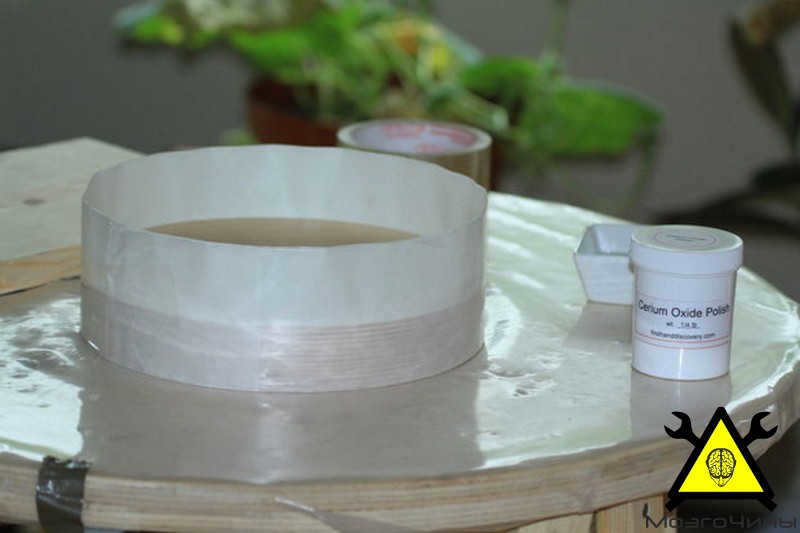
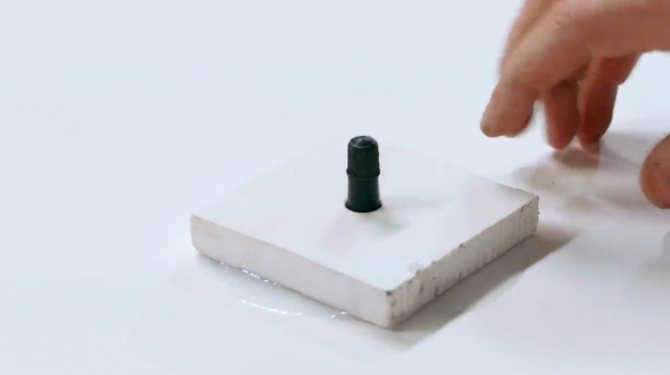
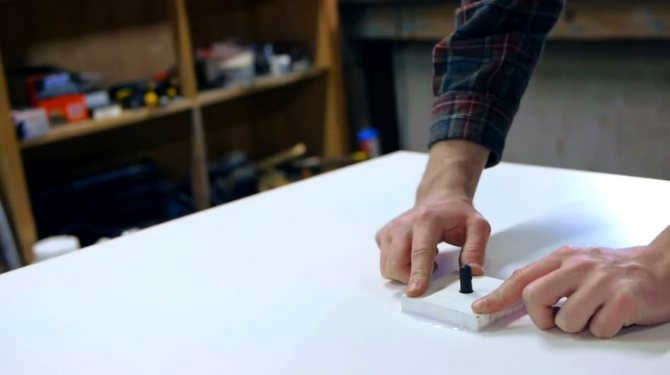
To protect the glass, we will encase it in plastic wrap. Create a cylindrical structure using cardboard and pour the plaster into it. Once the plaster has dried, remove the cardboard. Finally, delicately separate the glass and smooth out any rough edges.
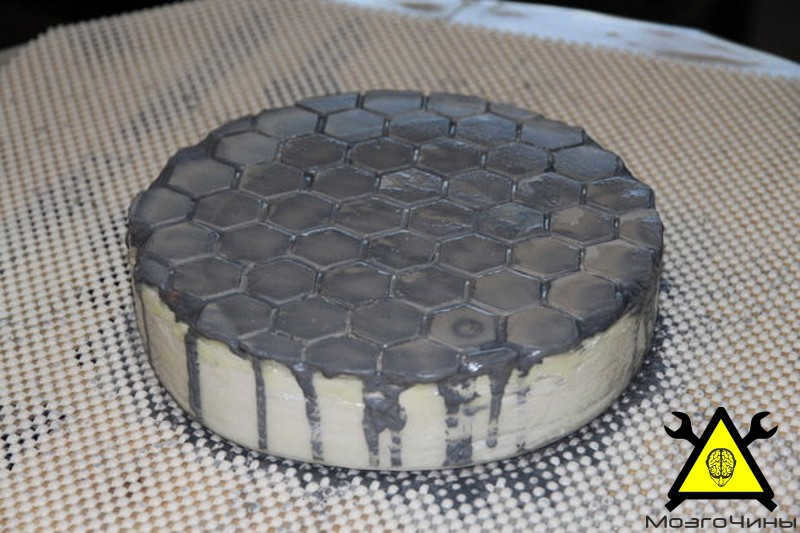
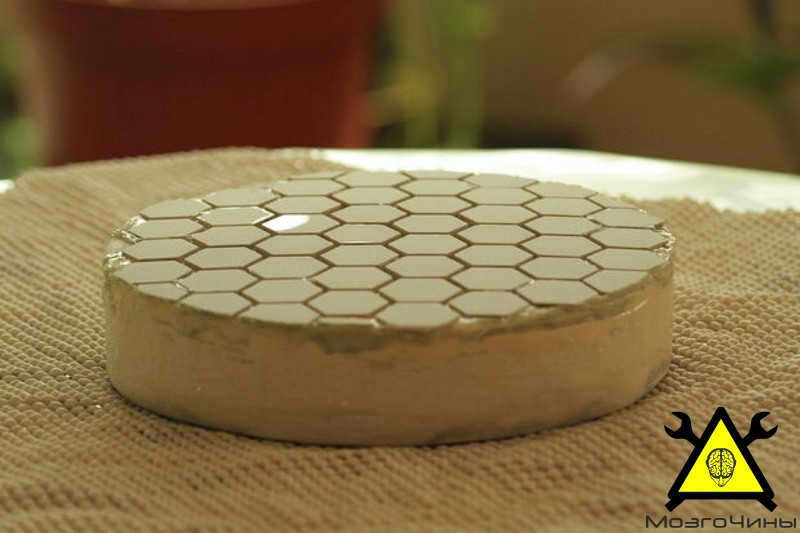
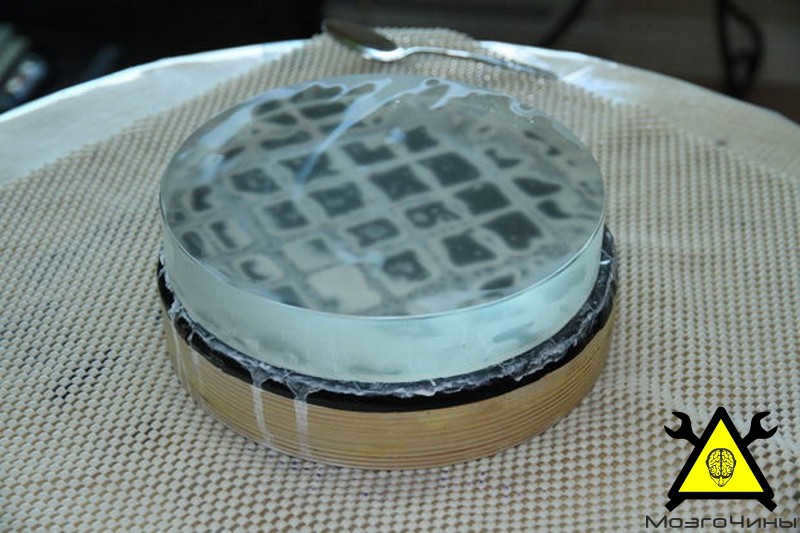
Fourth Step: Applying Ceramic Coating to Tiles
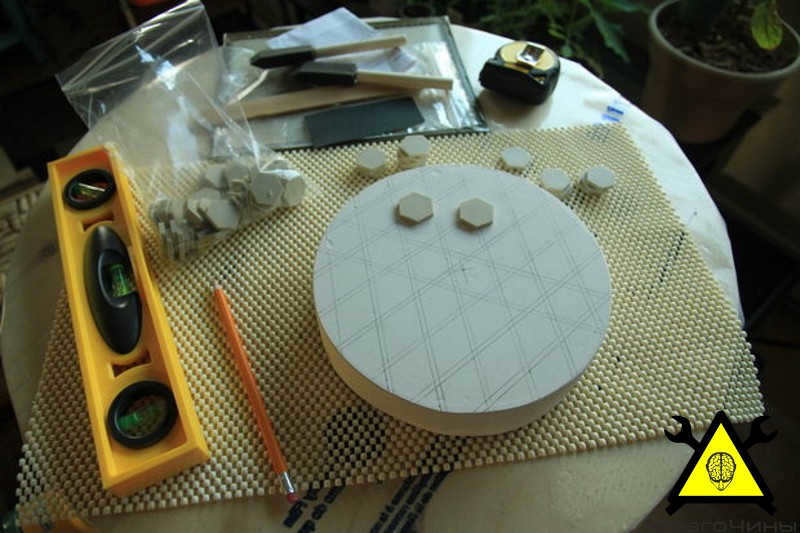
In order to sand the glass, we require a solid surface. Hence, it is necessary to place ceramic tiles over the curved section of the material.
We will affix the tiles onto the gypsum base using epoxy resin.
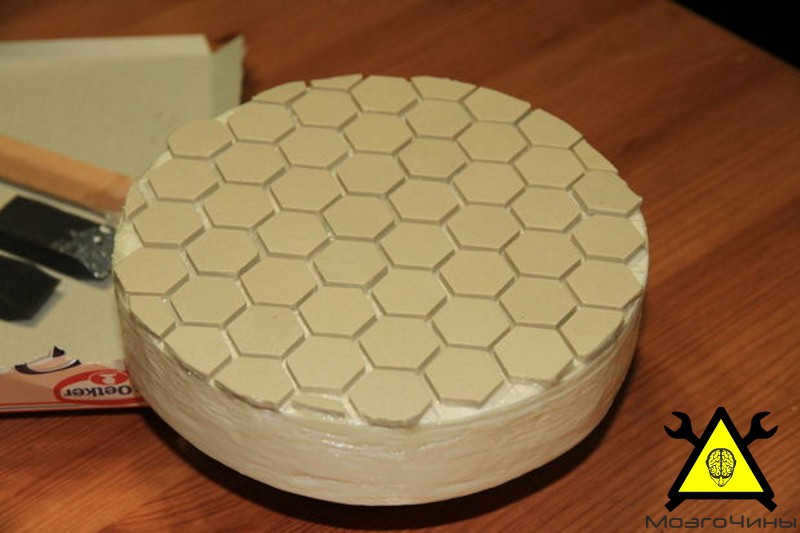
It is important to note that when making mirrors for telescopes, it is best to avoid placing the tiles or holes directly in the center. Instead, it is advisable to slightly offset the tiles to prevent any defects in the mirror surface.
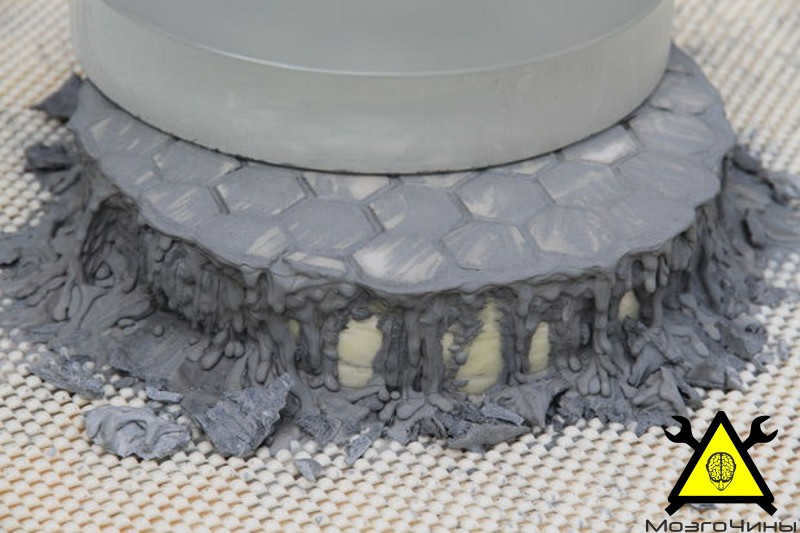
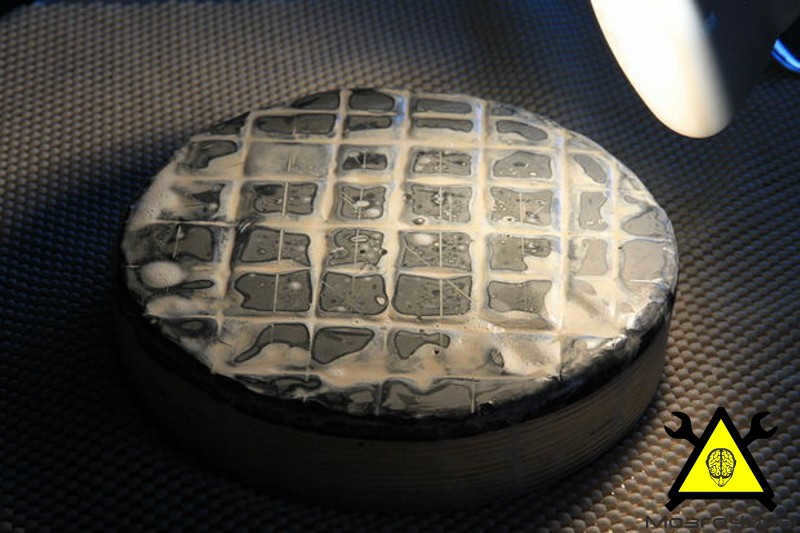
Step 5: Commence sanding
Take a handful of damp sand and apply it onto the tile. Begin by gently rubbing the mirror against the sandy surface.
To achieve a flawless result and avoid any errors, it is important to alternate the sanding direction of the mirror after a few strokes. This will guarantee a smooth finish from every perspective.

Procedure 6:
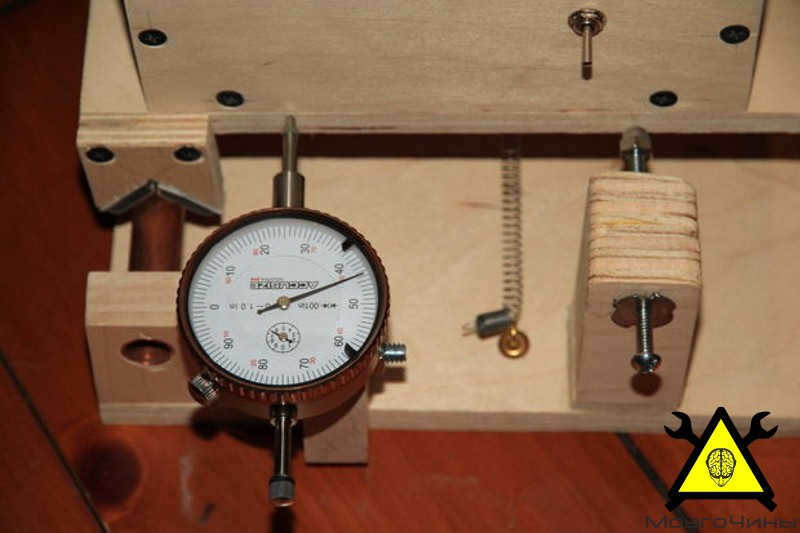
Keep sanding until the desired curve is achieved. To determine the curvature, utilize the calculator provided in the Sagitta measurement kit.
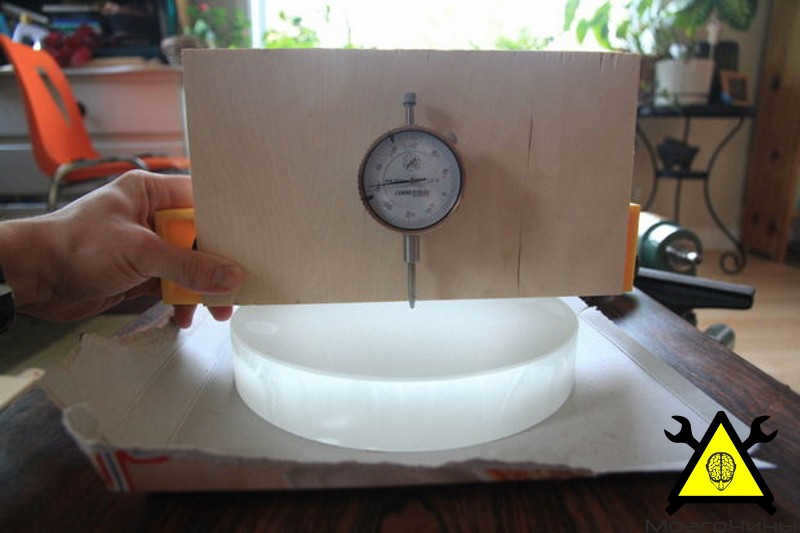
In order to observe planets using a telescope, it is necessary to have a focal ratio of F/8 or higher.
If your intention is to marvel at the immensity of galaxies and celestial nebulae, a smaller focal ratio such as F/4 would be necessary.
With an F/4.75 focal ratio, my 20 cm mirror has a sagitta of 0.254 cm.
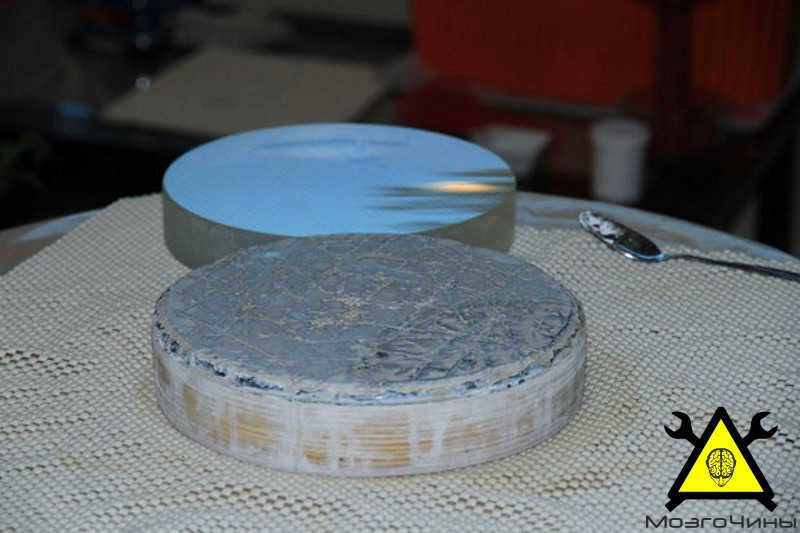
Step 7: Making the surface smoother
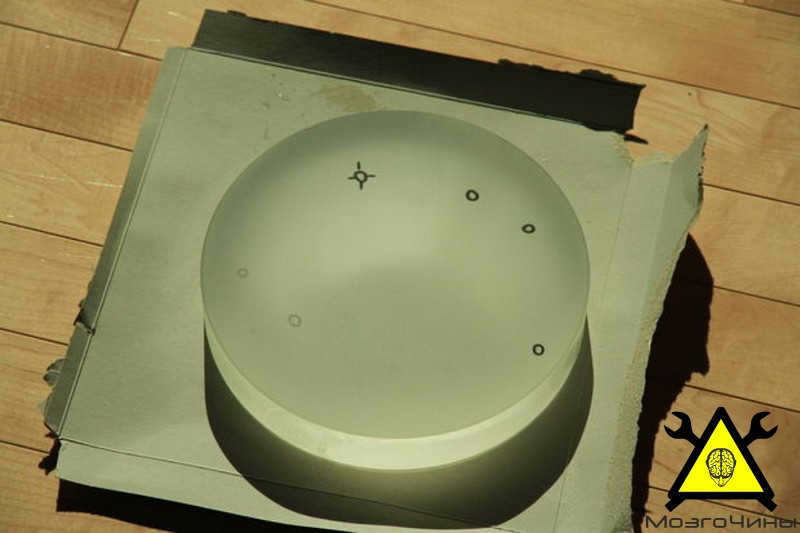
After achieving the desired curvature, it is important to ensure that the surface remains smooth and maintains the same curvature.
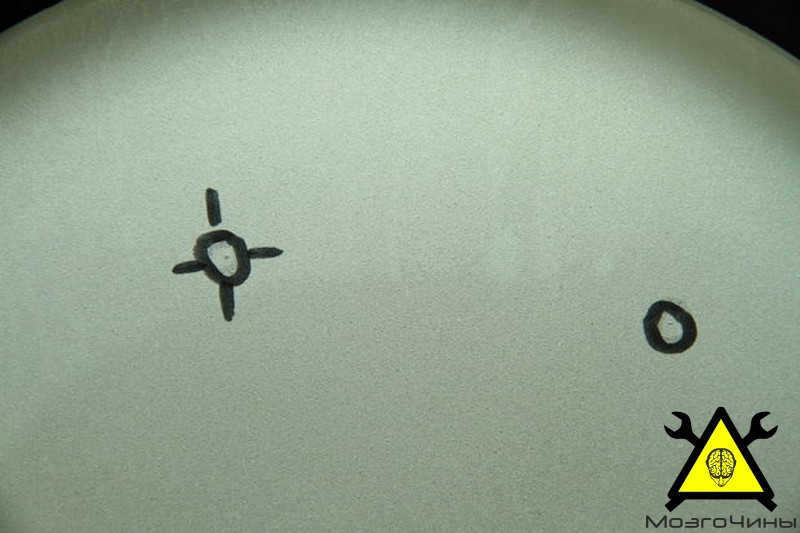
Identify any significant flaws by marking them with a marker, and continue sanding until they are fully eliminated. This will serve as a visual confirmation that it is time to switch to a finer abrasive.
Now, let’s proceed with silicon carbide #320. When you reach this stage, you will begin to notice certain reflections when observing the mirror blank.
Stage 8:
We require the creation of an additional instrument for this particular task. A viable option for constructing such an instrument would be to utilize either plaster or dense plywood. This instrument will then be coated with a pliable substance, such as resin.
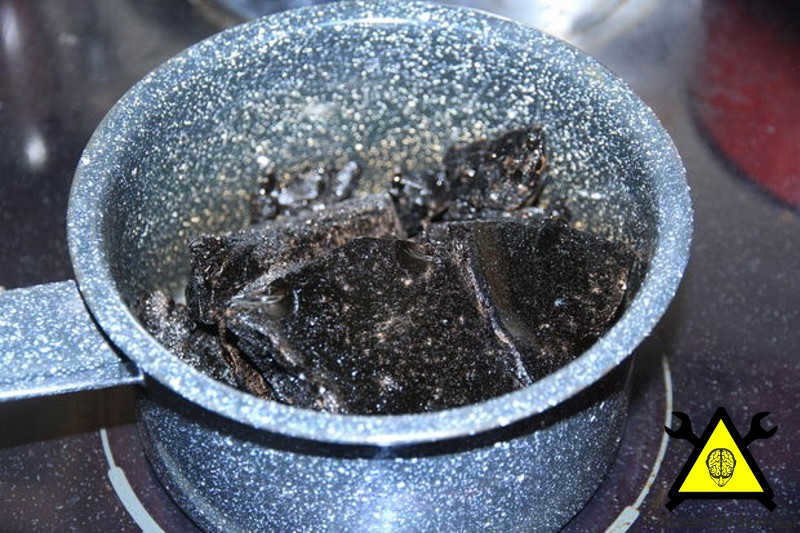
It is quite difficult to remove softwood resin because of its sticky and stubborn nature.
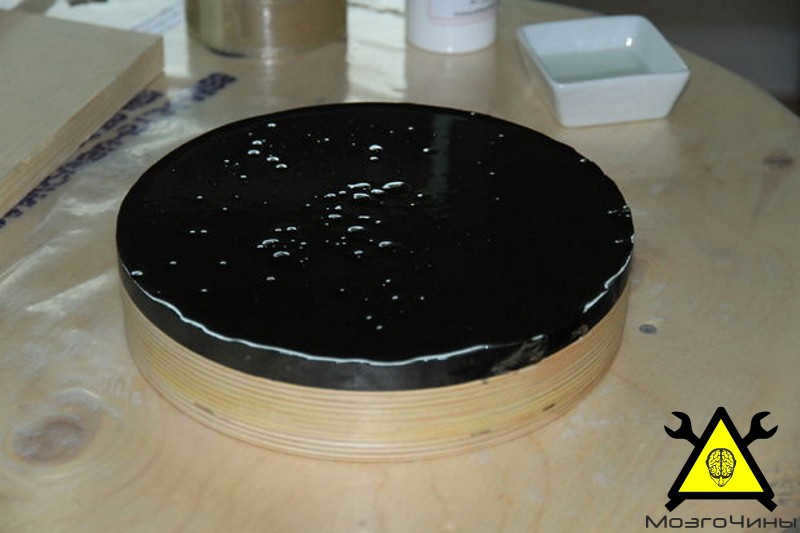
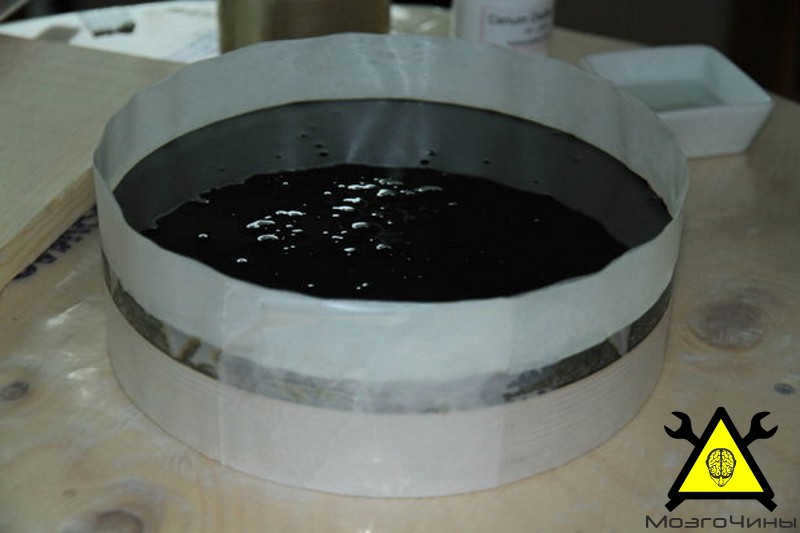
Create an additional cylinder around the foundation of the apparatus. Melt a generous quantity of resin and pour it into the cylinder. Let the resin cool and remove the cardboard covering. Following that, begin shaping the surface, ensuring it has a slight convex shape. The channels formed will also aid you during the glass processing stage.

Step 9: Finishing Touches
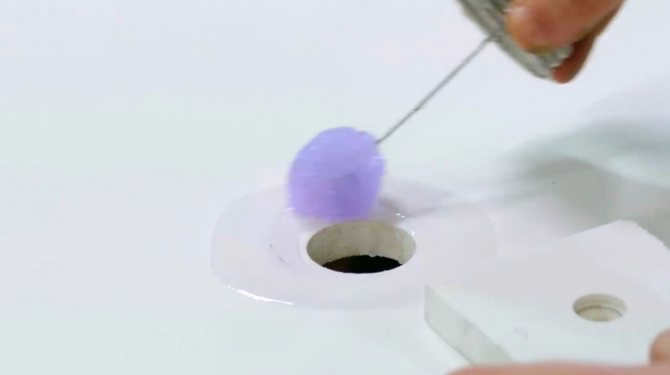
Apply moist cerium powder onto the resin and commence rubbing the mirror against it. The cerium will infiltrate the resin’s surface. Employ a soapy lubricant if necessary.

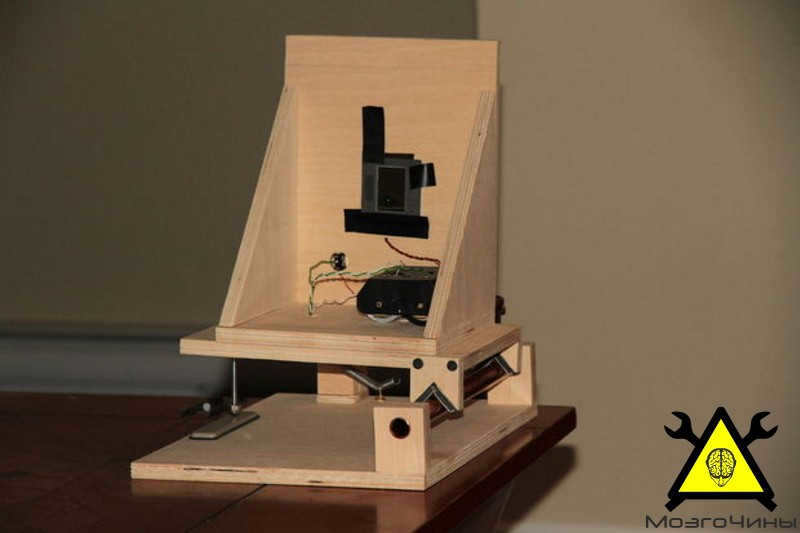
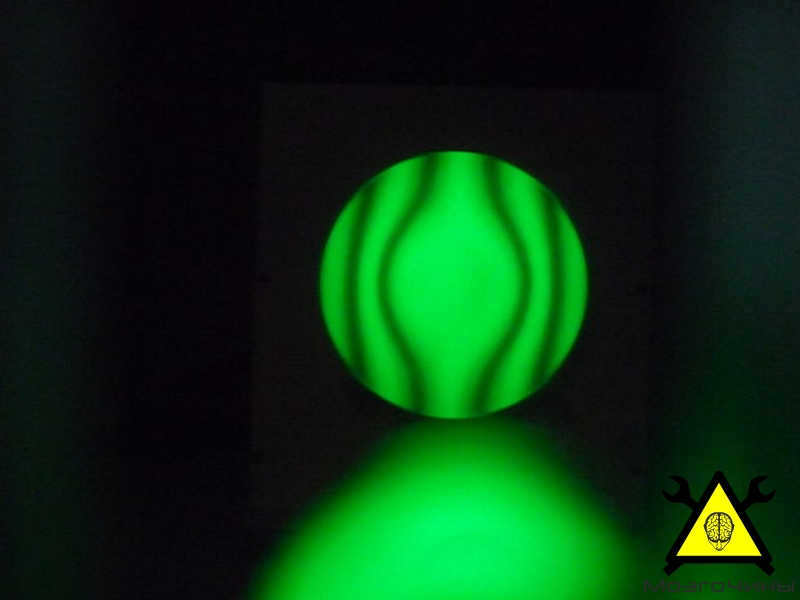
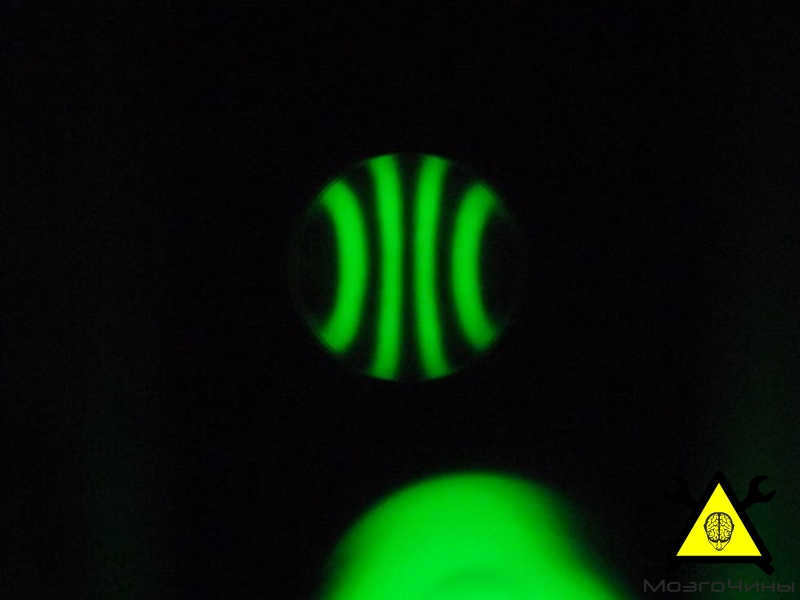
Step 10: Creating a Foucault tester
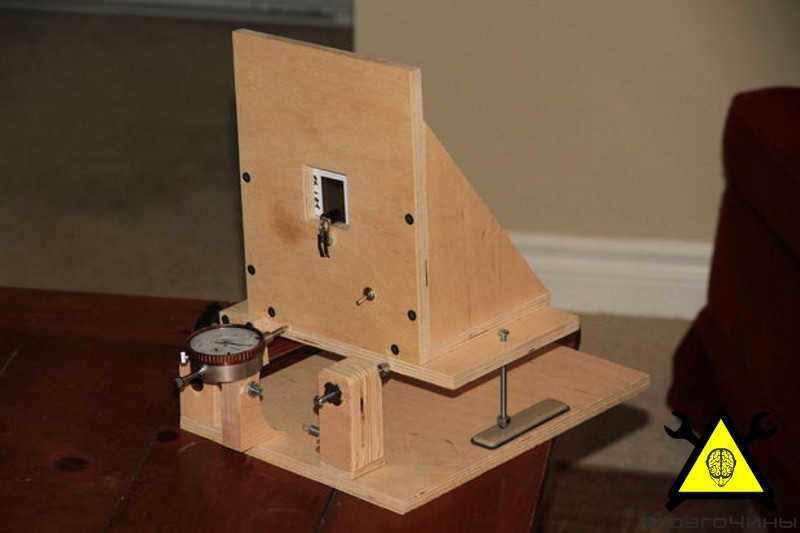
The Foucault tester is a device created to examine the surface of parabolic mirrors. It utilizes a light source which is directed onto the mirror. Upon its return, the light converges at a distinct location depending on whether it originated from the mirror’s periphery or center.
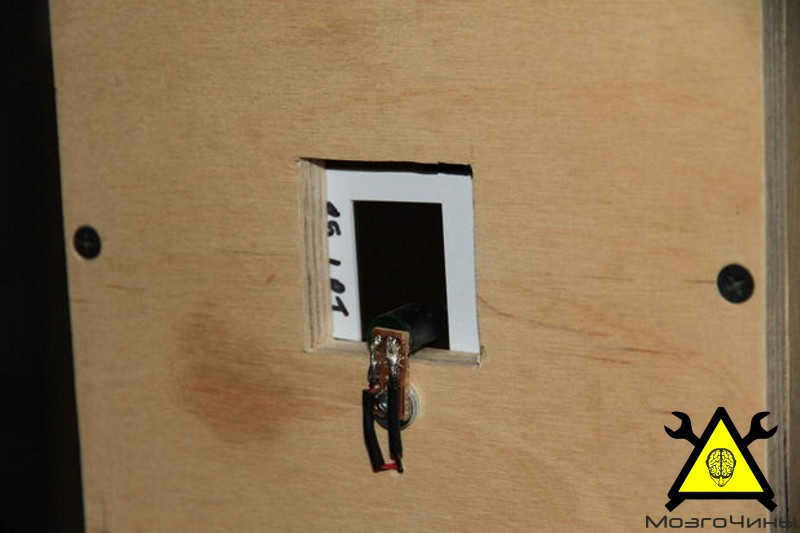
The tester employs this principle to enable you to visually detect errors within the range of 1 millionth of a centimeter. By incorporating a Ronchi screen into your tester, you will streamline the process and obtain an understanding of the surface without necessitating any measurements.
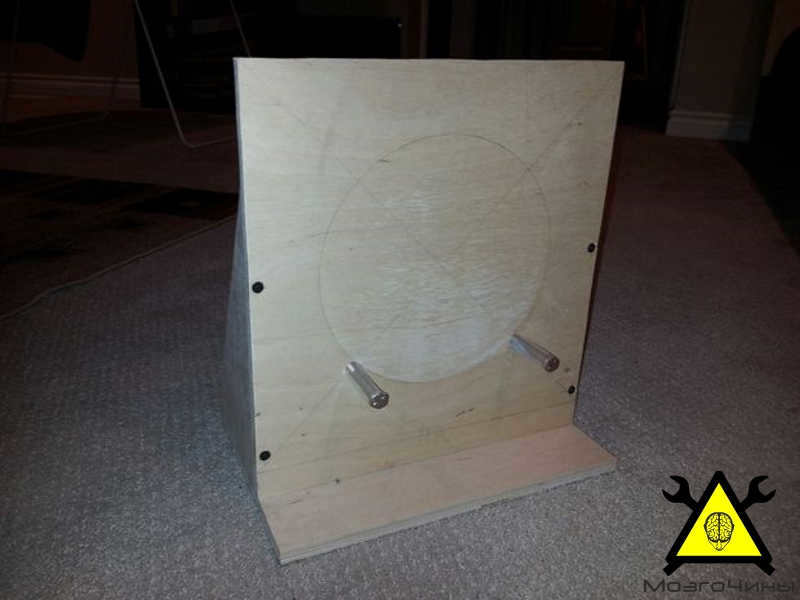
If you want to simplify your life, create a mirror stand that comes with an adjustable angle feature.
Step 11: Crafting the paraboloid
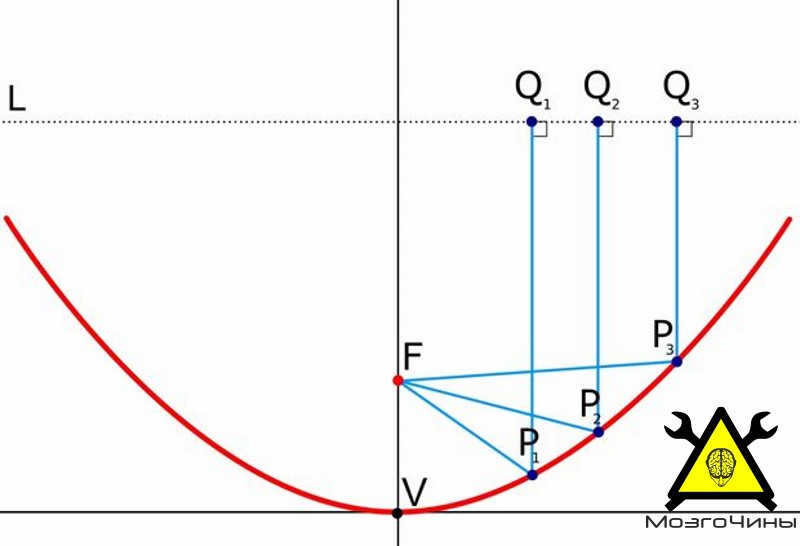
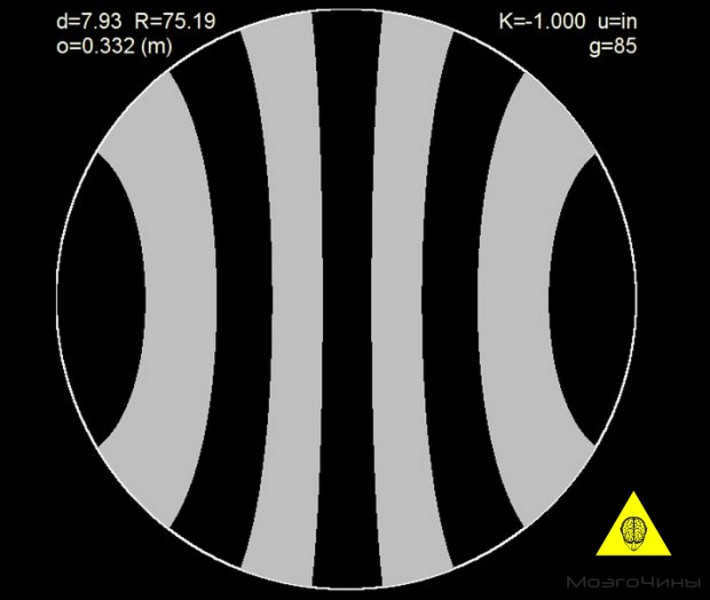
Once we have completed the finishing stage, our goal is to have a mirror that is completely polished and has a smooth spherical surface. However, a sphere is not ideal for astronomical use, so we need to transform it into a paraboloid shape.
The variation between a sphere and a paraboloid is relatively small, approximately 1 micron. To achieve this difference, we will employ a Foucault tester. With a clear understanding of what the reflection should resemble, we will perform a specialized finishing process using cerium oxide. This will continue until the mirror’s reflection matches the theoretical reflection we desire.

The grinding pattern will have a shape similar to a “W”. The amplitude in both the transverse and longitudinal directions should be 4/5 of the diameter.
Additionally, there is a comprehensive compilation of various methods available to rectify specific surface imperfections.
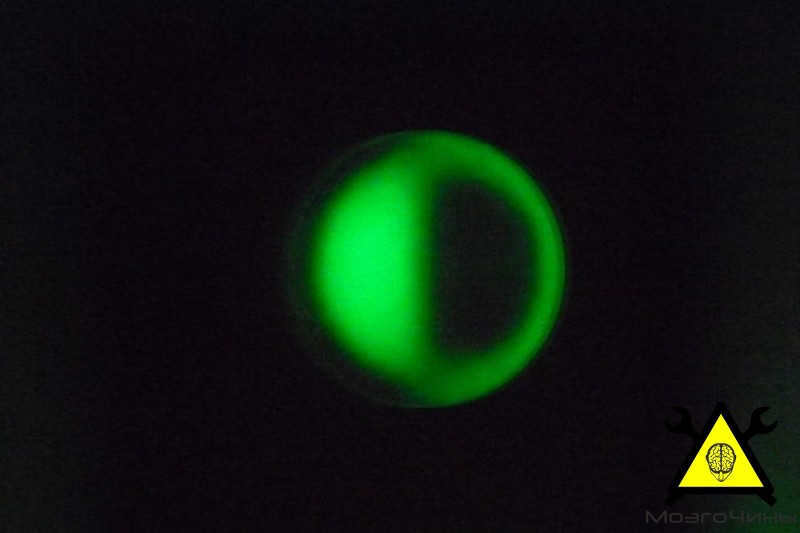
Step 12: Examine the surface using a Foucault tester
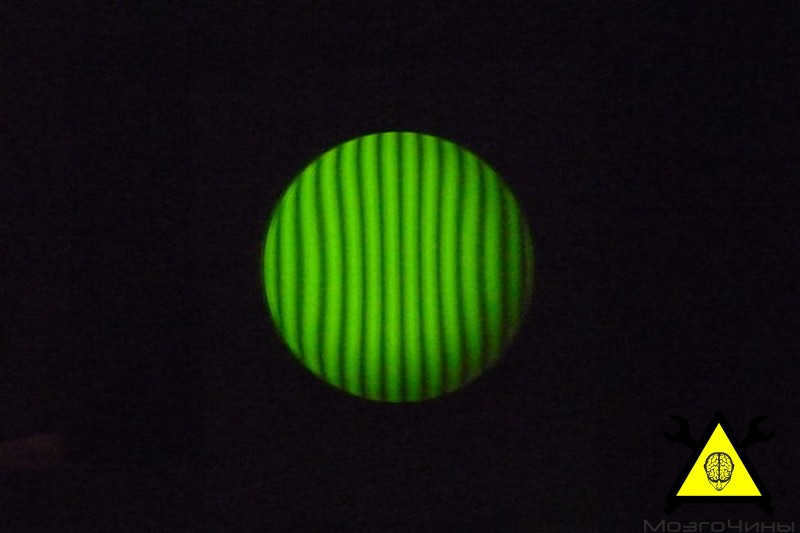
Here is the appearance of the reflection in a Foucault tester that has a Ronchi grid.
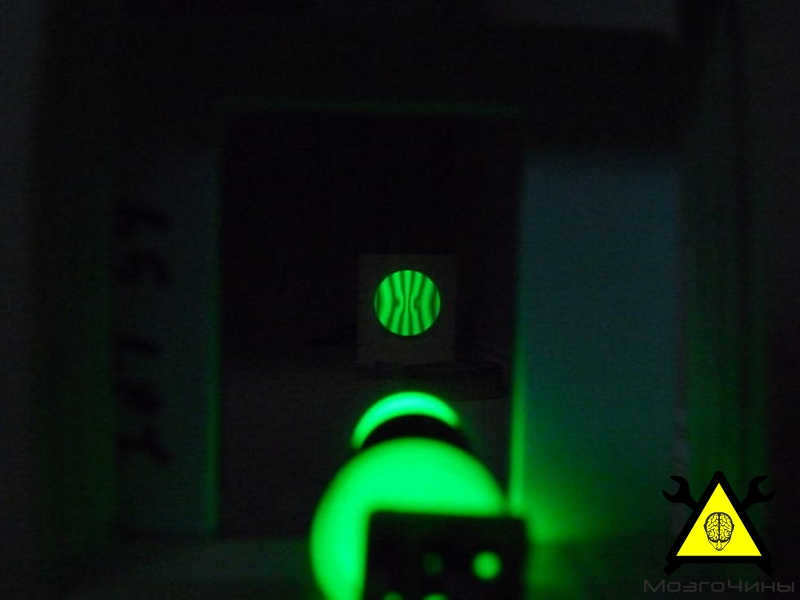
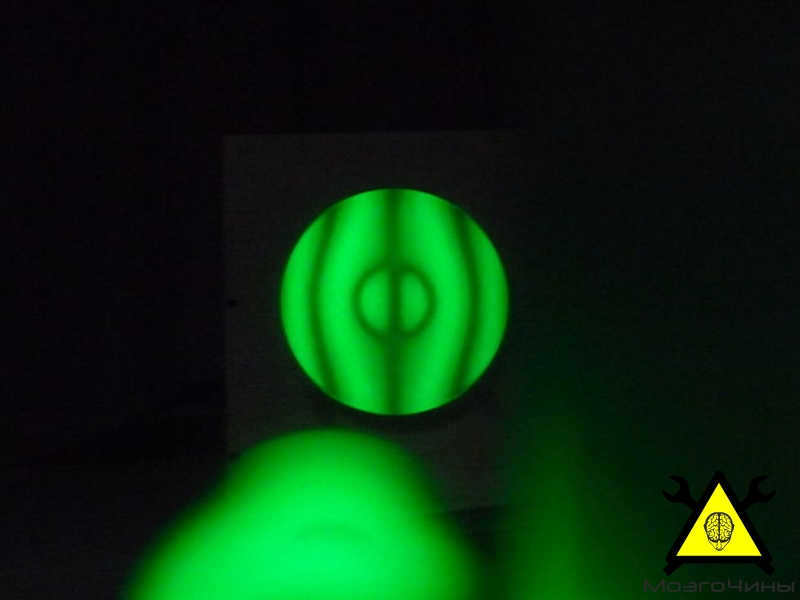
By determining whether the grid intersects the light before or after the radius of curvature, it is possible to analyze the lines and infer the contour of the surface.
Step 13: Completing the mirror
After meeting specific standards, the mirror can be regarded as finished.
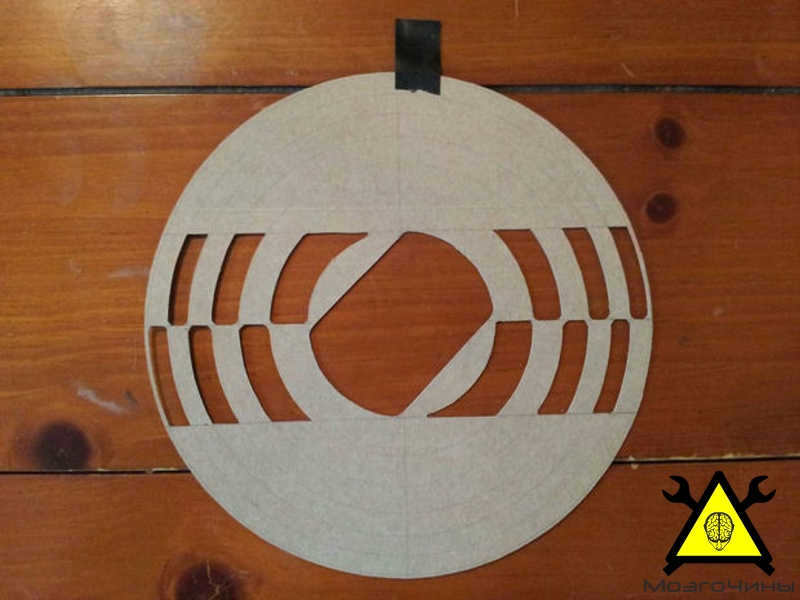
The Couder mask is utilized for performing measurements using the Foucault tester.
Stage 14: Applying Aluminum Coating
To achieve full completion of the project, it is necessary to send the craft for the process of aluminizing. At present, the mirror is capable of reflecting only 4% of the incoming light. However, the addition of aluminum to its surface will significantly boost this percentage by more than 90%.
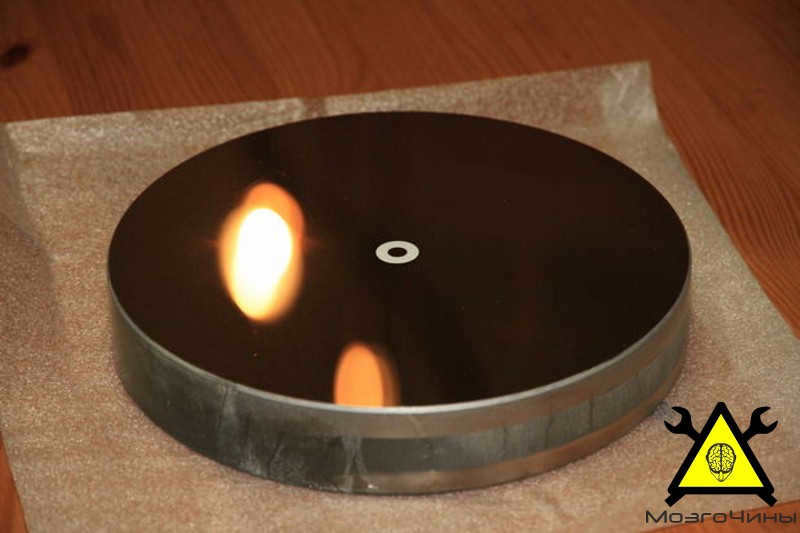
For protection against oxidation, you have the option to apply a SiO2 coating to the metal.
If desired, you can also include a center imprint on the mirror. This imprint is used for collimation purposes and does not impact the overall quality of the mirror or the image observed through the eyepiece.
Creating an exact shape for large telescopes can be challenging, particularly when it comes to the mirror. However, there is a more cost-effective and simpler approach to achieving a parabolic surface – using a liquid in a round container and spinning it. Could “liquid telescopes” be the future?
At present, multiple telescopes with lens diameters in the tens of meters are being developed worldwide. It is worth mentioning that, despite the rapid technological advancements we have witnessed, the progress in increasing the maximum lens diameter of telescopes still occurs over centuries. The explanation for this phenomenon is quite simple: as the lens diameter expands, the scientific capabilities of the telescope also increase, but so does its price. The current instruments with lenses measuring several meters cost hundreds of millions of dollars, while the future megatelescopes are projected to reach billions of dollars in cost.
Challenges Faced by Enormous Entities
Design thinking is always searching for ways to reduce the cost of expensive astronomical toys. One approach is to increase the size of the telescope’s “eye” by sacrificing other design features. Examples of this are the Hobby-Eberly telescopes in the USA, the Large South African Telescope in South Africa, and the LAMOST telescope in China. These telescopes are not fully rotatable like classical telescopes, but instead are fixed relative to one of the two axes of rotation. This limits their ability to point at any point in the visible hemisphere of the sky at any given time. However, with a well-planned program of observations, these limitations can be overcome. This approach significantly reduces the cost compared to a fully rotatable telescope. Alternatively, there is a more radical method to make astronomical instruments more affordable.
A historical concept
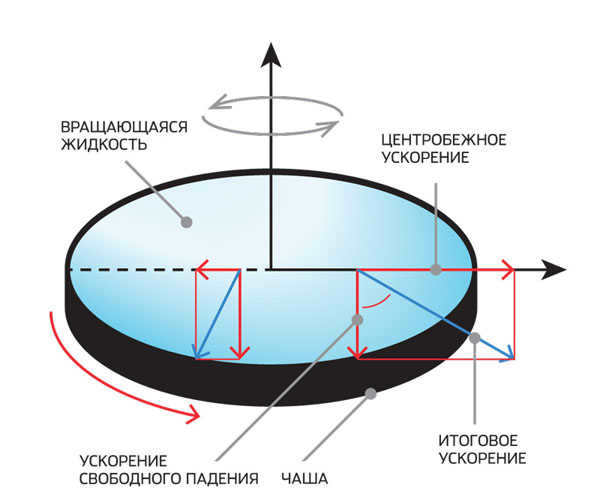
Newton came up with a much simpler and more affordable method for creating a parabolic reflective surface. The serene expanse of water is often likened to a mirror, suggesting that its surface is flawlessly smooth and level. When liquid, like water, is spun in a circular container, its surface naturally takes on a parabolic form, with the exception of the edges where surface tension causes distortion. It is true that water has a relatively low reflection coefficient, particularly for rays that approach the surface at nearly perpendicular angles, but it is possible to substitute water with a more reflective liquid.
The concept of a rotating mercury mirror for a telescope was first proposed in 1850 by Italian astronomer Ernesto Capozzi, and it was not taken seriously by astronomers at the time. However, in 1872, Henry Skei successfully created and presented a functioning mercury mirror telescope in New Zealand. It wasn’t until the early 20th century that Robert Wood conducted astronomical observations using a mercury telescope. In his 1909 experiments, Wood acknowledged that astronomers had previously dismissed the idea of a liquid mirror due to concerns about surface disturbances causing ripples and compromising observation quality.
Wood himself decided to tackle the issue, stating that he did so “purely for his own entertainment during the summer months”. He recognized the primary causes of surface ripples on the mirror: vibrations from the motor and suspension, the bowl of rotating mercury not being perfectly horizontal, and inconsistent motor speed. Through careful design and construction of the telescope, Wood demonstrated that these issues could be greatly reduced. In addition to the internal disturbances caused by the telescope’s mechanisms, external factors also contributed to the ripples. Wood’s largest telescope, equipped with a 20-inch mirror, was situated in a bustling location on Long Island (USA), causing it to shake from the nearby surf, passing carts, and even the footsteps of pedestrians. Wood suggested two methods for minimizing the remaining vibrations in the mirror. The first method involved making the layer of mercury in the bowl as thin as possible, as a thinner mercury mirror would have fewer ripples. The second method proposed coating the mercury with another liquid, such as water or glycerine, which would help dampen the vibrations.
Wood achieved perfection with his mercury telescope and demonstrated that it produced images of comparable quality to those of a “regular” telescope before abandoning the project. Although the technical challenges had been resolved, the scientific significance of a stationary telescope aimed at the zenith was not immediately apparent. As a result, the concept of rotating mercury mirrors was neglected for several decades.
However, it should be noted that mercury did not completely vanish from its astronomical applications. It continued to be utilized in the photographic zenith tubes (PZTs) known as the mercury horizons. These horizons made use of the tranquil surface of mercury, which inherently aligns with the plane of the horizon, to precisely align the lens with the zenith. This alignment is crucial for certain astrometric observations. Nevertheless, the concept of employing mercury as a material for telescope lenses was not rekindled until the early 1980s, when Canadian scientist Ermanno Borra from Laval University reintroduced the idea.
Why aren’t astronomers satisfied with such a device? The main issue is the inability to target any object they desire. Although the constellations passing through the near-zenithal area change throughout the night and year, the range is still limited. Moreover, a liquid mirror telescope (MLT) cannot even be directed towards objects within its field of view. Instead, they will pass over the telescope in curved paths (unless the telescope is located on the equator). In the past, when photographic plates were used, the only option was to capture star trails, which were not very helpful.
The situation underwent a transformation when the traditional method of using photographic plates was replaced by a new kind of radiation receivers known as charge-coupled devices (CCDs). These CCD receivers consist of light-sensitive elements called pixels, which are organized in a series of individual lines that form the CCD matrix. Unlike in conventional photography, where the image is captured simultaneously from all the lines, CCD receivers read the image one line at a time. Due to the Earth’s rotation causing the image to shift across the sky, the telescope needs to be rotated to track the image during exposure. This imaging mode is referred to as the tracking mode, enabling the capture of images with practically unlimited exposure time, facilitating the observation of extremely faint objects.
However, it is not necessary to read the images from all rulers simultaneously. If a star, galaxy, or any other object moves across the lanes of the matrix, the images can be read one by one and then combined into a complete picture. This mode is known as scanning, as the telescope scans the sky. While the scanning mode may not be particularly convenient when studying a specific celestial object, it can be more practical than the tracking mode in some cases and is widely used. In the scanning mode, the exposure time is limited by the time it takes for a star to move from one edge of the matrix to the other. However, this can be increased by combining images of the same area of the sky taken on different nights. Additionally, the limited imaging time on telescopes with liquid mirrors is offset by the ability to create very large mirrors.
By the end of the 20th century, there were advancements in aerostatic bearings, which helped reduce friction in the rotation of the mercury bowl, along with synchronous electric motors that provided a high level of stability in rotation. The challenges mentioned by Wood in achieving a high-quality liquid mirror are now much easier to overcome compared to the early 20th century. Since the 1980s, various laboratories have been constructing larger and larger mirrors, which have gradually become the foundation for modern mercury telescopes. This research was primarily conducted in Canada, although some work was also carried out in other countries. In the USSR, Viktor Vasiliev and Alexander Sogokon from Kharkov University conducted experiments with liquid mirrors in the late 1970s and early 1980s. They proposed using a floating bowl within another rotating bowl, such as one filled with water, to dampen the oscillations of a liquid mirror. However, this work did not result in the creation of a telescope.
What Can Be Seen on Mercury
Despite the limited capabilities of TZH, it is still able to capture certain objects in our vast Universe, regardless of its orientation. One such object is the Universe itself. Scientists have put forth proposals to utilize TWA for cosmological surveys, enabling us to gain a better understanding of the Universe’s structure through the observation of numerous galaxies and quasars. Given the isotropic nature of the Universe (i.e., the same in all directions), it is feasible to focus observations on a specific region of the sky.

There are approximately 20,000 artificial objects in the vicinity of Earth, including operational satellites and pieces of spacecraft of various sizes. An affordable telescope equipped with a liquid mirror has the potential to conduct regular surveillance and anticipate the passage of most fragments, thereby facilitating their detection.
Between 1995 and 2002, the NODO Observatory’s three-meter telescope, which utilized a mercury mirror, was employed by the NASA Orbital Debris Observatory to monitor space debris. However, accurately determining the quantity of smaller fragments (less than 10 cm) proves to be challenging. Therefore, the availability of an inexpensive and sizable instrument capable of detecting fragments as small as 2.5 cm would be highly beneficial.
Large Zenith Telescope
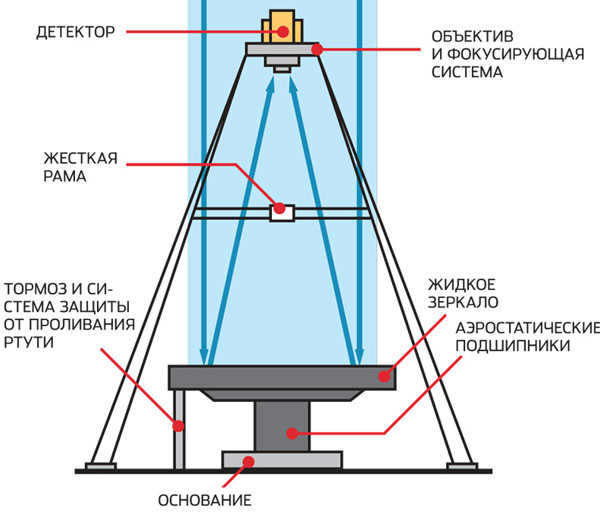
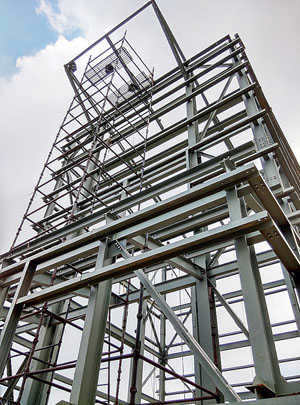
Canada is home to the largest TLZ, which was developed at the University of British Columbia under the guidance of Paul Hickson. Named the Large Zenith Telescope (LZT), this impressive telescope boasts a mirror diameter of 6 meters. Surprisingly, its creation only cost $0.5 million in the mid-1990s! The LZT utilizes an aerostatic bearing to support a steel frame that holds a polyvinyl chloride bowl. The frame must be incredibly sturdy to prevent any slight bending that could disrupt the rotation of the heavy liquid inside the bowl. Additionally, strict standards are enforced for the telescope’s vertical axis – any deviation from the vertical must be less than an angular second.
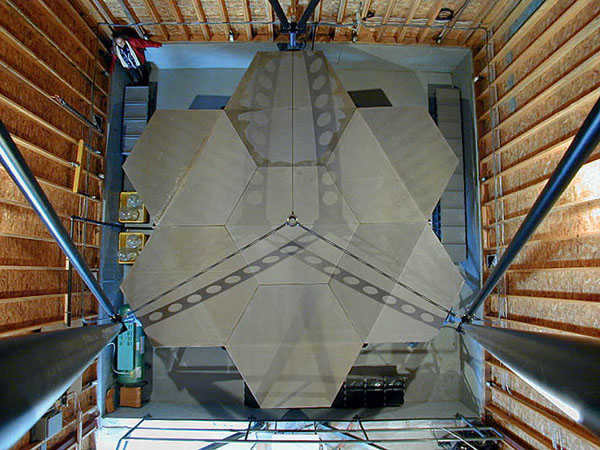
The LZT telescope utilizes a unique mirror design consisting of seven hexagonal and six triangular segments. These segments are carefully thermoformed to create the shape of a paraboloid of rotation, which in turn helps to reduce the thickness of the mercury layer on the final mirror.
The bowl’s surface is covered with epoxy resin and features a parabolic form, which deviates slightly from the desired mirror shape. This slight deviation is intentional in order to minimize the necessary thickness of the mercury layer. The goal here is not solely to reduce mercury consumption. As previously mentioned, the presence of ripples on a liquid mirror diminishes as the thickness decreases. In the case of a six-meter LZT, the mercury layer is less than 1.5 mm thick. It is not feasible to make it thinner, as attempting to do so would cause the mercury to break up into separate droplets, resembling the terminator T-1000 (which incidentally would make a flawless mirror).
A transparent film is stretched horizontally just above the mirror, covering the entire mirror area. In order to achieve the necessary focal length of 9 m, the mirror must make a revolution approximately every 8.5 seconds. This means that the edge of the mirror moves at a speed greater than 2 m/s, which can cause wind disturbances on the smooth mercury surface. The protective film acts as a “trap” for the air, allowing it to rotate with the mirror. The film itself does slightly affect the image quality, but it is something that must be accepted.
Pouring the mirror
Commencing the process of preparing the mirror involves the act of pouring approximately 100 liters of mercury into the LZT bowl. Interestingly, there exists an insufficient amount of motor power to initiate the motion of the bowl, resulting in the necessity for manual spinning at the outset.
Following approximately one hour of rotation, the mirror achieves stabilization and a two-day process of extracting the mercury commences to reduce the thickness of the mirror to a minimum value (initially around 3.5 mm). Once the mirror’s surface has stabilized, a layer of mercury oxide develops, effectively halting the metal’s evaporation. This means that a couple of days after the mirror has been uncoiled, it is safe to be in its proximity without requiring any special protective measures. The reflectivity of mercury (approximately 70%) is lower than that of a freshly applied aluminum coating. However, as time progresses, aluminum becomes hazy and its reflective properties decline. In contrast, the aluminization process is intricate and costly. Mercury may also become hazy, but the mercury mirror can be easily restored on a monthly basis without any complications or expenses.
The LZT telescope is currently being utilized for studying the atmosphere in order to enhance adaptive optics systems for the TMT and E-ELT giant telescopes. The performance of the LZT in terms of image quality has been moderate, but it is crucial to consider that it was primarily constructed as a testing device and is therefore situated in an unfavorable atmospheric environment, specifically 70 km away from Vancouver at an elevation of merely 400 meters.
The future of fluid telescopes
The International Liquid Mirror Telescope (ILMT) features a Kevlar bowl supported by a polymer foam base. To achieve the shape of an optimal mirror, a layer of polyurethane is applied through rotational polymerization. This process involves pouring liquid monomer into the bowl and continuously rotating it until the coating solidifies.
However, a challenge arises when it comes to assembling this telescope, as it will require human intervention. Therefore, its development must be postponed until permanent lunar bases are established. Despite this limitation, the transportation, assembly, and operation of the ILMT will be significantly more cost-effective compared to a traditional telescope. Of course, this is a prospect that lies far in the future.
Currently, it appears that this technology is widely undervalued, but things could change in the future. The high costs associated with “typical” large telescopes hinder the development of such devices, despite the demand for large mirrors being significant. A relatively inexpensive and simple-to-construct large LST could serve as a viable option, particularly for tasks that don’t necessitate precise targeting. This type of telescope, for instance, could conduct routine surveillance of space debris, anticipating that the majority of fragments will eventually pass by and be identified.
Expanding the capabilities of LSTs could be achieved with the addition of extra optics, allowing for a significant increase in the available sky area. Another avenue for improving liquid telescopes involves exploring the possibility of tilting them. While this might not be feasible with mercury, experiments are being conducted with mirrors in the form of a film of nanoparticles, such as silver, on the surface of a viscous rotating liquid. However, it is important to keep in mind that these improvements will gradually erode the main advantage of TZhZ, which is their low cost.
The author would like to express gratitude to Paul Hickson (University of British Columbia, Canada) and Jean Sourdey (University of Liège, Belgium) for their assistance in preparing this article.
For a long time, I’ve had a desire to own a telescope for observing the stars. Recently, I came across an interesting article written by a resourceful individual from Brazil who successfully crafted a reflective telescope using only basic materials and his own ingenuity. Not only was he able to fulfill his dream of stargazing, but he also managed to do it on a budget. I found his story inspiring and it motivated me to consider trying my hand at building my own telescope as well.
Further from the author in machine translation.
Everyone has a fascination with stargazing and admiring the moon on a clear night. However, there are moments when we yearn to observe something even more distant. We long to examine it up close. And so, mankind invented the telescope!
Today, we have a wide variety of telescopes available, such as the traditional refractor and the Newton reflector. Living in Brazil, telescopes are considered a luxury item due to their high cost. Prices range from R$1,500.00 (approximately US$170.00) to R$7,500.00 (US$2,500.00). While it’s possible to find a refractor for R$500.00, this amount is equivalent to about 5/8ths of a salary, which is a significant expense considering the number of low-income families and young individuals hoping for a better quality of life, including myself. However, I have discovered a solution to still enjoy stargazing – why not build our own telescope?
Another challenge in Brazil is the lack of available information and resources about telescopes.
The materials needed, such as mirrors and lenses, are not excessively expensive. Unfortunately, many people are unable to afford them. Thankfully, there is a simple solution – repurpose items that are no longer being used!
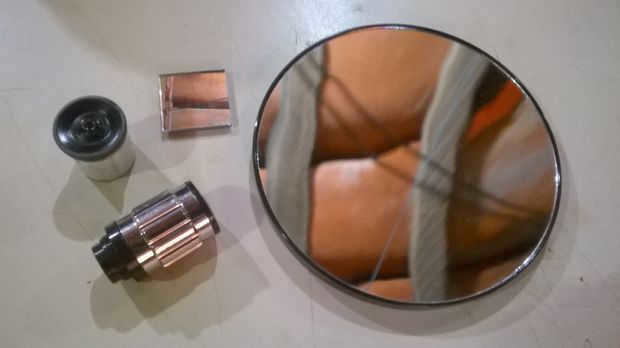
But where can we find these items? It’s actually quite easy! The main component of a telescope reflector is:
– The main mirror (concave)
– The optical lens (the most challenging part!)
Where can you find these items?
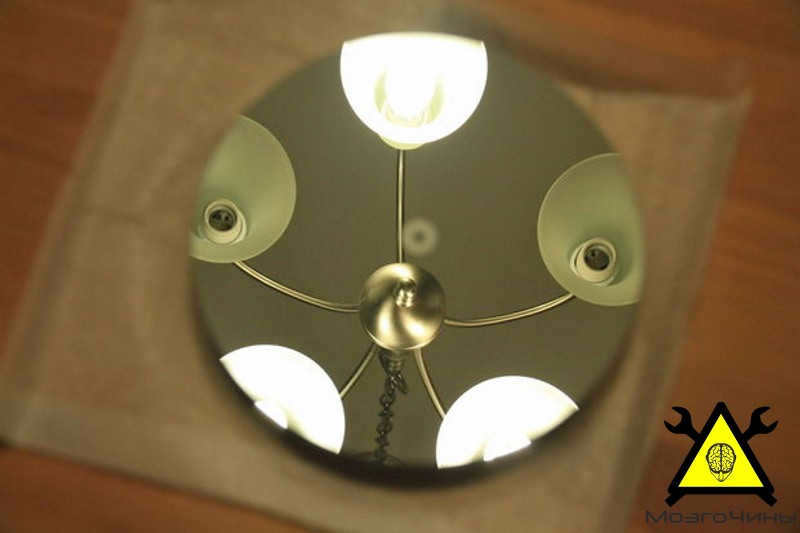
– Concave mirrors can be found in beauty salons (makeup, stores, hair salons, etc.);
– Flat mirrors are present in various objects. You just need to locate a small mirror (approximately 4 cm2);
– Finding an optical lens is more difficult. You can obtain one from a broken toy or create it yourself (I used an old 10x lens from a broken pair of binoculars).
– You can use water pipes (somewhere between 80mm and 150mm in diameter), but I prefer using an empty ink tin and tin towels.
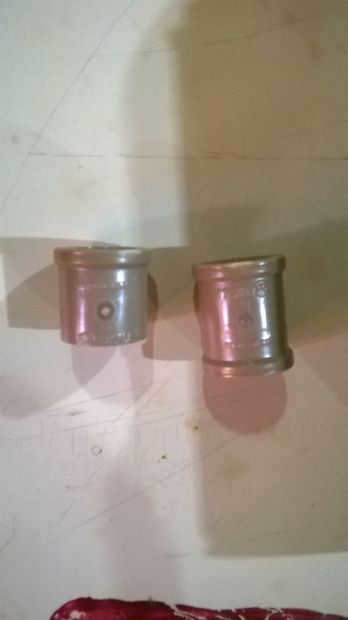
You also need PVC pipes, connectors, and some cardboard rolls.
You can secure everything with hot glue or silicone paste.
Now, there’s no more time to waste! Let’s get started!
Step 1: Calculation of the optical elements
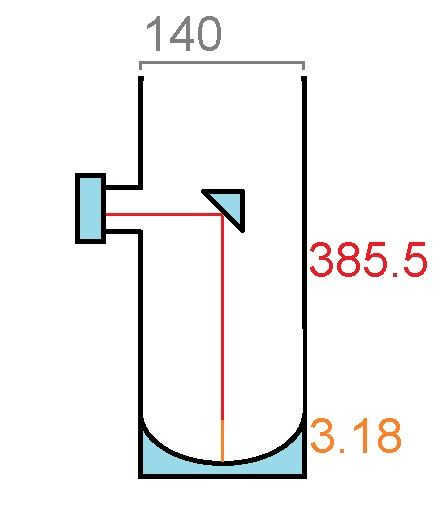
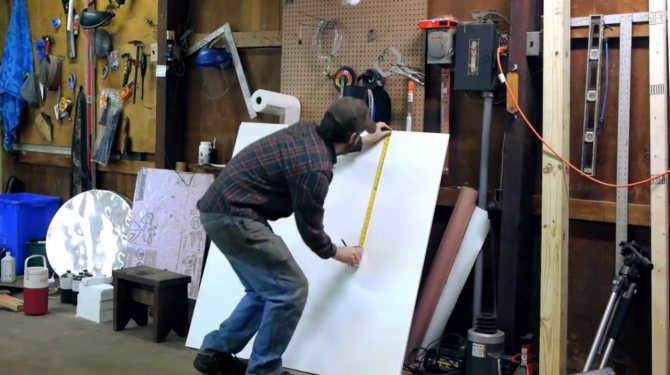
I have obtained a concave mirror for my telescope with a diameter of 140mm. The sagitta of the mirror, measured using a caliper, is 3.18mm.
Before we proceed, it’s important to understand what the sagitta of a mirror is. It refers to the depth of the mirror, which is the distance between the lowest point of the mirror’s surface and the height of its borders.
From these measurements, we can determine the mirror’s radius (R), which is half the sagitta, i.e., 70mm.
The radius of curvature (P) can be calculated using the formula P2 / 2C, resulting in a value of 770.4mm.
Finally, the focal length (F) is half the radius of curvature, so it is 385.2mm.
With all these measurements, we now have everything we need to construct our telescope!
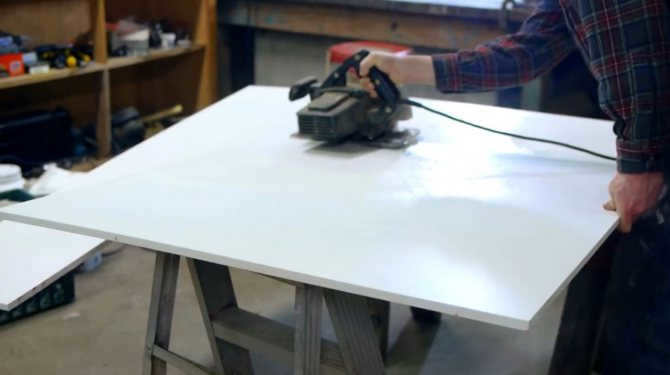
Step 2: Creating the main cylinder
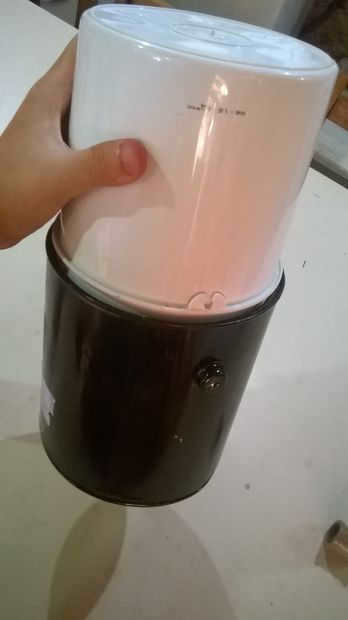
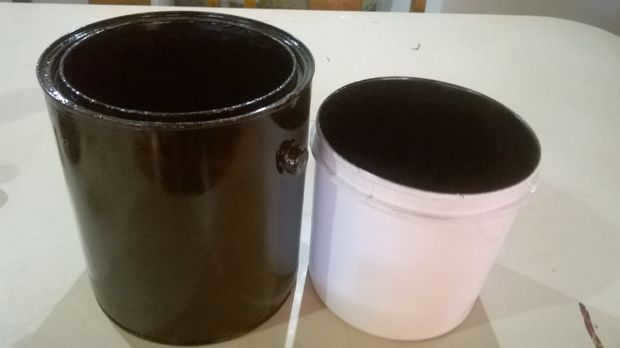
It’s a coincidence that our paints are the perfect choice for a tin towel!
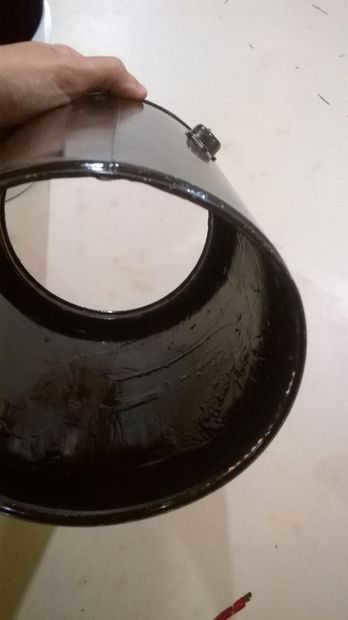
The first step is to eliminate the paint on the bottom can’t.
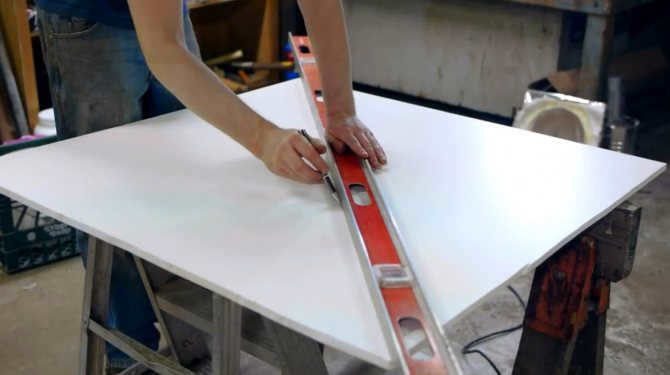
To determine the distance between the concave mirror and the eyepiece location, you will first need to measure it. It is important to take into consideration the radius of the paint can.
Next, mark the height at 315 mm, which is approximately 30 cm.
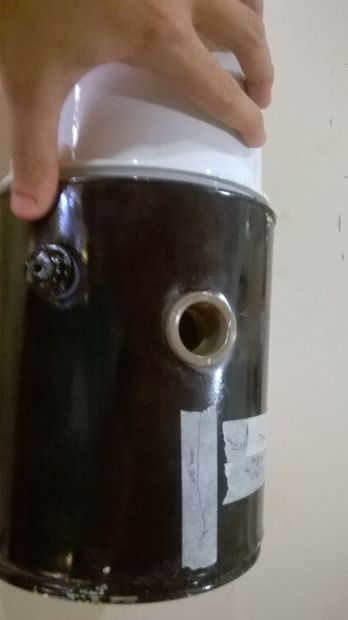
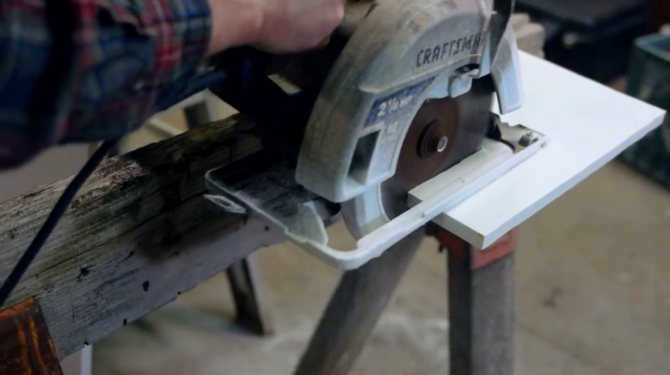
At this designated height, create a hole in the can, similar to the one shown in the photo. In my case, I made a hole of approximately 1.4 inches to accommodate the PVC connector.
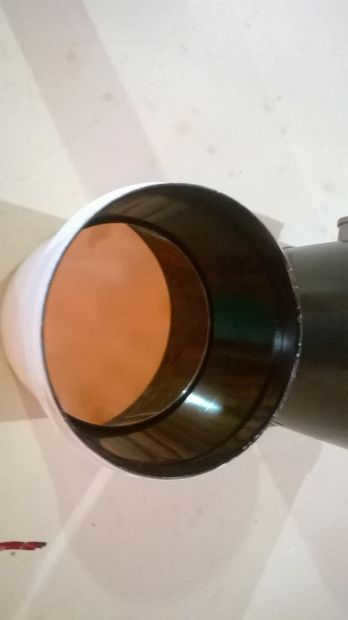
As depicted in the subsequent photo, the mirror fits snugly inside the can.
Step 3: Installing it horizontally
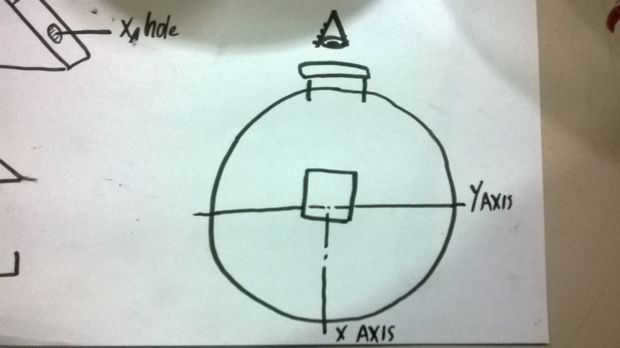
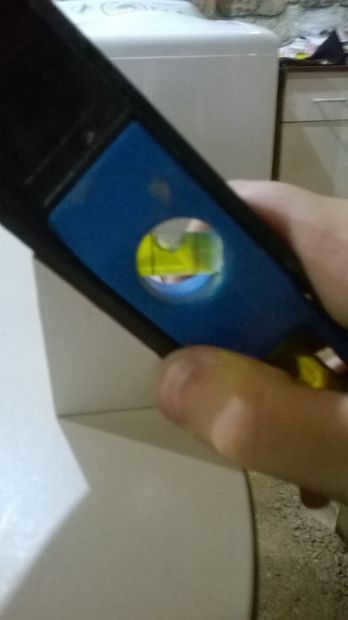
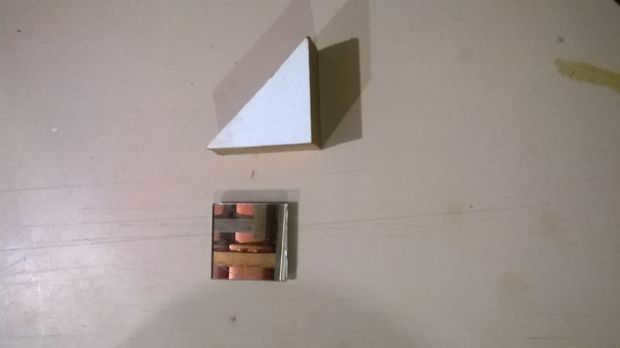
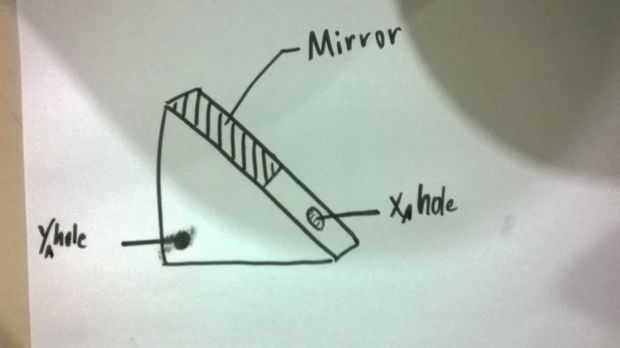
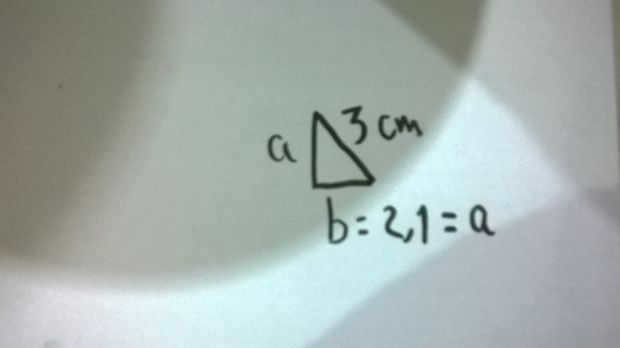
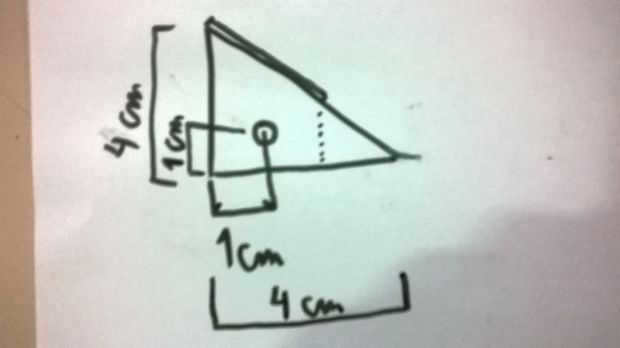
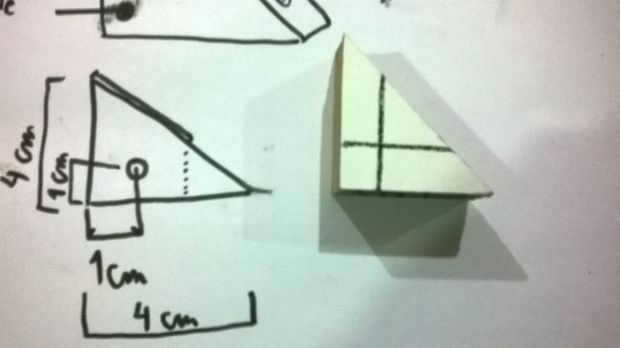

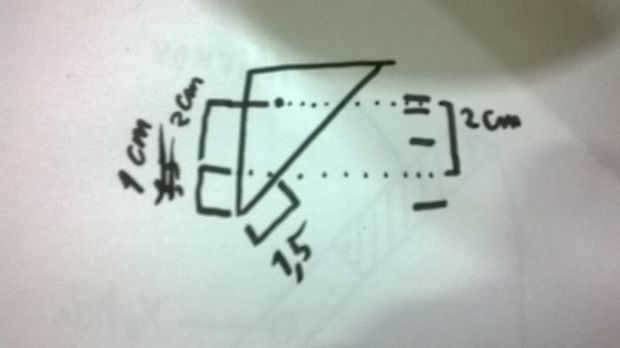
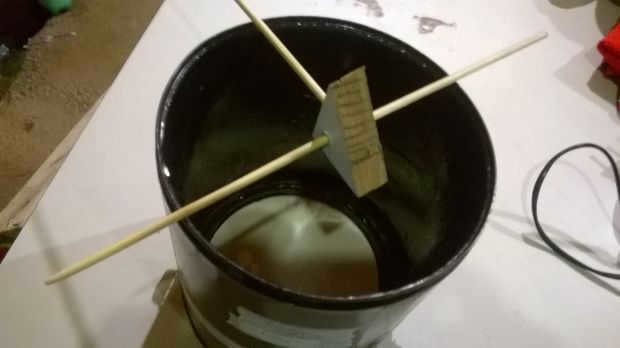
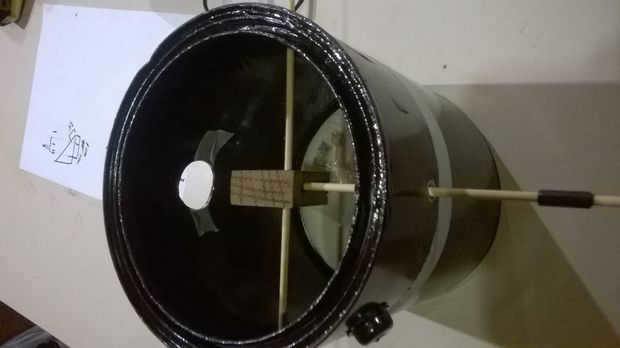
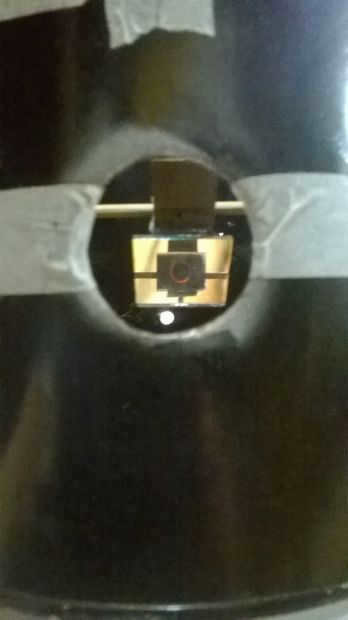
To fit the mirror plane, I utilized a pair of wooden sticks and a small wooden triangle with a 45° angle. Next, I took measurements and used a drill to create holes for inserting the sticks. I then calculated the distance between the mirror’s center and the handle of the hole, which measured 20 mm. Using a drill bit, I made holes in the paint can. Finally, I adjusted the sticks to align with the mirror plane so that when looking through the eye holes, my own eyes were reflected. To secure the mirror, I affixed it to a support using hot glue.
Step 4: Focusing on Correction
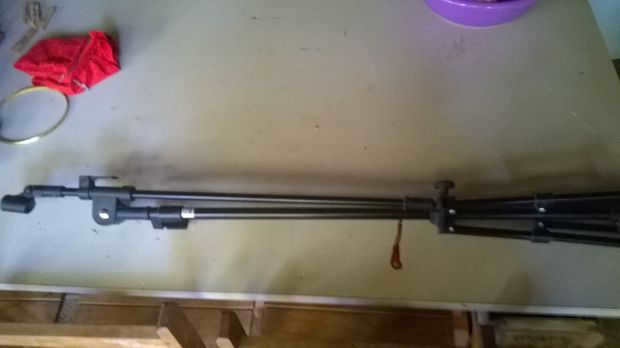
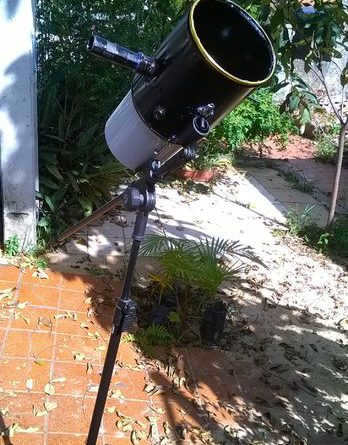
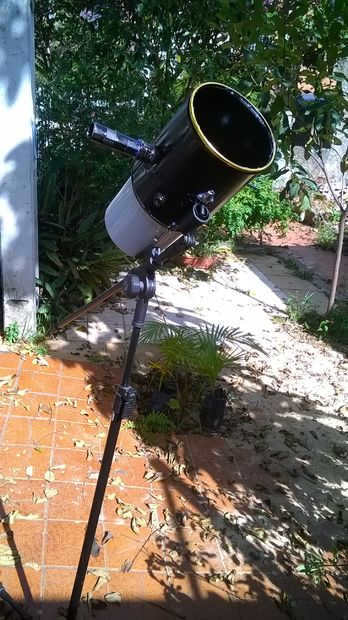
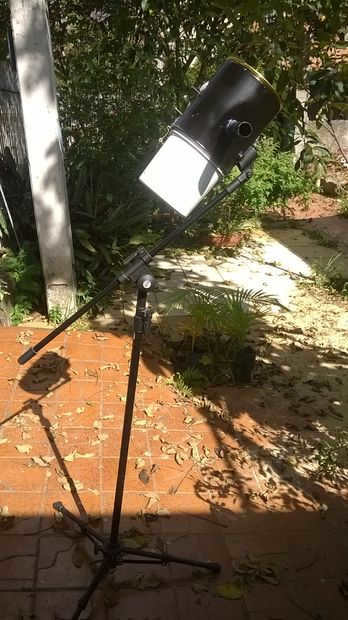
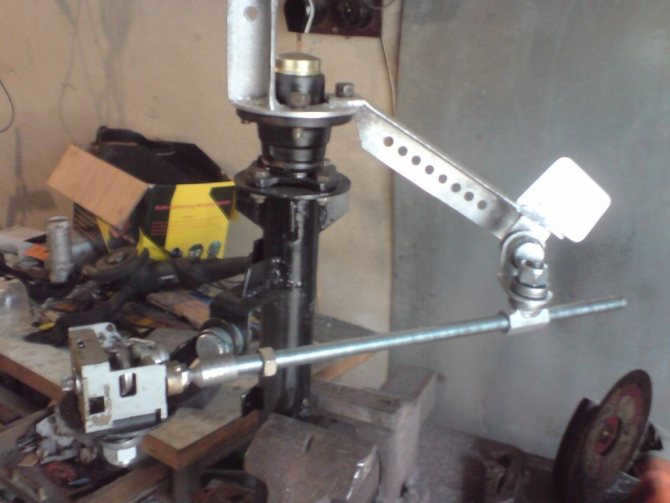
I repurposed the pedestal microphone as a makeshift tripod for the telescope, securing it in place with tape and elastic.
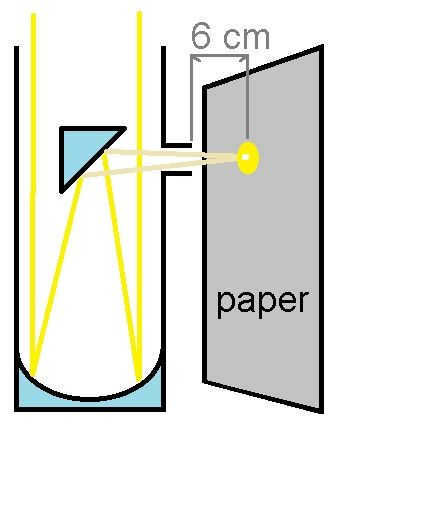
In order to locate the focal point, it is necessary to align the telescope with the sun. It goes without saying that one should never directly observe the sun through a telescope!
To determine the focal point, place a piece of paper in front of the eyepiece and locate the smaller light spot. Then, measure the distance between the eyepiece and the paper as shown in the illustration. In my case, the distance was 6 centimeters.
This measurement represents the distance that should be maintained between the eyepiece and the eyehole. To accommodate the eyepiece, I fashioned a holder using a cardboard roll (from a toilet paper roll), which I cut and secured with a small amount of tape.
Step 5: Assistance & Attire
The interior of the tube should be completely black to prevent any light from reflecting in different directions.
I painted the outside of the tin black for aesthetic purposes. I also modified the barrettes to securely hold tin towels inside the tin paint.
Some additional barrettes are used to secure secondary mirror sticks… and I repaired the “PVC tripod socket” with a rivet and hot glue.
I applied gold plastic edging on top of the black paint to add a touch of elegance.
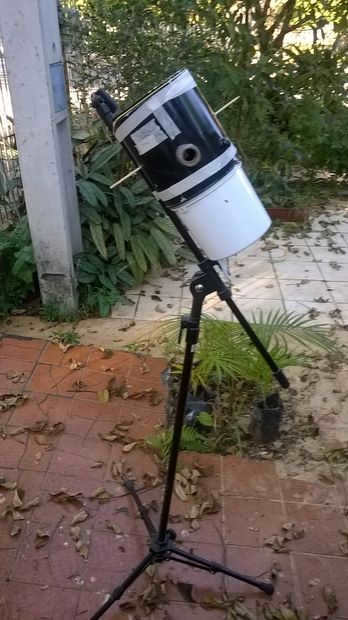
I eagerly anticipated the arrival of darkness, much like a young child eagerly anticipating the arrival of a Christmas present. When night finally descended, I ventured outside to put my telescope to the test. And the outcome was as follows:
As we all know, capturing pictures with a telescope is no easy feat.
However, as you can see, it actually works!
An invaluable resource that aided me in this endeavor was the book:
NICOLINI, Gene. “Manual non Astrônomo Amador”. Papyrus, 2nd ed, 1991.
Currently, I am patiently awaiting moonlight as we are currently in the New Moon phase. Once the moonlight arrives, I will attempt to capture a picture of the moon.
Thank you for your attention.
Lastly, I would like to express my gratitude to my friend Julia for her invaluable assistance, particularly with regards to proofreading my text. Please forgive any errors, as I am still learning.
Source: www.instructables.com
There’s more to explore
- Repurposing an old laptop with your own hands(1)
I’ve owned a laptop that has served its time. It wouldn’t make sense to sell it as the individual components are worth more than the laptop itself. I plan on making it useful […]. - DIY Loft Door for only 2500 rubles(0)
https://youtu.be/BPICYO6mxA0 Want to learn how to make a simple wooden door in the loft style? Check out this detailed video on how to create […]. - The significance of gaming in our lives. Mastering the art of poker(0)
The ability to self-develop and improve is ingrained in all living beings, including humans, at a genetic level. This innate quality allows us to become […] - Mounting foam(0)
Using mounting foam is an essential method of sealing in any modern repair. Its application enables the quick installation of various […]. - Palm-sized Kitty(0)
A soft homemade kitty that comfortably fits in the palm of your hand can be a creative project with your children. It will not […] - DIY Floor Scrubbing(0)
Repair is a word that holds mystery and even mystique. Some repairs last a lifetime, and people enjoy this process. Others […]
DIY Affordable Mylar Parabolic Mirrors
Greetings, esteemed readers and DIY enthusiasts! Some of you may have already tried your hand at creating parabolic mirrors out of old satellite dishes. However, these mirrors tend to be quite heavy and come with their fair share of disadvantages.
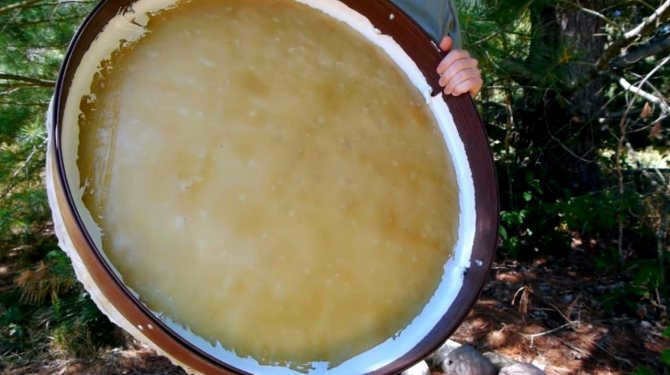
In this article, we will explore a new technique for crafting a lightweight and budget-friendly 28-inch parabolic mirror. This mirror offers a multitude of applications, ranging from heating substances to cooking. It can even be incorporated into a telescope.
Making your own mirror for telescopes is an easy task that can be done individually, and the expenses for the necessary materials are minimal.
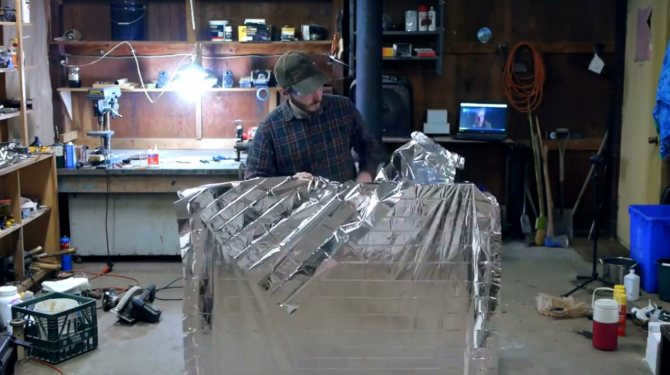
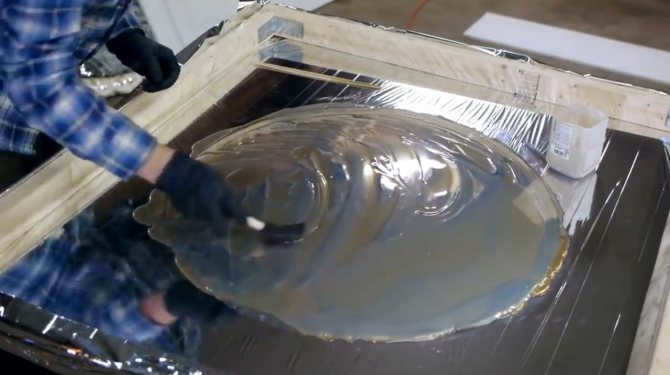
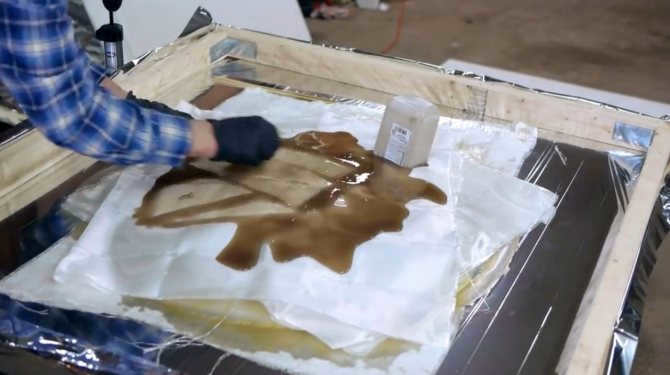
Required materials include: Mylar film, construction foam, fiberglass cloth, nipple, two-component epoxy resin, sheet polyurethane foam, plastic tape, pine boards, steel corners, aerosol contact glue, and silicone sealant.
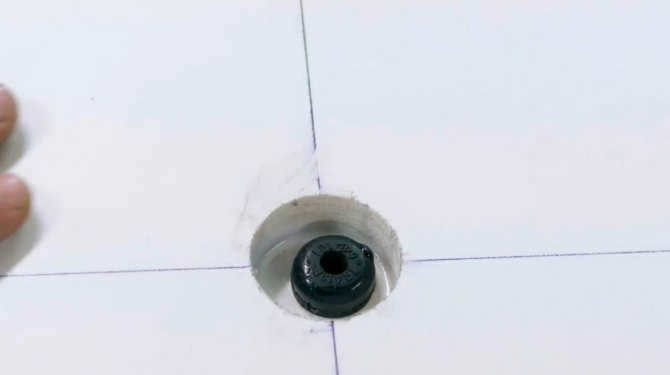
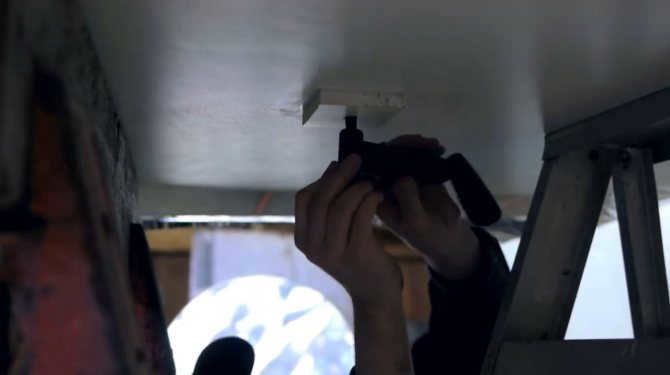
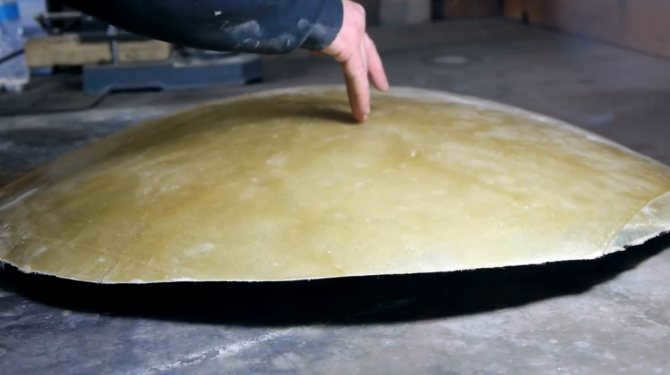
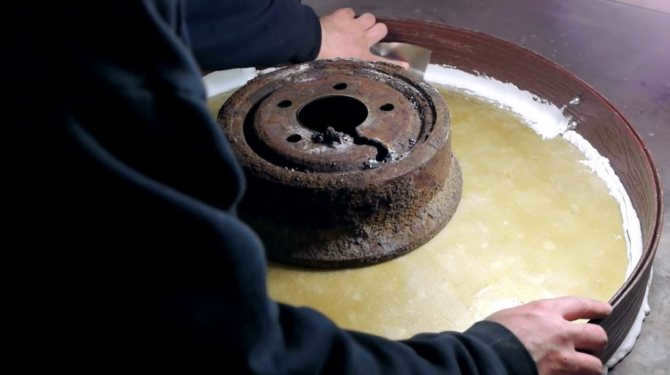
The author utilizes a variety of tools including a cutting disk, bicycle pump, step drills, screwdriver, and drill press. The manufacturing process involves utilizing compressed air to shape a parabolic form from a sheet of aluminized film known as “mylar.” Mylar is commonly found in the form of emergency blankets. The mylar is secured to a completely flat, airtight surface and then pressurized from underneath, causing it to inflate similar to a large bubble. The author begins by preparing the surface where the aluminum-coated material will be inflated, opting to use a half-inch polyvinyl chloride fiber sheet that is both airtight and perfectly flat. This choice of material proves to be ideal.
Additionally, learn how to make small stars and cut them out of paper for decorative purposes.
The author creates an opening for air supply at the center of the sheet. In order to accomplish this, it is necessary to initially attach the valve from a bicycle tire tube to a small piece of polyvinyl chloride sheet.

There is a noticeable hole in the middle that is appropriately sized, and its sides are covered with PVC glue. The block that has the valve attached to it is then positioned on top, with the valve’s base facing upward.


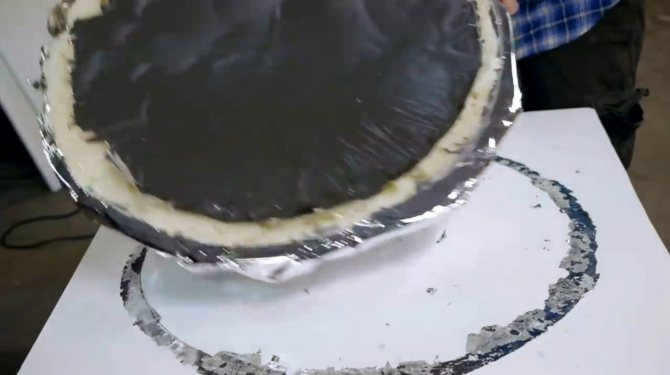
By flipping the sheet over, with the reverse side facing down, the true intention of the creator is revealed – the mirror is concealed within the surface.
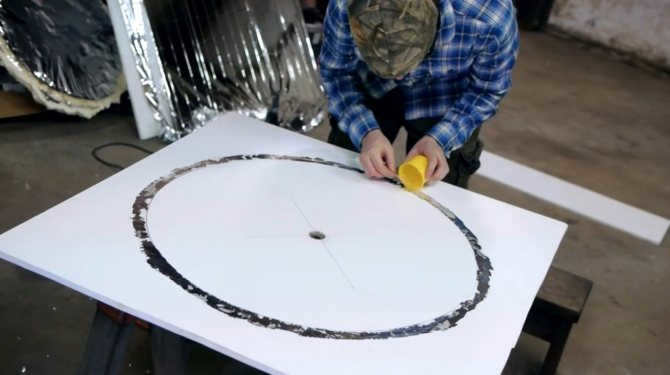
Afterward, the writer provides a brief overview of the process of creating a mirror for telescopes. One way to accomplish this is by tracing the circumference of the desired diameter using a circular template or a shape that fits the purpose.
He smooths the surface of the outer edge of the circle using sandpaper. It is along this contour that the glue will be applied to attach the mylar and seal the desired region.

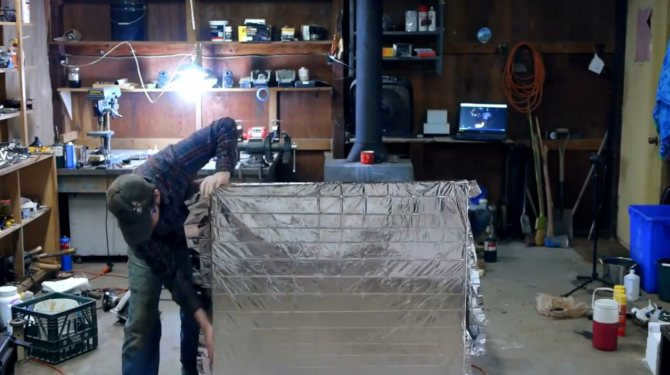
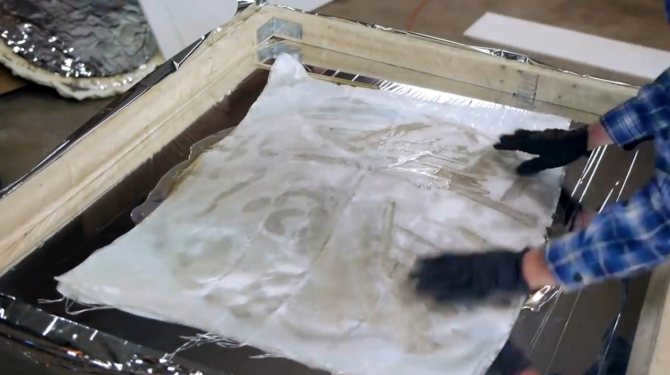
As mentioned earlier, mylar is marketed as a survival blanket and is packaged with multiple folds, resulting in numerous creases on its surface.
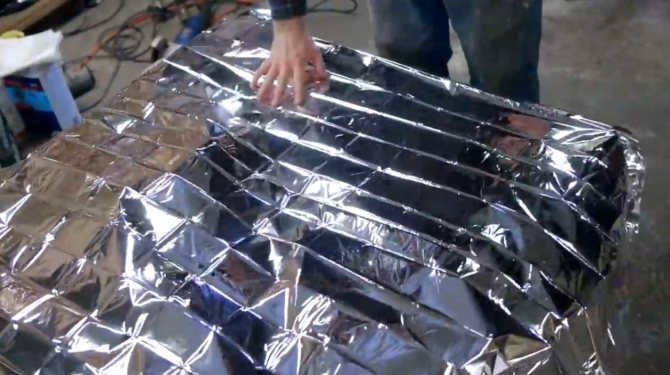
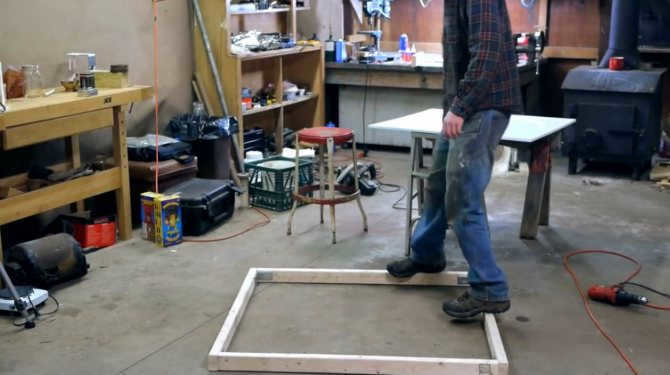
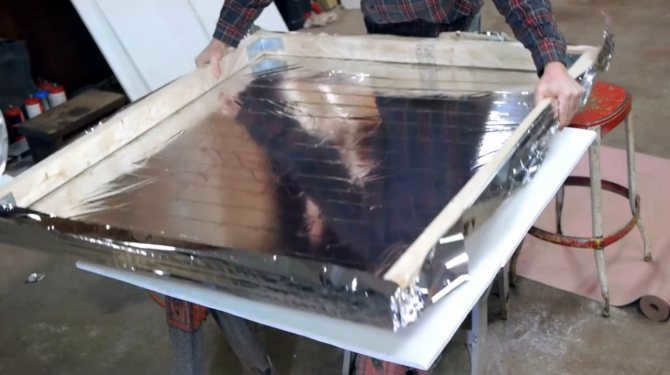
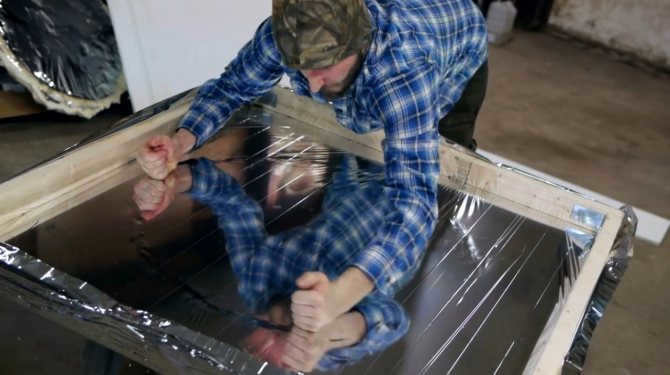
Before creating a prototype mirror out of it, the PVC sheet must undergo a flattening process. To achieve this, the author constructs a wooden frame that is slightly larger than the sheet itself. The aluminum-coated film is then stretched across the frame.
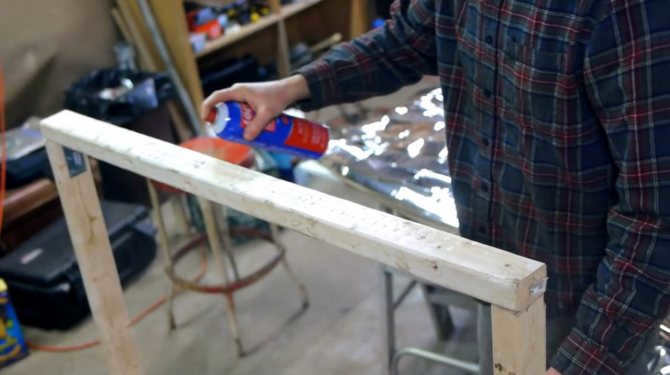
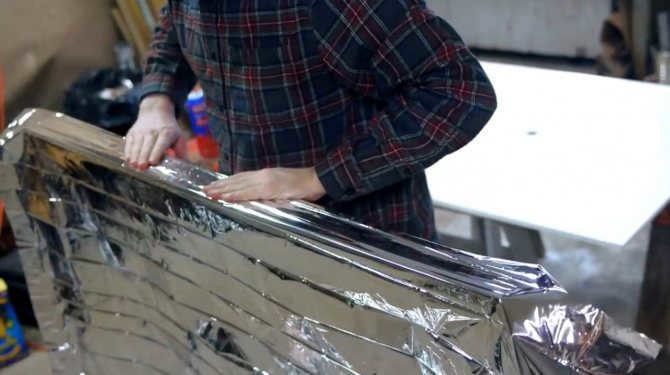
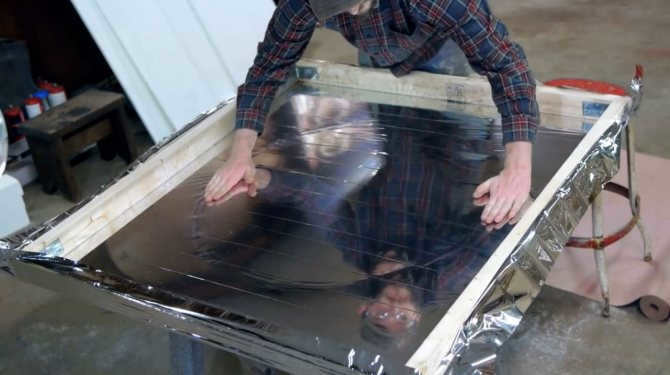
The most convenient method of temporarily attaching mylar to a wooden frame is by using a spray contact adhesive. The author applies the adhesive to the upper surface of the frame, carefully secures the mylar without any creases, and then flips the frame over to treat the opposite edge with glue. The mylar is then tightly stretched and aligned to eliminate any folds. This process is repeated for the remaining sides of the frame.

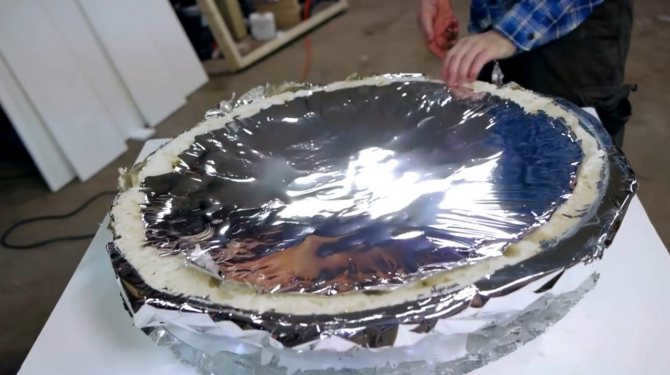
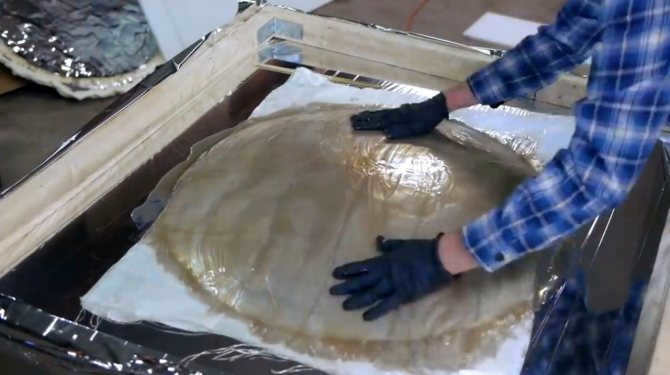
Based on previous experience, the writer has discovered that mylar bonds most effectively with PVC to epoxy resin. To create an insulated space in the center, they apply a layer of mylar to the circumference of the circle and place the frame with the webbing on top. The mylar is promptly pressed around the circumference, ensuring proper adhesion. It is crucial for the epoxy to dry thoroughly.

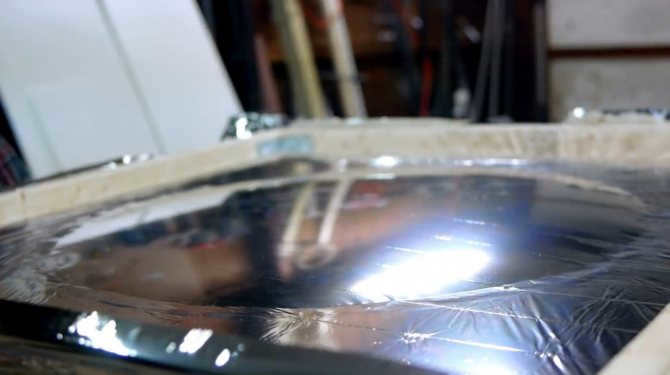
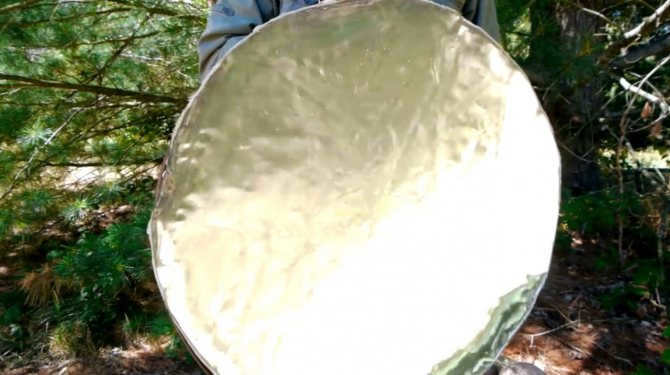
In order to inflate it, a regular bicycle pump is utilized. The maximum limit to which the mylar can be pumped before bursting is difficult to ascertain. However, fortunately, it quickly assumes the shape of a parabola.

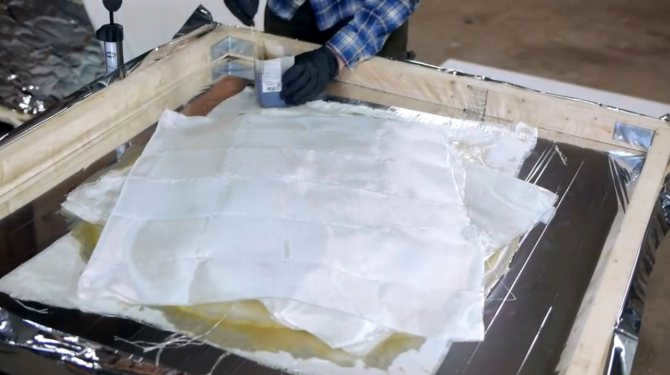
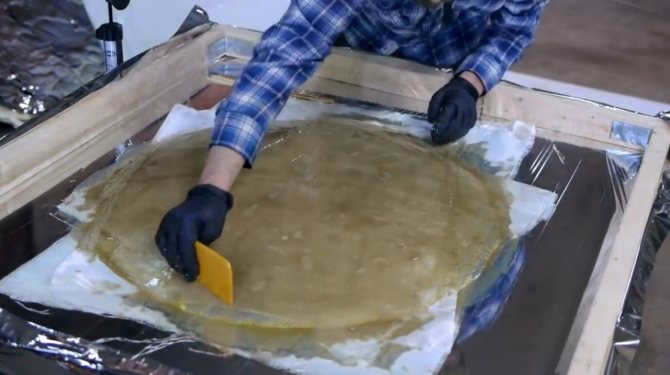
In order to achieve the desired shape, the author uses a layer of regular construction foam on top of the mylar during the initial attempt.
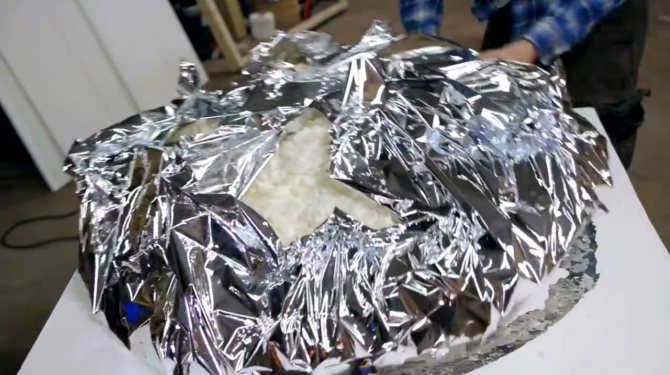
However, the outcome was rather unsatisfactory. The positive aspect is that the foundation can be easily tidied up and repurposed.


While the fiberglass is curing, you have the opportunity to inflate the “bubble” slightly. Meanwhile, he applies an additional two layers of fiberglass cloth.
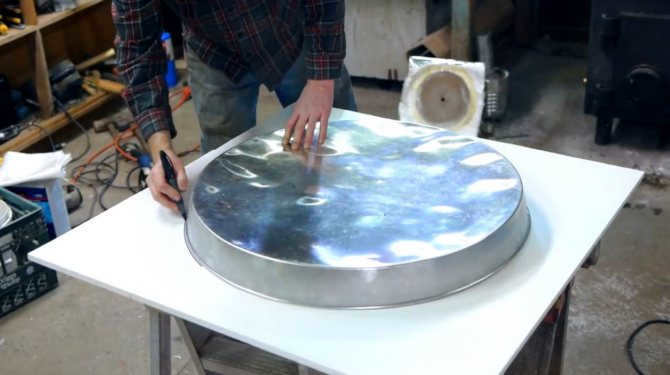
To avoid causing any harm to the mirror, the author employs a bolt cutter to detach it from its base.
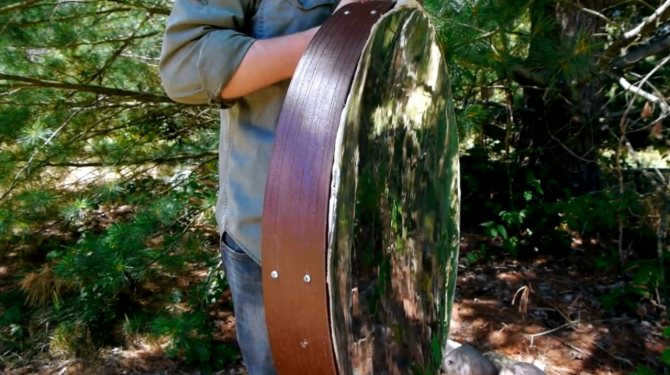
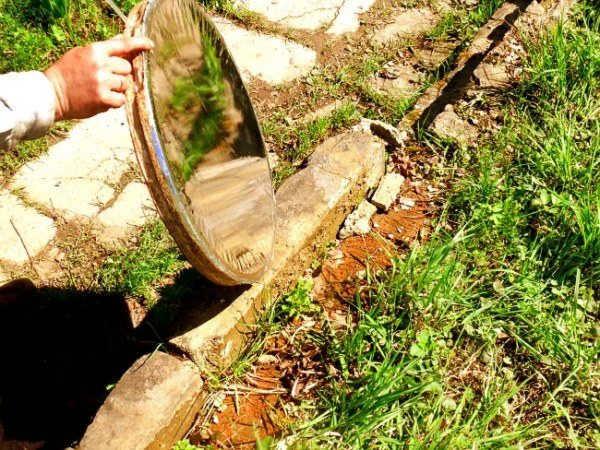
And behold the outcome! The mirror’s reflectivity is rather impressive.
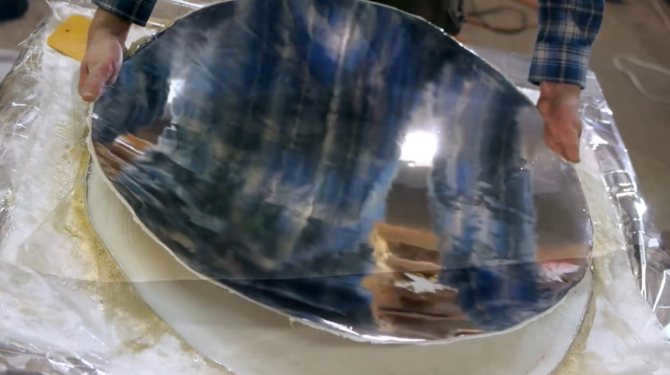
The issue we have is that the fiberglass material has a higher degree of flexibility than we desire. As a result, the mirror’s parabolic shape is somewhat compromised.
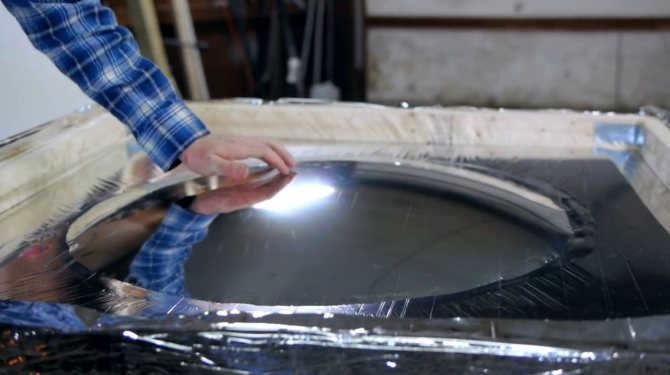
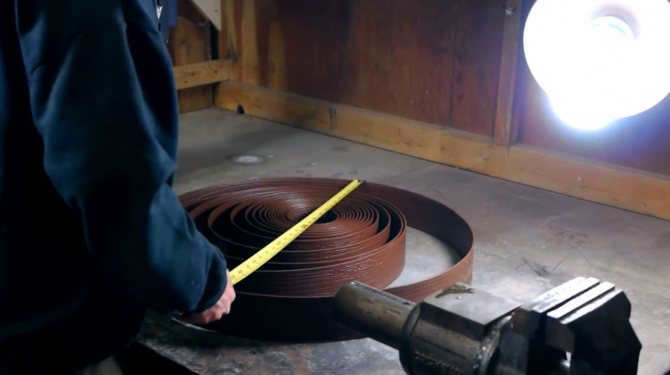
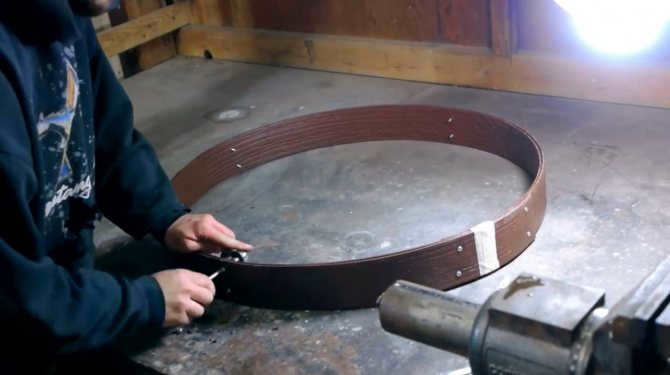
In order to rectify the shape, the writer opts to employ a hoop. To accomplish this, a plastic garden edging designed for vegetables is utilized. The writer proceeds to roll it into a circular form and secure it in place using bolts and nuts.

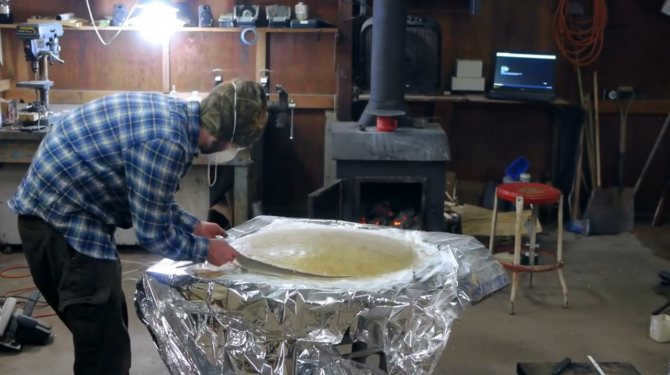
To achieve the desired shape, the mirror is firmly pressed down with a weight, causing its edges to slightly straighten and the surface to take on the desired curvature.
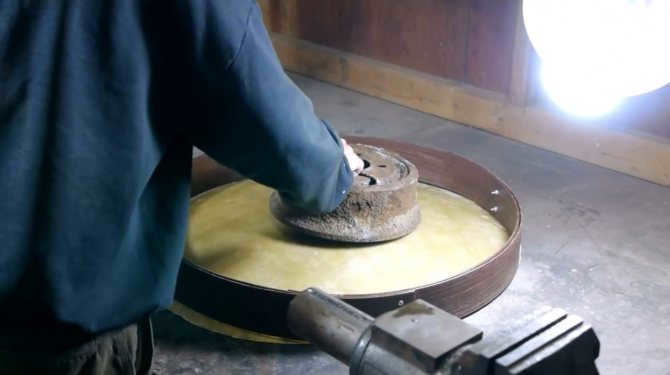
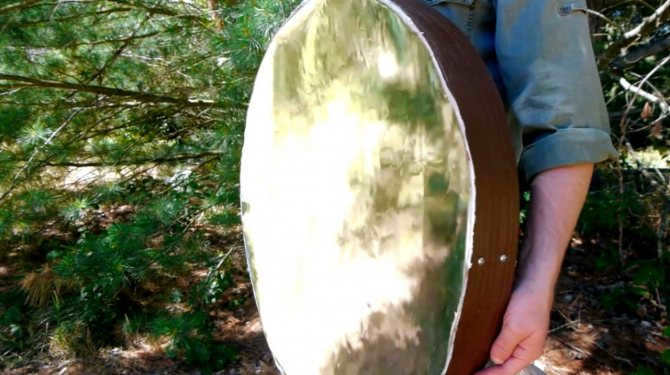
The silicone sealant is applied around the entire edge of the mirror and allowed to dry.
Let’s now evaluate the outcome. Taking into account the expenses for the materials, the outcome is rather satisfactory. A smoother surface could have been achieved if there was a possibility to slightly expand the mylar.
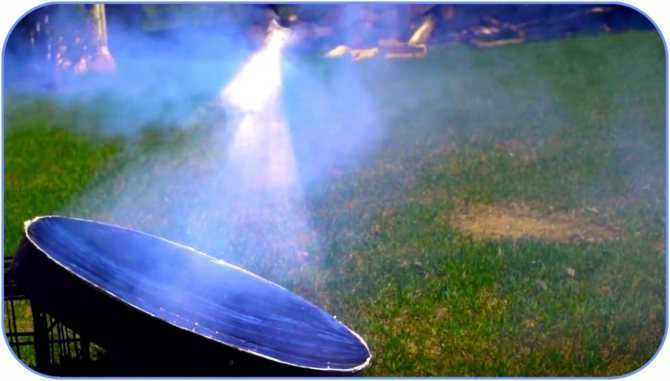
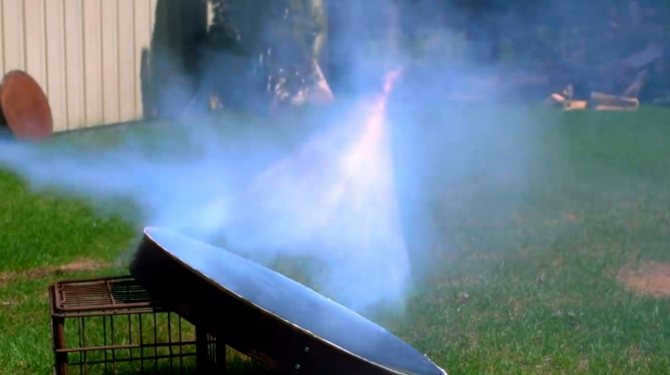
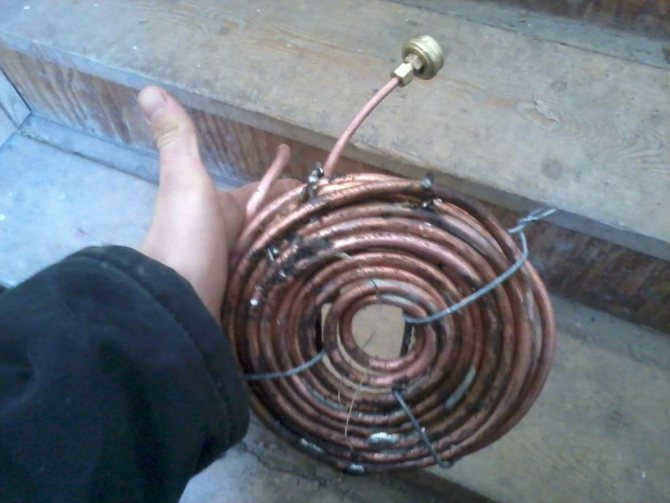
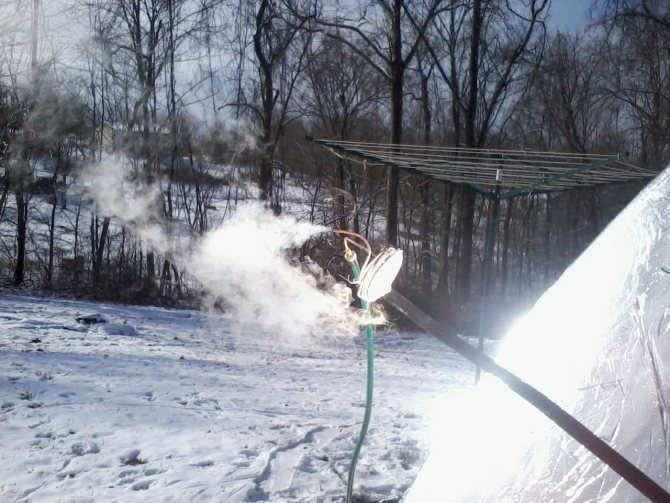
It’s astonishingly simple to set fire to even a large piece of wood.
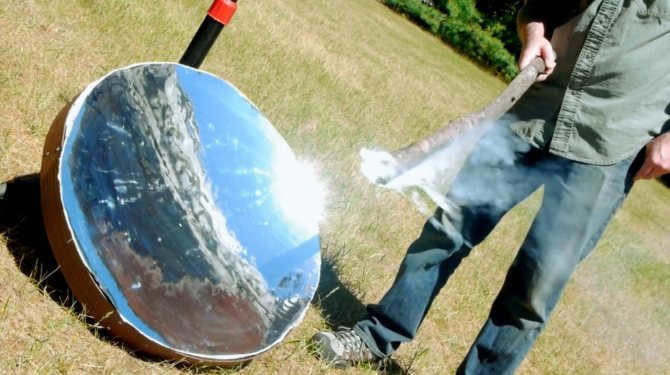
Now that the technology has been mastered, there is an opportunity to enhance the design of the mirror and adjust the focal length to meet individual needs. As you may have already realized, by utilizing a group of these mirrors, it is possible to create an affordable heating system. Additionally, there is room for experimentation with the mirror’s shape, such as making it resemble half of a tube. This would allow for the implementation of a longitudinal receiver for capturing solar rays, in the form of a pipe with a coolant, positioned along the entire focal point.
Read also: DIY Paper Chrysanthemums. How to Make Chrysanthemums from Paper Napkins. Step-by-step Photo Tutorial
Many thanks to the creator for an uncomplicated yet captivating technique for crafting parabolic mirrors! May your day be filled with positivity, fortune, and inspiring concepts!
For the original video by the author, kindly click here.
Interested in becoming an author on this website? Share your own articles and descriptions of do-it-yourself projects and get paid for your written content. Learn more by clicking here.

DIY mirror film solar concentrator
The utilization of abundant natural resources like solar power, water, and wind has been a long-standing practice. While some individuals consider it a mere hobby, others heavily rely on energy-extracting devices that harness power “out of thin air”. For instance, in various African countries, solar panels have become a lifesaver, supporting individuals in arid regions by introducing solar irrigation systems and solar-powered pumps for wells.
Chinese stores also offer solar ovens for sale.
While the sun may not shine as brightly in European countries, the summers can still get quite hot. It’s a shame to let all that free energy go to waste. Thankfully, there have been successful advancements in solar stoves. However, many of these stoves utilize expensive solid or prefabricated parabolic mirrors. Not only does this drive up the cost, but it also adds unnecessary weight to the design. As a result, these stoves are not always convenient to use, especially when you’re looking for something lightweight and portable.
Fortunately, a talented inventor has come up with an interesting solution. They have created a homemade parabolic solar concentrator that doesn’t require mirrors. This means that it is incredibly lightweight and won’t be a burden to carry on a camping trip.
Take a look at the merchandise available for creators. Store hyperlink.
In China store, you can find a wide range of electronics specifically designed for making homemade solar concentrators.
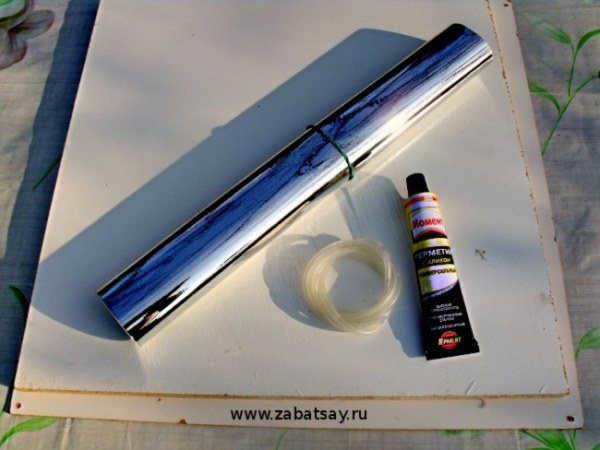
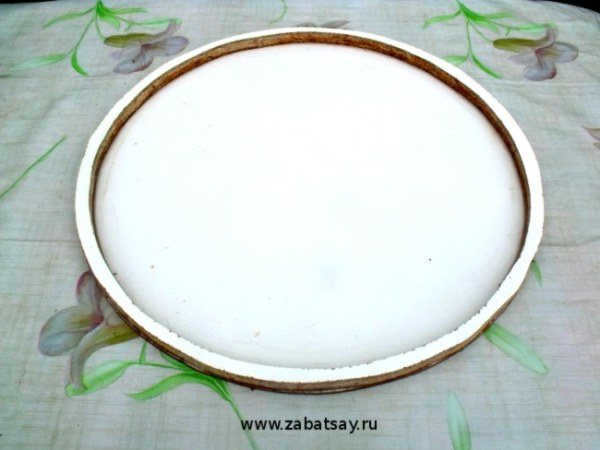
To construct a DIY solar concentrator using film, you will only need a few items, all of which can be found at any clothing market. Firstly, you will need self-adhesive mirror film, which has a smooth and shiny surface, making it an ideal material for creating the mirror component of the solar oven. Additionally, you will require a sheet of chipboard and a sheet of organite of a similar size. Lastly, you will need thin hose and sealant.