According to the author, when viewed through a telescope, the Moon appears brighter, more contrasting, and with more relief. In Rostov-on-Don, anyone passing by had the opportunity to gaze at the Moon.
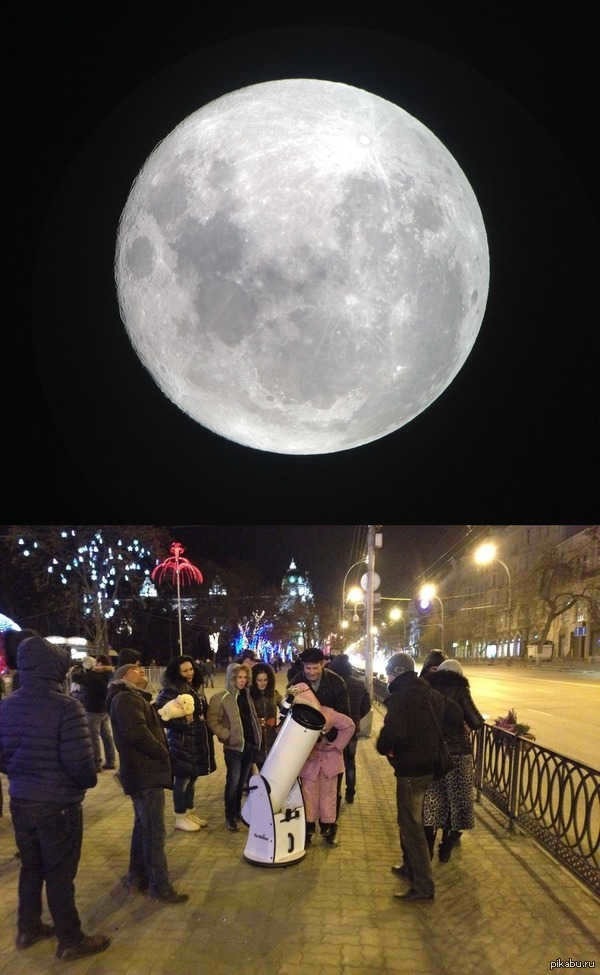
A regular moon captured by an SLR camera. I always believed that through a telescope, one could spot lunatics).
A regular camera, without the aid of a telescope, can capture images of the moon.

The lunar phenomenon observed on July 22nd.
The moon was captured using a MAK127azgt telescope and Canon 1000Da lens.
ISO 100, exposure of 1/80s
This observation took place on the garage roof in Novorossiysk.

11.06.2023 Moon Observation in Leningrad Region
A series of 8 images were captured using infrared (IR850) technology at approximately 7 am on June 11, 2023.
The following equipment was used for the shoot:
– HEQ5 mount;
– SW BKP2001 telescope;
– QHYIII462C camera.
On the date of 28.05.2023, Peter observed the Moon
Panorama consisting of 9 images
Equipment used:
HEQ5 mount
Levenhuk Skyline Plus 115s telescope
ZWO ASI 120MC-S camera
BARLOW 2x lens
Location and date of capture: St. Petersburg, Pargolovo, backyard, around 19:00 on May 28, 2023
Moon photograph and Venus footage captured from my balcony
Not long ago, I made a post seeking assistance from fellow stargazers regarding my newly acquired telescope (Inquiry about Telescope and Planet Imagery from a Novice. No ratings yet).
Finally, I have managed to acquire the telescope and have been fortunate enough to have favorable weather conditions and the moon’s positioning. As a result, I am sharing with you some photographs of the moon and a video of Venus taken on my smartphone, which even shows its current phase. I am open to any suggestions and recommendations from knowledgeable individuals.
The telescope I am using is a Skywatcher Explorer-130M 130mm (5.1″) f/900 Newtonian reflector.
For these captures, I utilized a 10mm eyepiece along with a x2 Barlow lens and a lunar filter.
PS. If anyone has any tips on processing planetary video on macOS, I would greatly appreciate it. I am aware that there are applications available for Windows, but I have been unable to find any for Mac.
PPS. Please don’t be too harsh – I am new to this and still have a lot to learn.
Here’s a video showcasing the beauty of Venus. It would be interesting to see if any stunning photos can be extracted from it through some post-processing techniques.
Additionally, I have included a couple more photos from the initial attempt.
April 23, 2023: The Moon
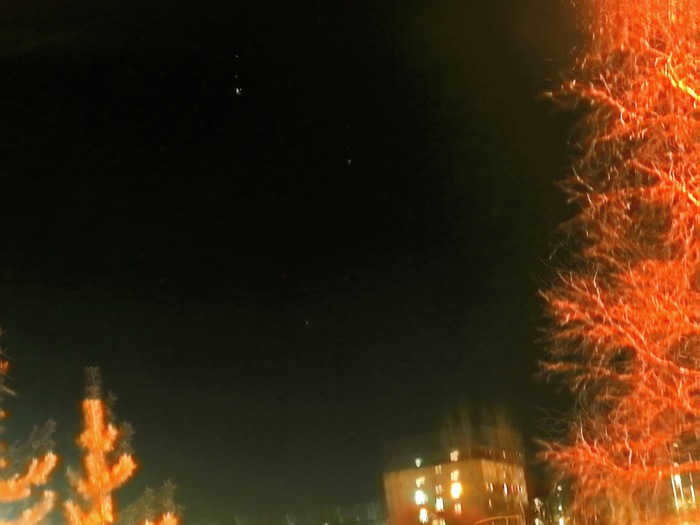
Supermoon and a Few Stars
On April 7, 2023, in Arkhangelsk, a magnificent supermoon illuminated the night sky, accompanied by a sprinkling of sparkling stars. The celestial display was a sight to behold, reminding us of the beauty and wonder of the universe. As we gazed up at the heavens, our minds were filled with a sense of awe and amazement. It was a moment of pure tranquility, where the complexities of life seemed to fade away, leaving only the simple beauty of the moon and stars.
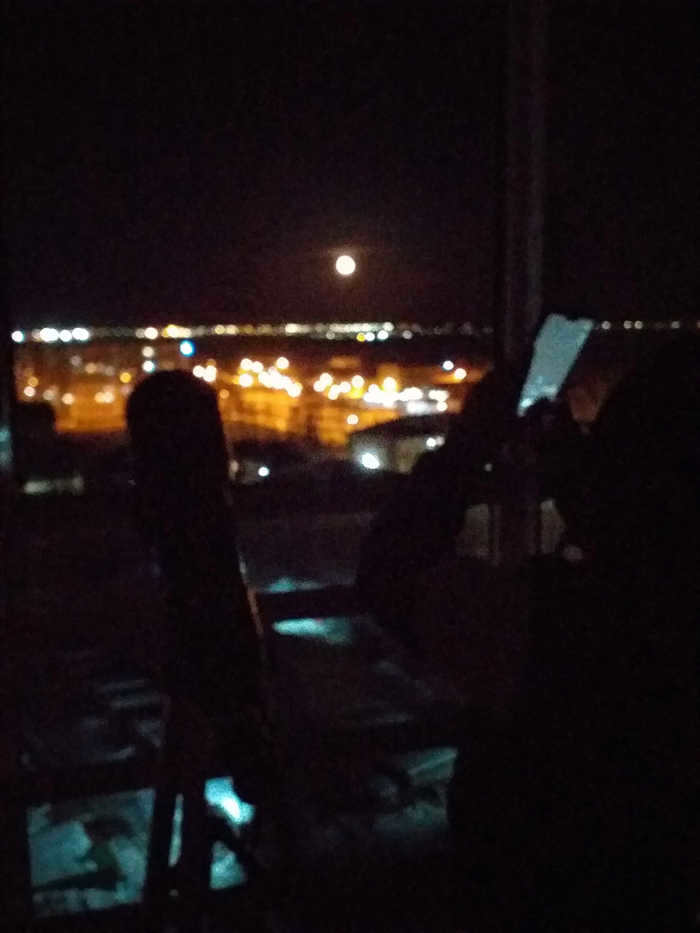
There is one available with an ISO setting of 400. However, you are already familiar with the phone.
Nevertheless, I am curious about the total number of options available.
With my phone, a pack of cigarettes, my keys, and a lighter, I fixed my gaze out the window of the entrance for a 32-second exposure, all while trying my best not to breathe…
March 07, 2023 Full Moon

Constructing a telescope from scratch
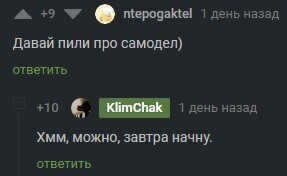
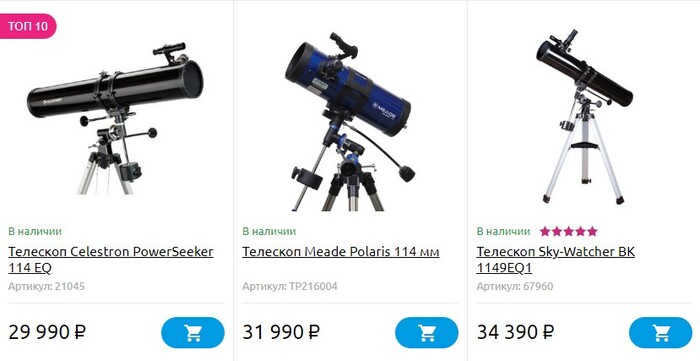
Taki witnessed a post about a telescope firsthand. The concept of constructing one’s own telescope occurred to me in June while watching YouTube. I stumbled upon a video showcasing the capturing of the galaxy through a telescope, and I became enthralled with the idea of replicating the experience. However, acquiring a telescope with desirable specifications proved to be quite costly, with prices starting at 30,000 rubles. Therefore, I resolved to search for a DIY telescope project online and attempt to recreate the same outcome. Fortunately, my endeavor proved successful and the result was rather impressive.
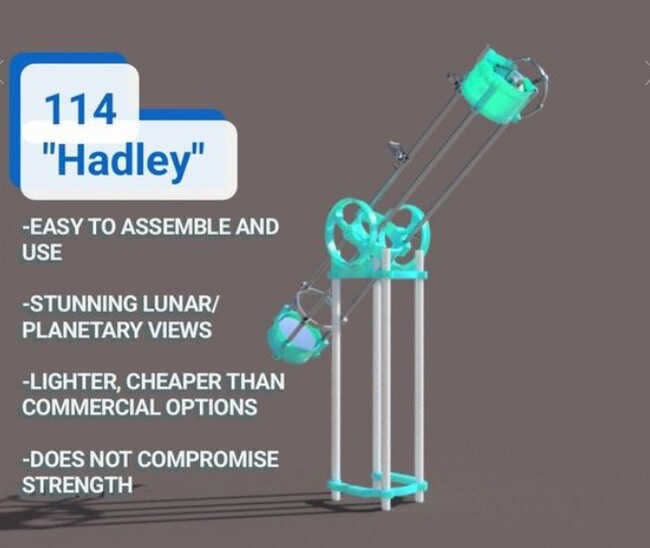
While searching for a project, I came across a popular website called Thingiverse, which is known for its 3D printer designs. After browsing through various options, I stumbled upon a fascinating project: the “Hadley” telescope (https://www.thingiverse.com/thing:5408737). This particular telescope boasts impressive features, including a maximum magnification of 230x and a decent aperture size. What’s even better is that it is relatively affordable compared to commercially available telescopes, costing around 8,000 rubles to create.
The majority of the components were acquired from Aliexpress, including a set of mirrors and two eyepieces (Plossl 25mm and wide-angle 6mm). For those interested in replicating the project, I will provide the links at the end of the post. The telescope parts were created using a 3D printer, while the mounts were purchased from a store. However, there were some challenges encountered with the guides.
The writer employs inches as measurements, using half-inch pipes (13mm) that are approximately one meter in length. However, 13mm diameter pipes are not commonly found in stores, and the writer was unable to locate them online, resulting in a one-month delay in the project. After a month, the writer decided to attempt assembling it using 6mm studs, but this turned out to be a poor decision.
One of the key requirements for such a tool is the precise alignment of mirrors with each other. Unfortunately, the studs do not provide the necessary stability, causing the telescope to sag and produce an inadequate image.
I managed to find pipes at a store catering to moonshiners, although they were quite expensive at around 500 rubles per meter. Nevertheless, in the pursuit of knowledge, I ordered three meters of pipe, and after a delivery time of approximately 10 days, I was able to reassemble the telescope using proper guides.
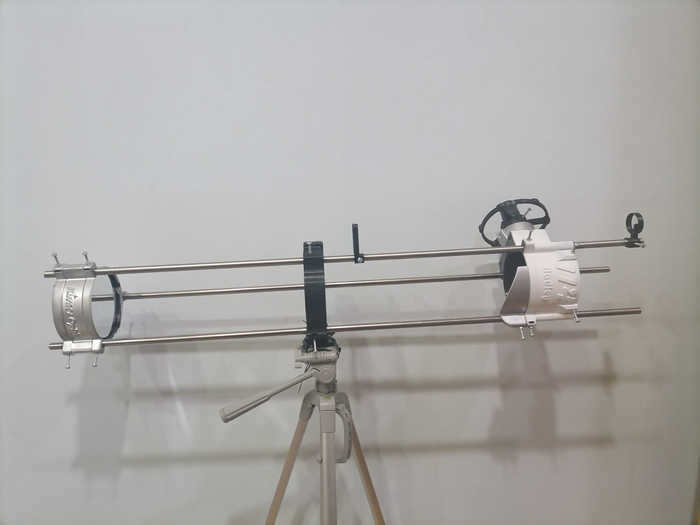
The telescope is affixed to a homemade tripod mount as the original mount did not fit properly. While it would be ideal to have a specialized telescope tripod that enables precise pointing at celestial objects, an ordinary tripod suffices for amateur observations. To ensure accurate aiming, a mechanical sighting device is employed.
An additional challenge is the initial adjustment of the mirror positions. The author provides a description of the assembly and adjustment process on the project page, and there are also Russian-language YouTube videos demonstrating how to adjust telescopes of this system. With a few mirror adjustments during the telescope’s reassembly, one can quickly learn to perform this task.
Now, let’s delve into the most fascinating aspect of this project – the observations. The town may be small, but it still offers a modest amount of backlight, although not as intense as in larger cities. Here, you have the opportunity to marvel at the stars, the Moon, Mars, Jupiter, and its satellites. If you’re lucky, you might even catch a glimpse of Saturn, as well as various nebulae and clusters. Unfortunately, due to the light conditions, I wasn’t able to spot any clusters, which is a bit disappointing. However, to enhance your observing experience, I highly recommend downloading the Stellarium app, which is available for both phones and computers. This app will help you identify and understand the celestial objects you are observing.
And here are a few photos, starting with the Moon.
Also observed Jupiter, it is easily visible along with its satellites even at a low magnification of 36x. However, capturing pictures in the freezing conditions of -25 degrees Celsius is quite challenging. I will attempt to take photos tomorrow if possible.
That’s all for now. If you have any questions regarding the project, feel free to leave them in the comments section. I will do my best to respond.
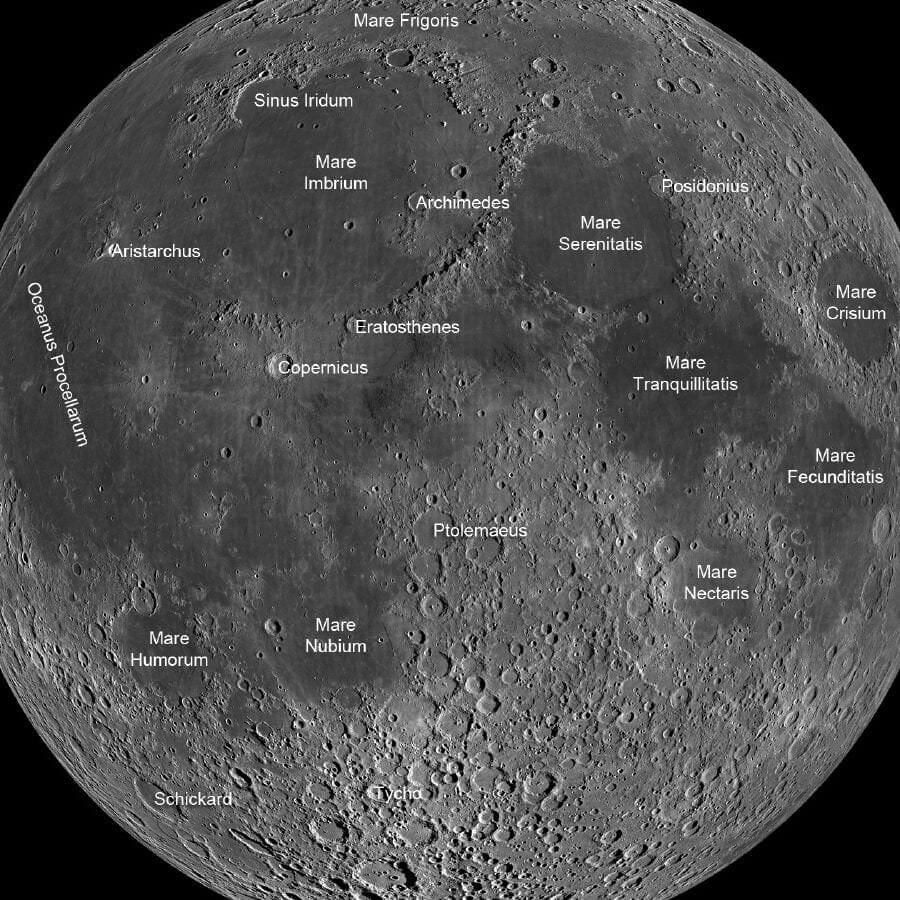
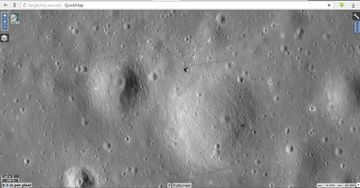
For a high-resolution map of the Moon, you can visit this link: http://target.lroc.asu.edu/q3/#zoomIn. On the left side of the page, you can adjust the map to be displayed in black and white or color, as well as change the lighting angles.
This map offers a remarkably high level of detail.
For individuals involved in amateur close-up photography of the Moon, this map proves to be highly beneficial as it allows for comparisons of details at the same scale, enabling one to make conclusions regarding the realism of their own personal astrophotographs.
Share22014-02-06 19:23:36
- Author: Nyaf
- Moderator
- Awards:
- Registered : 2012-01-08
- Posts: 754
- Last visit:
2016-10-17 23:08:31
Informative and uninformative photos.
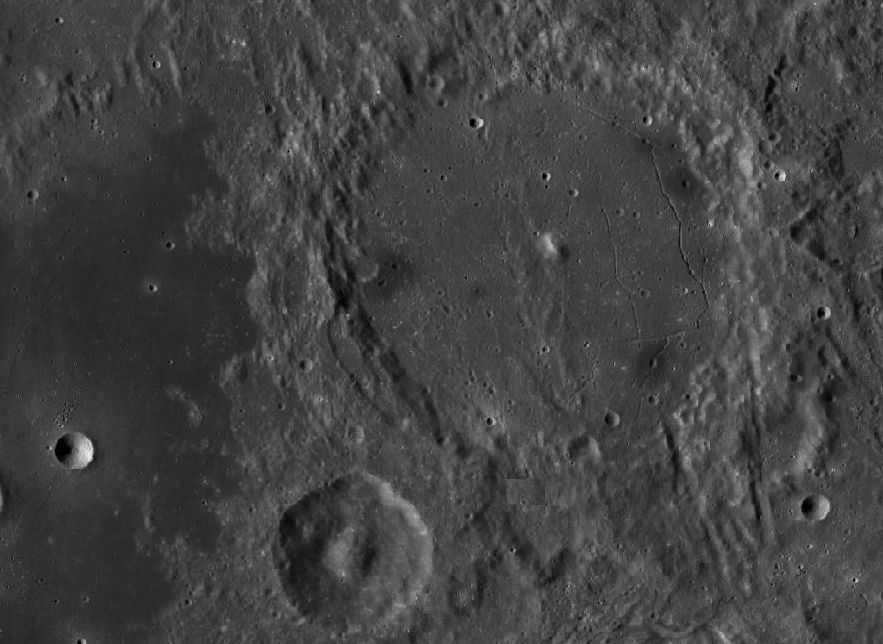
Amateurs from around the world aspire to have their photos featured on the LPOD site, hoping that their pictures will be seen as world-renowned masterpieces. However, when these amateur masterpieces are compared to space photos at the same scale, it becomes evident that they do not quite measure up to reality.
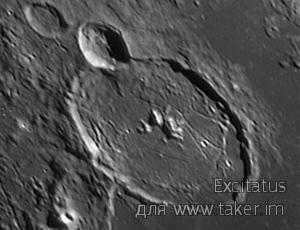
On January 8, 2014, the appearance of the moon through a telescope was observed and documented. The image shows the detailed view of the lunar surface, revealing its craters and other geological features. This image provides a unique perspective on the moon’s appearance and allows for a closer examination of its composition and structure. The observation was made possible by the use of advanced telescopic technology, which enhances our understanding of celestial bodies like the moon.

http://target.lroc.asu.edu/q3/
The lack of craters and the unrealistic depiction of the Moon’s surface in the amateur image is evident. It is apparent that this photo holds no scientific value. It is merely a regular amateur photograph, among the countless uninformative ones found on the internet. (I possess numerous similar photos myself)
The images that capture the most attention are typically the ones that align with the details found in space images. While it is rare, these amateur images can be found on the internet. One such example is a realistic-looking amateur image available at this link:
http://www.zwoptical.com/Eng/Galleries/ASI120.asp
The details in this image closely match those found in space images, making it a commendable amateur photograph. It provides a wealth of information.
P.S. Unfortunately, the founder of LPOD passed away in 2015. As a result, it is unlikely that any more washed-out and uninformative photos will be uploaded to the site, which may be seen as both unfortunate or fortunate.
Share32014-03-21 23:25:51
- Author: nyaf
- Moderator
- Awards:
- Registered : 2012-01-08
- Posts: 754
- Last visit:
2016-10-17 23:08:31
Scale, magnification, and apparent size of craters.
When you obtain a lunar map, you can also observe at what scale or magnification the sizes of lunar craters begin to vary.
That’s approximately how it appears, give or take a small margin of error.
Share42014-03-22 18:12:52
- Author: Nyaf
- Moderator
- Rewards:
- Registered : 2012-01-08
- Posts: 754
- Last Visit:
2016-10-17 23:08:31
Is it possible to observe a Soviet Lunokhod, an American flag, or Apollo footprints through a telescope?
Occasionally, amateur astronomers fantasize about capturing the footprints of the Lunar rovers, the landing sites of the American Appolons, or the American flag with their telescopes. Some amateurs believe it is completely feasible.
phants:
There are simply no words!
I’m anticipating some Apollo pictures, they should probably be visible at this scale.
As always, the Forum Zvzedochet entertains its readers with its “impressive” expertise in astronomy.
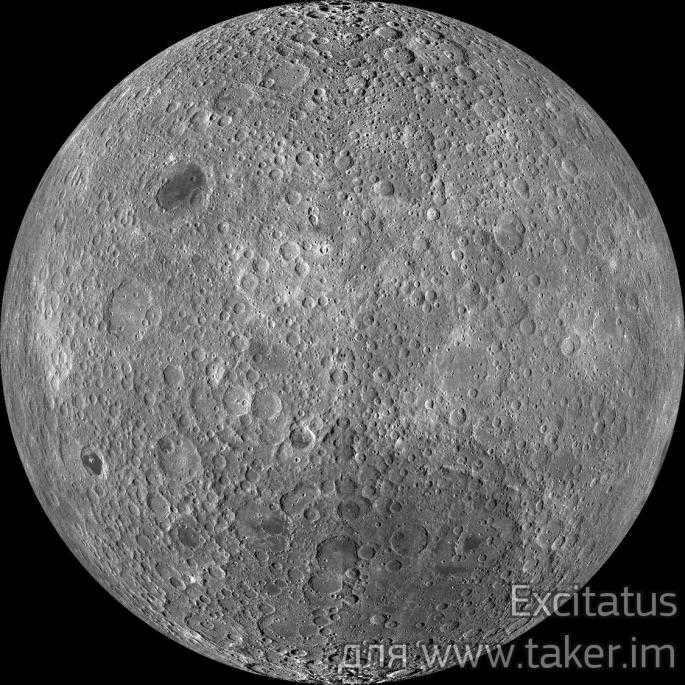
Astronomical image showing the appearance of the Moon through a telescope can be found at the following link:
http://kosmos.of.by/index.php?newsid=2450
Slightly bigger:
http://lroc.sese.asu.edu/posts/650
Share52014-11-15 17:52:32
- Author: Nyaf
- Moderator
- Awards:
- Registered : 2012-01-08
- Posts: 754
- Last visit:
2016-10-17 23:08:31
Apollo 11:
http://www.nasa.gov/mission_pages/LRO/nasa_moon_pictures.html
The remaining Apollo photographs: http://www.nasa.gov/mission_pages/apollo/apollo_photographs_index.html
Share62014-11-16 02:49:36
- Author: nyaf
- Moderator
- Awards:
- Registered: 2012-01-08
- Posts: 754
- Last Visit:
2016-10-17 23:08:31
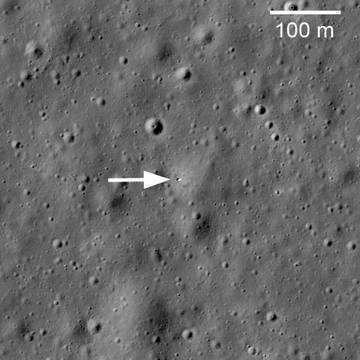
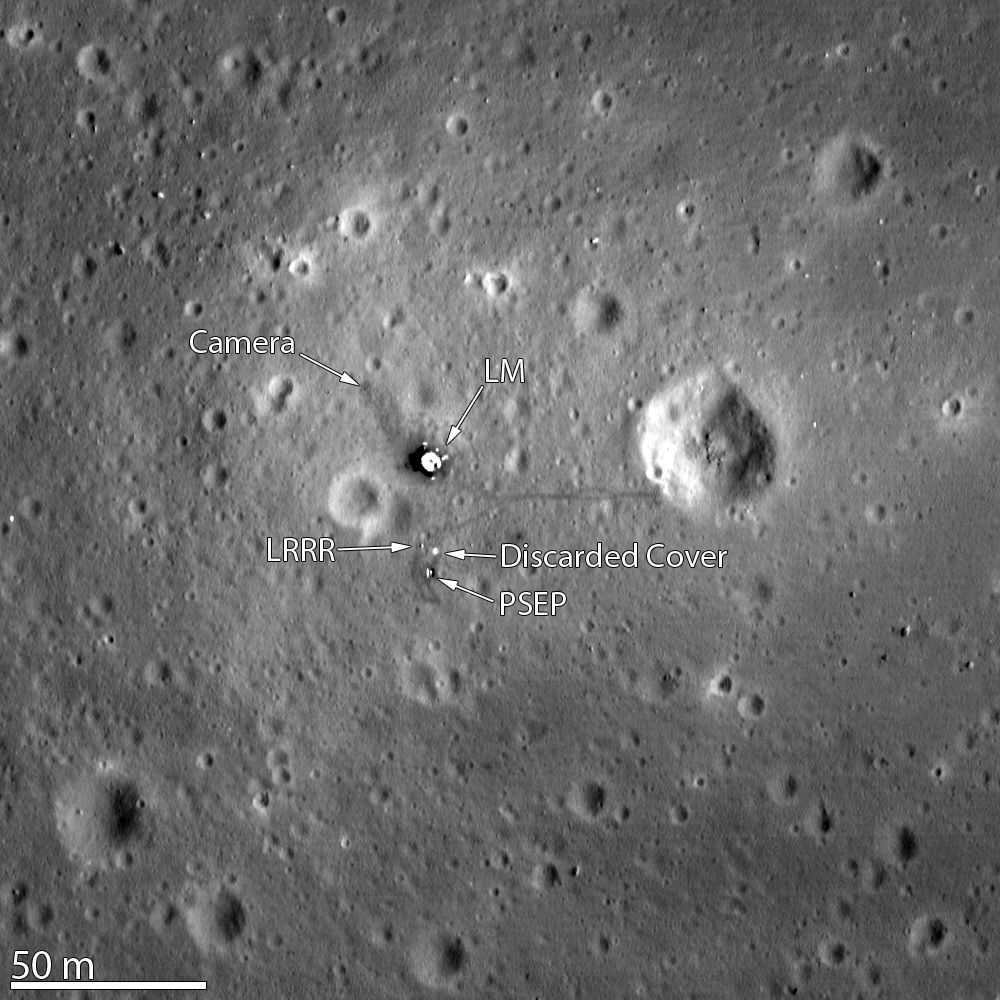
Examined the Moon map and attempted to locate Apollo 12.
Seems like I managed to do it.
I also made an attempt at determining the necessary telescope specifications for a professional astrophotographer aiming to capture Apollo 12 as a minuscule dark speck..
125mm telescope –> maximum useful scale of 500 m/pix.
250 mm telescope –> maximum useful scale 250 m/pix.
500 mm telescope –> maximum useful scale 125 m/pix
1 m telescope –> 62.5 m/pix
2 m telescope –> 31.2 m/pix
4 m telescope –> 15.6 m/pix
8 m telescope –> 7.8 m/pix
16 meter telescope –> 3.9 m/pix.
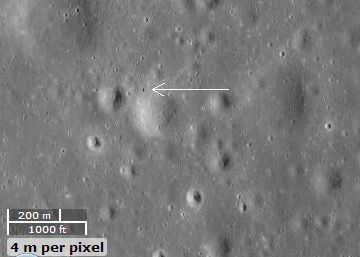
The telescope that was created has a diameter of 16 meters and a scale of 4 meters per pixel:
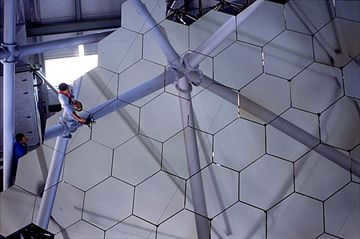
Theoretically, it is possible to attempt capturing the spot with a mirror of this size, which is found in the largest observatories.
Share72014-11-16 15:10:51
- Author: nyaf
- Moderator
- Rewards:
- Registered : 2012-01-08
- Posts: 754
- Last Visit:
2016-10-17 23:08:31
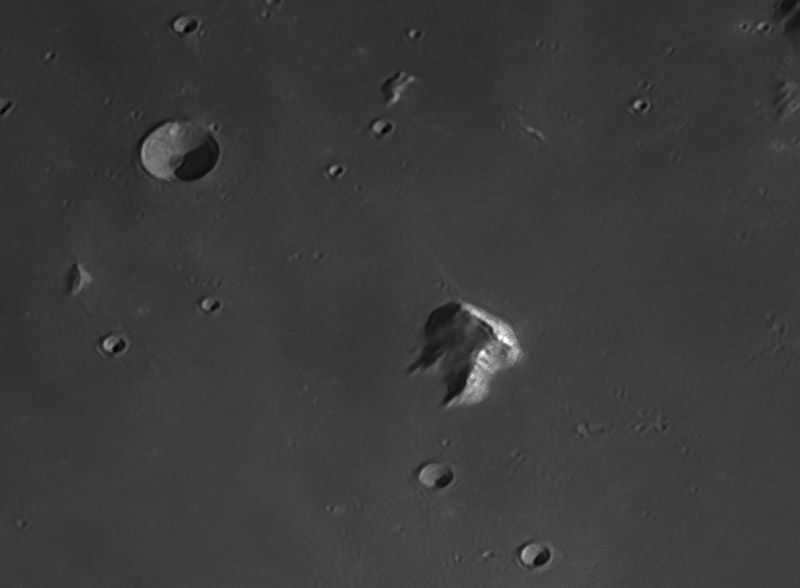
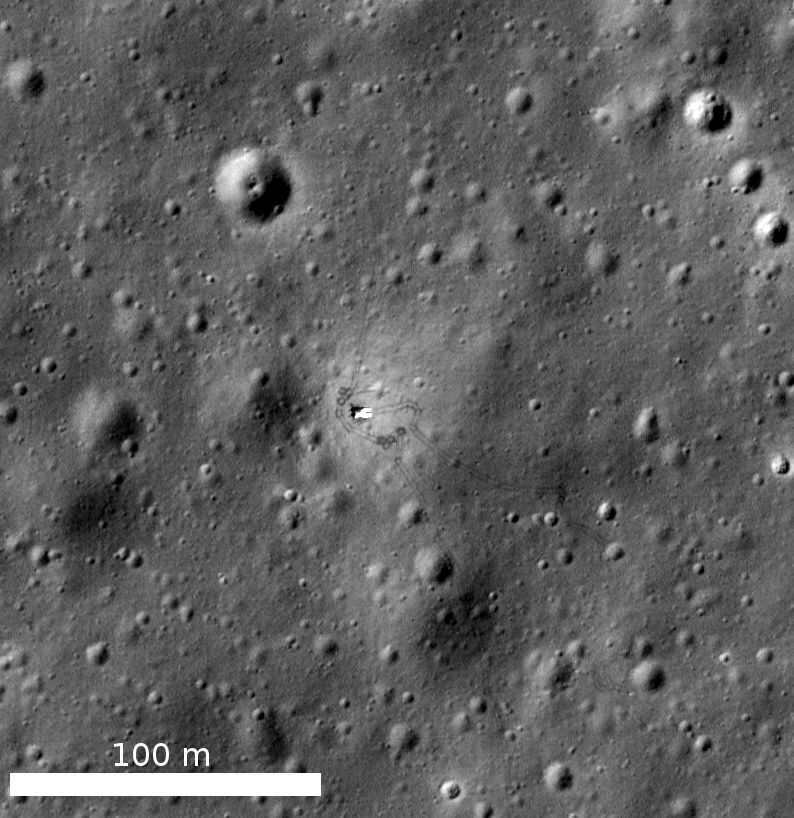
Some enthusiasts may believe that capturing images of the Apollons and Moonwalkers would require a significantly larger telescope. At first glance, this may appear to be the case. If you calculate theoretically, using various formulas, a telescope with a diameter of 125-250 meters would be necessary. However, this is not the reality. It is actually easier to photograph mountains, crevices, protrusions, satellites, and moon rovers than craters of the same size. This is a peculiar aspect of photography.
For instance, it is easier to capture footage of an 800-meter-high slide inside the Aristarchus crater than an 800-meter-high crater itself.
Check out this link for an example:
http://www.shvedun.ru/fotomoon925-12.htm
A shallow crevice or “rivulet” measuring 400 meters wide in an Alpine valley presents a greater ease in photography compared to a 400-meter crater. You can find the photographs of this phenomenon here: http://www.shvedun.ru/fotomoon925-14.htm
This well-known peculiarity dictates that it is indeed simpler to capture images of three or four-meter Apollos and Moonwalkers as opposed to craters of the same size. A 16-meter telescope may be adequate for observing Apollons and Moonwalkers, although the resulting image would only reveal a black dot lacking any discernible details. To truly examine the object in its entirety, a telescope several times larger would be necessary.
Up until now, amateur astronomers utilizing their smaller telescopes have managed to capture intricate details spanning hundreds of meters. However, I have yet to witness any smaller details myself.
Regarding the craters themselves, they can manifest in various forms and sizes.
Using a 125mm telescope would allow you to observe a crater that is approximately 2km in diameter. If you were to use a 250mm telescope, you would be able to observe a crater with a diameter of 1km. A 500mm telescope would allow you to observe a crater that is 0.5km in diameter. If you were to use a 1m telescope, you would be able to observe a crater with a diameter of 0.25km. A 2m telescope would allow you to observe a crater that is 125m in diameter. If you were to use a 4m telescope, you would be able to observe a crater with a diameter of 62.5m. Using an 8m telescope would allow you to observe a crater that is 31.2m in diameter. A 16m telescope would allow you to observe a crater that is 15.6m in diameter. If you were to use a 32m telescope, you would be able to observe a crater with a diameter of 7.8m. Using a 64m telescope would allow you to observe a crater that is 3.9m in diameter. Finally, a 128m telescope would allow you to observe a crater that is 1.9m in diameter. If you were to use a 256m telescope, you would be able to observe a crater with a diameter of 0.9m.
If one wanted to capture a 1 meter diameter crater, one would need a telescope with a diameter of about 250 meters.
Our daughter has entered the sixth year of her life, an age where children are curious about everything. We strive to satisfy her thirst for knowledge by providing her with as much information as possible. We avoid vague statements like “you’ll find out when you grow up” or “they’ll teach you in school.” While not everything may be fully comprehensible to a young child, their level of awareness will steadily increase, and over time, quantity will surely transform into quality.
One of the objects that has captured our daughter’s keen interest is the natural satellite of our planet, Luna (known as the Moon in our language).
Luna:-))
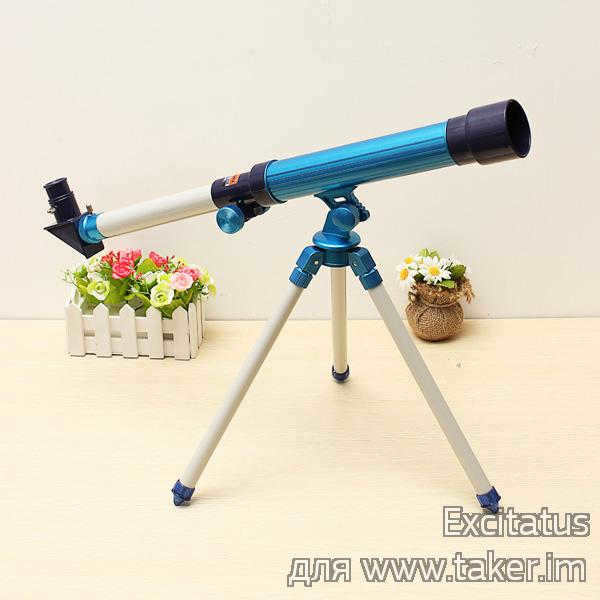
In order to determine with certainty whether the peculiar purple creatures known as Luntiks from the famous cartoon inhabit the Moon, a children’s astronomical telescope equipped with a diagonal mirror was chosen for observation.

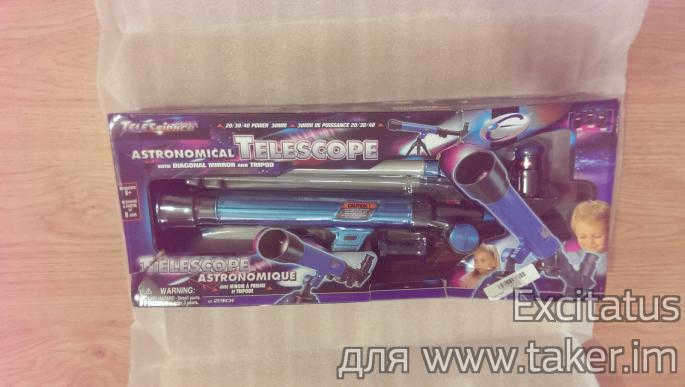
The box itself has sustained some damage, but the contents remain undamaged, for which we are grateful.
The front of the box displays the following information:
- The telescope is equipped with three eyepieces, each with a 30 millimeter diameter and magnifications of 20x, 30x, and 40x respectively.
- Furthermore, this is not just any telescope, but an “astronomical telescope with a diagonal mirror and tripod (also known as a tripod).
- This device is suitable for ages 8 and above.
- There is a warning in the lower left corner stating that the device contains small parts and is not suitable for children under the age of three.
The remaining space is filled with images of the telescope and smiling children, presumably observing celestial objects.
On the back of the box, you can find information about the different parts of the telescope.
- The cap for the lens
- The lens itself
- Protective cover for the lens
- Tube for the telescope
- Supporting bracket
- Screw
- Base for the tripod
- The actual legs of the tripod
- Holder for the focus tube
- The focus tube
- Viewing piece
- Cap for the viewing piece
- Knob for adjusting focus
- Mirror for reflecting light
Additionally, there is a warning in the top left corner advising against looking at the sun through the telescope. This warning is accompanied by an illustrative image for clarity.
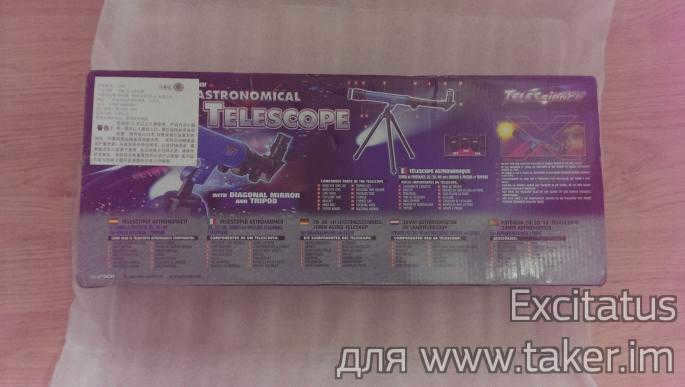
Furthermore, the box is adorned with a white paper featuring Chinese characters. Their significance eludes me.
The contents of the box include:
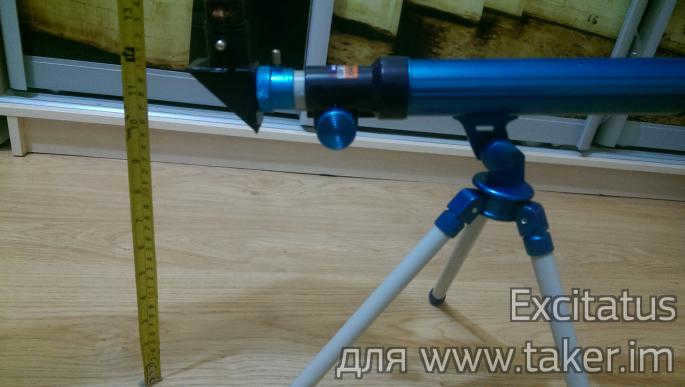
The tripod offers a decent level of stability, however, due to its relatively low height, even a child as young as five would struggle to peer through the telescope’s eyepiece when it is placed on the ground. 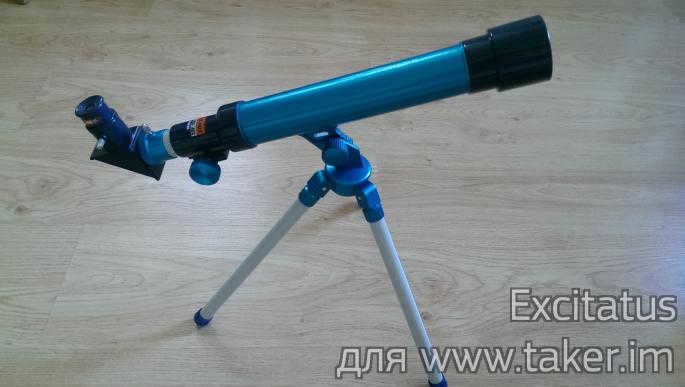
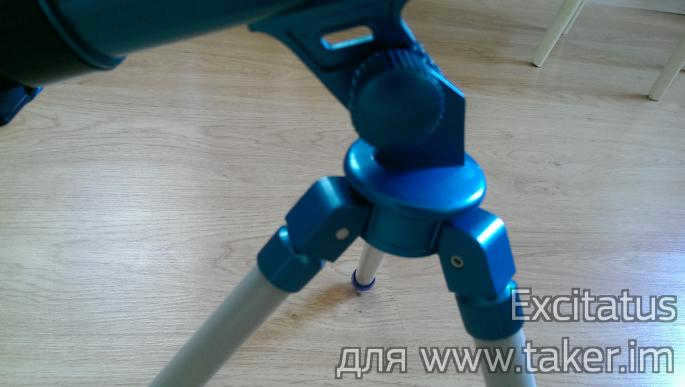 We had to improvise with a stool, but unfortunately, the telescope wobbles like a drunken sailor on it, making it quite challenging to focus it on the Moon.
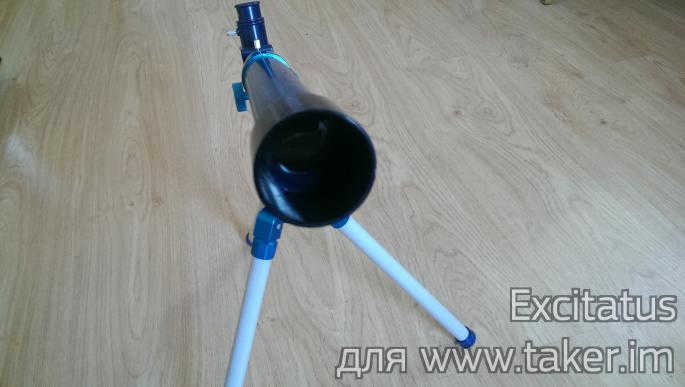
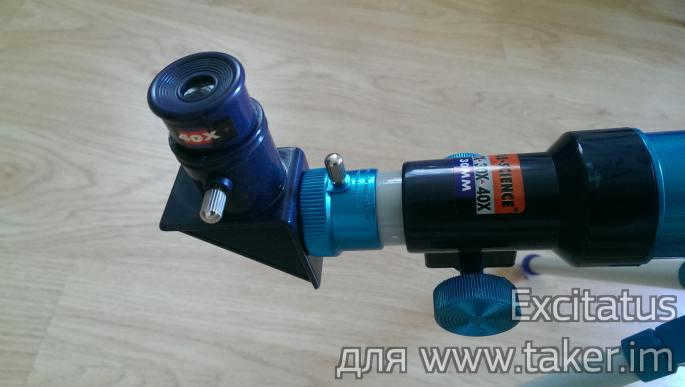
The telescope tube allows for easy interchangeability of eyepieces, allowing them to be used either directly in the tube or in a device with a diagonal mirror.
Recommendations for Moon observation.
Upon consulting reputable sources, we have discovered that the full moon is not the most optimal time for observing the Moon. The minimal contrast of lunar details makes them nearly impossible to observe. Throughout the “lunar month” (the period from new moon to new moon), there are two particularly favorable periods for Moon observation. The first period begins shortly after the new moon and concludes two days after the first quarter. Many observers prefer this period as the Moon’s visibility is highest during the evening hours.
The second favorable period begins two days prior to the final quarter phase and continues until the arrival of the new moon. During this time, the elongated shadows on the moon’s surface are especially prominent, particularly over the mountainous regions. Additionally, observing the moon during the last quarter phase offers the advantage of a calmer and cleaner atmosphere in the morning hours, resulting in a more stable and clear image. This enhanced clarity allows for the observation of finer details on the moon’s surface.
Another significant factor to consider is the moon’s altitude above the horizon. The higher the moon is positioned, the less dense the layer of air it must penetrate. Consequently, there is less distortion and a higher quality image. However, it should be noted that the moon’s altitude above the horizon varies throughout the seasons.
However, as we did not plan to strictly adhere to the guidelines for experienced astronomers with their professional telescopes, we decided to make our observations on the 12th day of the lunar cycle (during the waxing Moon).
Trying to locate and focus on the satellite turned out to be quite a daunting task. Even the slightest movement in any direction meant starting the process from scratch. After a lot of effort, I was finally able to position the telescope correctly and adjust the focus, but it felt like I had a sharp object piercing my eye and reaching all the way to my brain.
Moreover, with even the slightest movement of the telescope, the subject of scrutiny started to multiply: there was a bright, distinct moon in the center and three faint, almost imperceptible duplicates near its edges. Hence, our observation went as follows – I would align the telescope with the desired object for approximately five to seven minutes, and then my daughter would take a peek through the eyepiece, being careful not to disturb the telescope itself.
There are some incredible and captivating attractions, such as:
Bay of Rainbows (Sinus Iridum).
Situated in the northwestern region of the Moon, Rainbow Bay is a prominent feature that can be easily spotted with 10x binoculars. When observed through a telescope at medium magnification, this crater, which dates back to ancient times and spans 260 km in diameter, offers an unforgettable spectacle. Unlike most craters, Rainbow Bay lacks a rim, and its remarkably flat bottom is adorned with numerous small craters.
The Copernicus Crater, one of the most well-known lunar formations, can be observed using a compact telescope. This impressive structure is accompanied by a unique ray system that stretches 800 km from the crater. With a diameter of 93 km and a depth of 3.75 km, the crater offers breathtaking views of sunrises and sunsets.
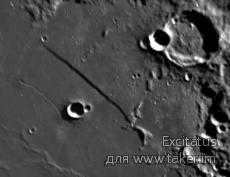
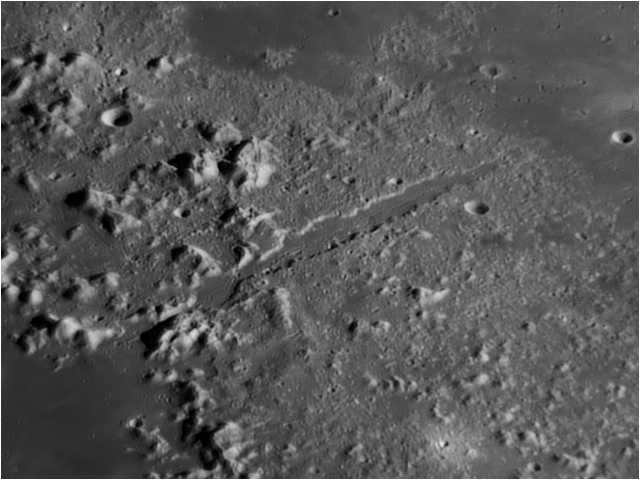
The Rupes Recta, also known as the Straight Wall, is a tectonic fault that stretches for 120 km. This remarkable feature can be easily observed through a 60 mm telescope. The Straight Wall is situated at the base of a deteriorated ancient crater, with remnants of the crater visible on the fault’s eastern side.
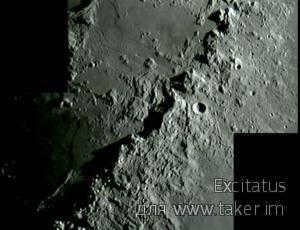
The Apennines are a mountain range that spans 604 kilometers in length. While they can be seen with binoculars, a telescope is needed for a more detailed study. Certain peaks in the range reach heights of 5 kilometers or more above the surrounding surface. The mountain chain is also intersected by grooves in certain areas.
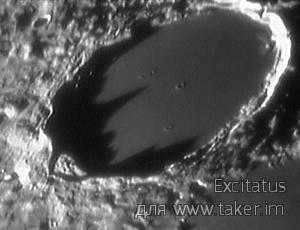
The Plato crater, which has a diameter of 104 km, is well-known and popular among those who are passionate about astronomy. Even when observed through binoculars, it captivates the attention of many enthusiasts. The Polish astronomer Jan Hevelius (1611-1687) famously referred to this crater as the “Big Black Lake”. When viewed through binoculars or a small telescope, Plato appears as a prominent dark spot contrasting against the bright surface of the Moon.
While the crater can be seen with small binoculars, the real beauty is unveiled when observing it through a high magnification telescope. The floor of the crater, shaped like a dome, is covered with numerous grooves and cracks.
The crater, known for its immense system of rays stretching for 1450 km, is one of the most well-known lunar formations. These rays can be easily observed using small binoculars.
Gassendi Crater, also known as Gassendi, is an oval-shaped crater that spans 110 km. It can be easily observed using 10x binoculars, and with a telescope, you can see that the crater’s bottom is filled with numerous crevices, hills, and central slides. Additionally, careful observers may notice that parts of the crater’s walls have collapsed. Located at the northern tip of the crater is Gassendi A, a smaller crater that, when viewed together with its larger counterpart, resembles a diamond ring.
While we were unable to clearly identify all the features on the Moon, my daughter and I were still able to distinguish the lunar craters and seas quite clearly using a 40X eyepiece.
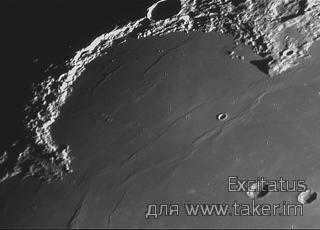
Despite the challenges, I was able to capture a photograph of the Moon through the eyepiece of the telescope.
Experienced astronomers utilize light filters to protect their eyes from the piercing glare of the nearly full Moon’s relentless radiance.
Summary
To sum up, despite facing some challenges in positioning the toy on the target, the telescope provides valuable information and offers a glimpse into the beauty and romance of our beloved Moon. While stars are also visible through the telescope, the difference in observation compared to the naked eye is negligible. However, it is not possible to observe quasars, pulsars, and black holes through this telescope. Fortunately, Luntik was not on the Moon either.
Occasionally, when the allure of the moon is particularly strong, we take out the telescope and spend a few minutes marveling at the majestic lunar surface. Afterward, my daughter happily goes to bed, and I struggle to regain focus due to my astigmatism and severe nearsightedness.
Ultimately, it is possible that some individuals may deem the telescope to be a frivolous plaything, while others, particularly young boys (as girls do not seem to have a strong inclination towards astronomy, in my humble opinion), may be inspired by their childhood experiences with this or a similar telescope, and ultimately unlock the enigma of the universe’s origins in the future.
If you enjoyed this review, I kindly ask you to consider sharing this referral link with others. By doing so, the manager can track the number of clicks and draw conclusions regarding the review’s usefulness. Thank you!
P.S. It is vital to note that looking directly at the sun through a telescope can be harmful to the eyes and may lead to negative effects on the retina. Therefore, it is highly recommended for children to engage in astronomical research under adult supervision.
Indeed, this article will present a refutation of the misconception surrounding the “super moon”. Additionally, it will provide a helpful guide on how to capture stunning photographs of the Moon. I have been meaning to write this guide for quite some time, and I specifically chose August as the month to do so. This is because August tends to be the time when sensationalized astronomical news circulates the most. As we all know, non-specialized media outlets are prone to either distorting the truth or simply being misinformed.
First and foremost, it is important to acknowledge the distinct subjects involved in capturing such a mundane object like the Moon. There are several typical scenarios:
- Acquiring a new telephoto lens/camera with a substantial zoom and desiring to photograph the lunar surface
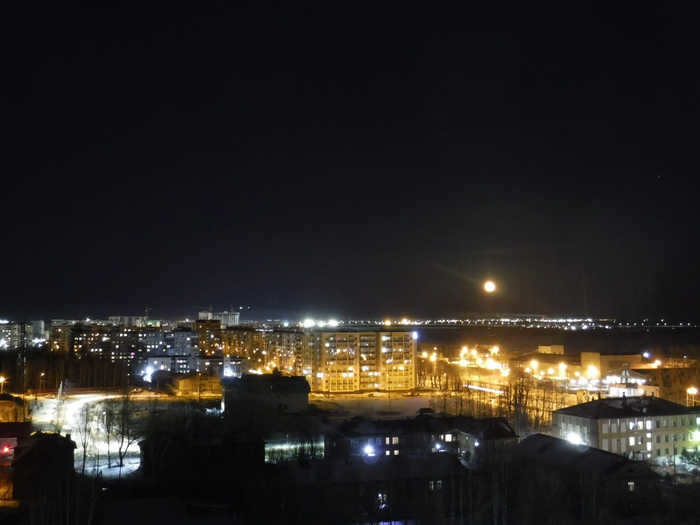
- Aspiring to capture a landscape featuring the moon, or alternatively a lunar trail
Capturing images of the Moon or even its craters using a television camera
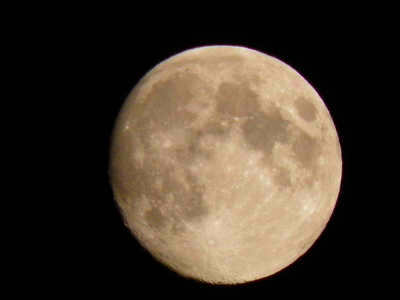
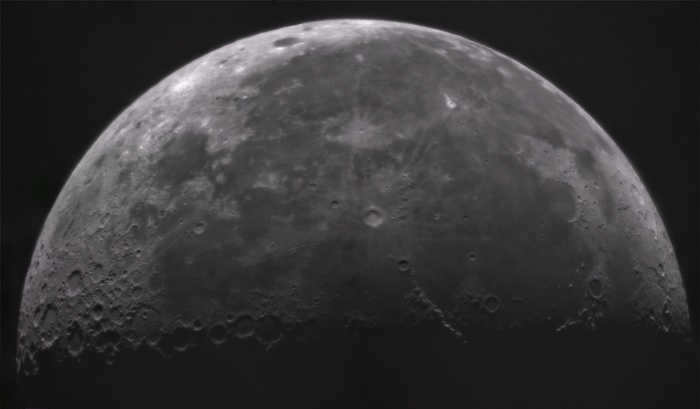
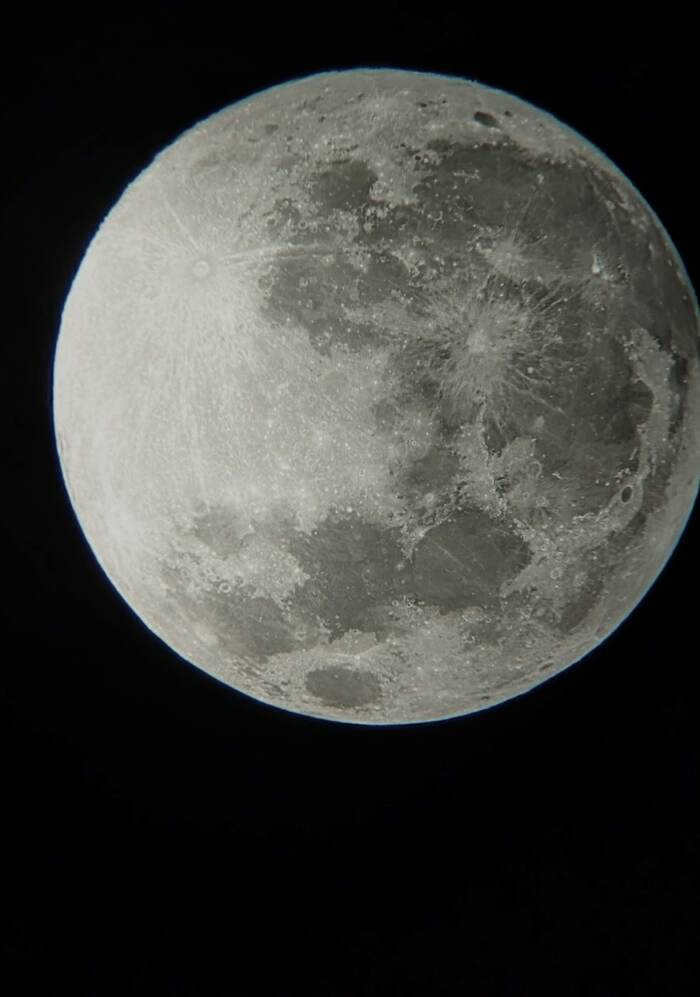
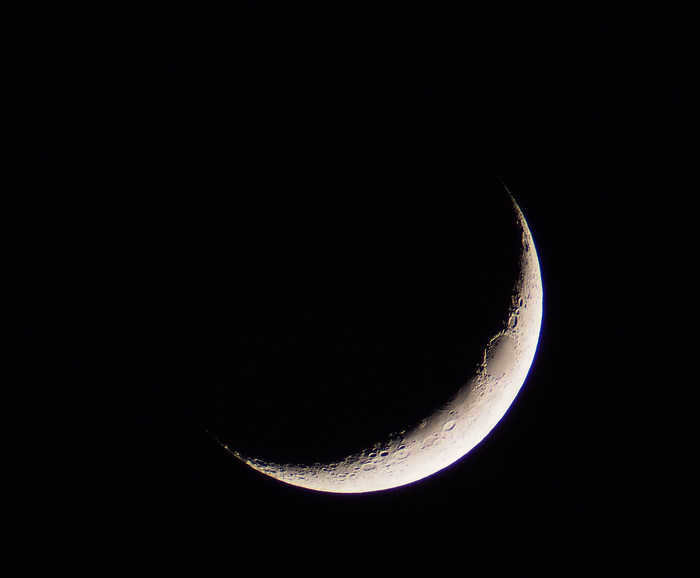
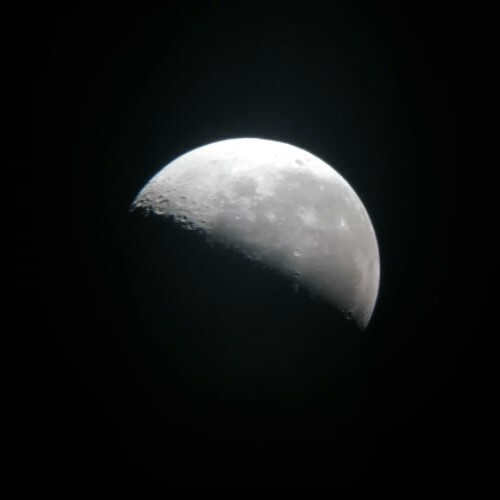
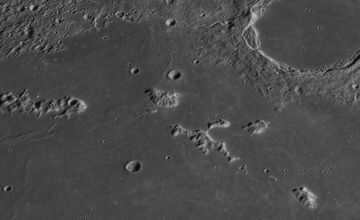
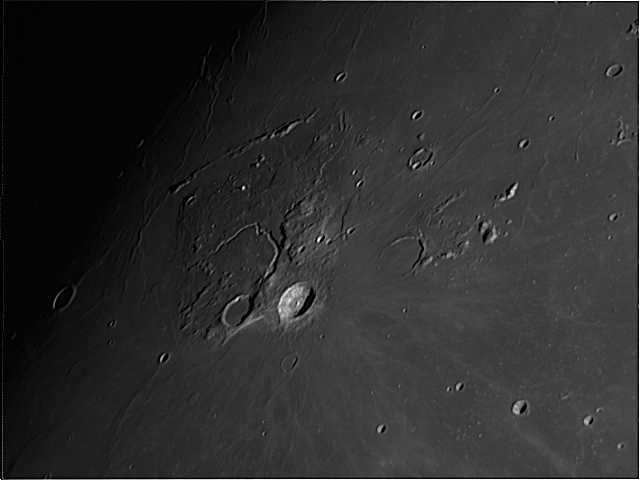
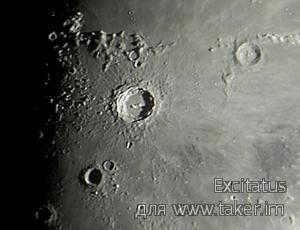
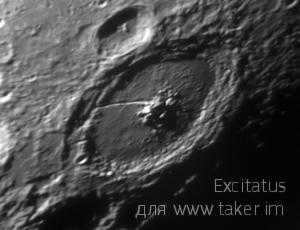
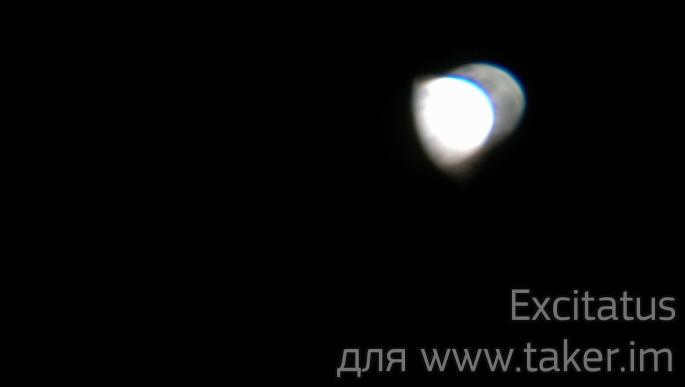
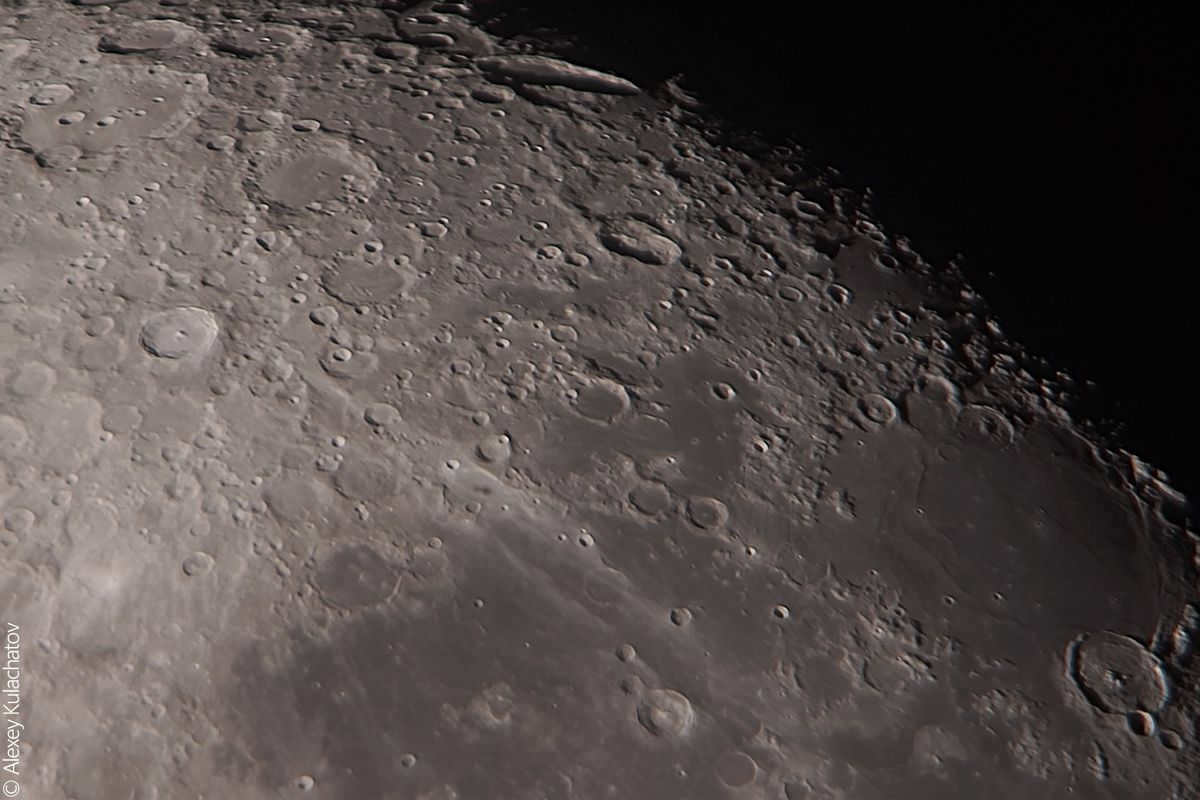
When it comes to the first choice, there is no requirement to wait for a “super moon” or even a full moon. Take a look at the photo below:
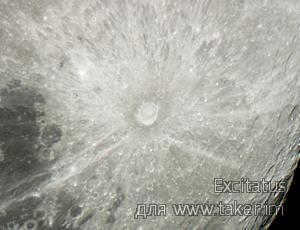
The image displays the topography of the moon, showcasing its craters and mountains. In contrast to the first photograph captured during a full moon, these features appear more pronounced and three-dimensional. During a full moon, the sun’s light directly illuminates the moon, resulting in a flat appearance without shadows. Unlike Earth, the moon lacks variation in color, making its surface relatively uniform. The most captivating phase of the moon occurs when 25% to 75% of its disk is illuminated, preferably before the full moon, as the lunar landscape becomes less visually captivating afterwards.
Equipment
Any camera will work, the key is to have the ability to adjust the shutter speed. A lens with a focal length of 200mm (or a 10x zoom if you have a point-and-shoot camera) is recommended, and the longer the focal length, the better. An even better option is to use a telescope. I personally took photos of the Moon using a telescope with a focal length of 1000mm, which produced great results. One advantage of using a telescope is that you can easily increase the focal length. For example, I was able to “boost” the focal length of the same telescope up to 10 meters.
Using a tripod is highly recommended for capturing images of the Moon. While it is possible to use a shutter speed of 1/500 of a second and an ISO of 100 in a full moon scenario, having a tripod will provide better stability and ensure sharper images. It is advisable to experiment with different shutter speeds to find the optimal setting. Additionally, manually focusing the camera (with the assistance of a tripod) is recommended.
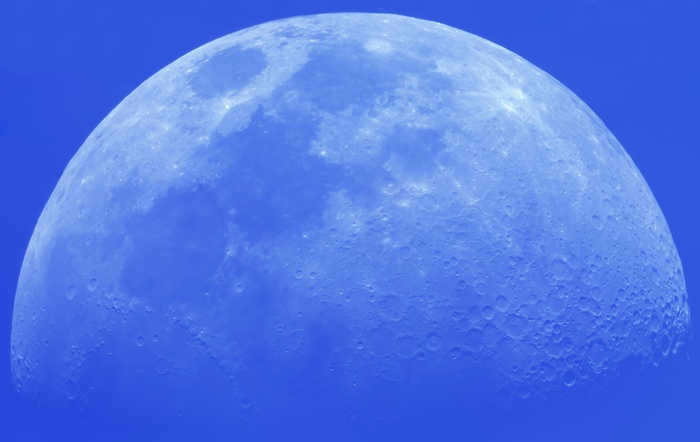
Another important consideration is white balance. Surprisingly, many photographers, even those using professional-grade cameras and shooting in RAW format, tend to overlook the importance of adjusting the white balance when photographing the Moon. It is common to come across images where the Moon appears white in color. The automatic white balance setting often fails to accurately capture the scene, so it is best to manually set the white balance to “sunny” before shooting. This will ensure accurate color reproduction.
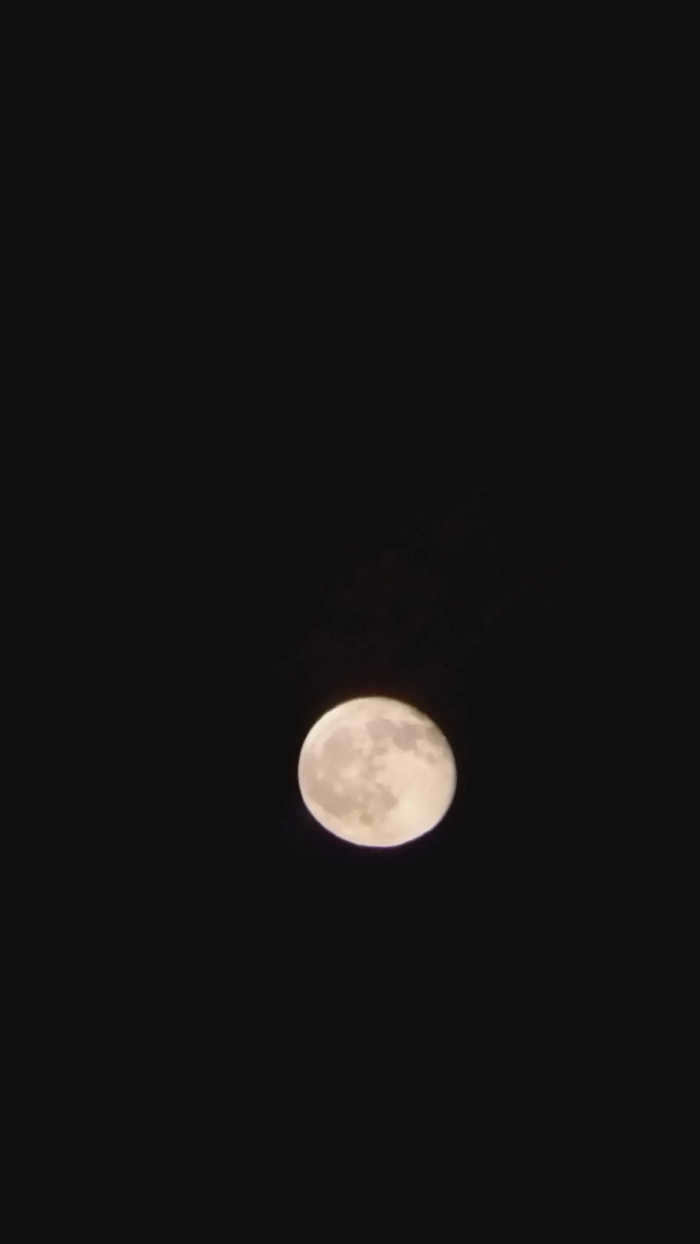
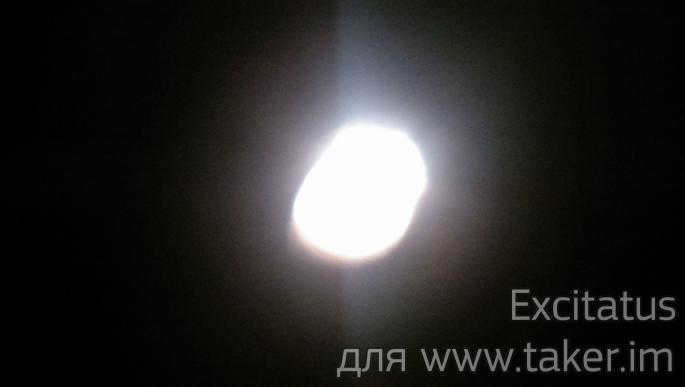
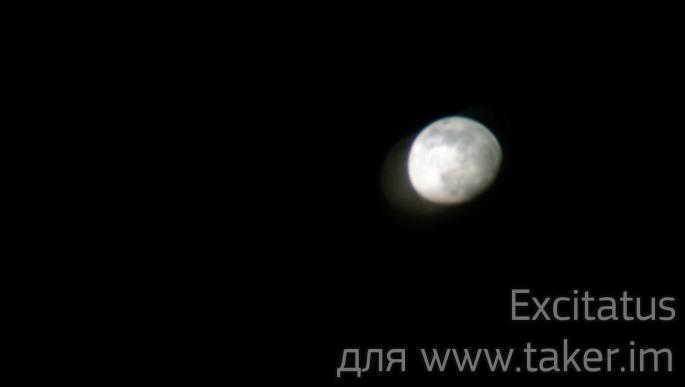
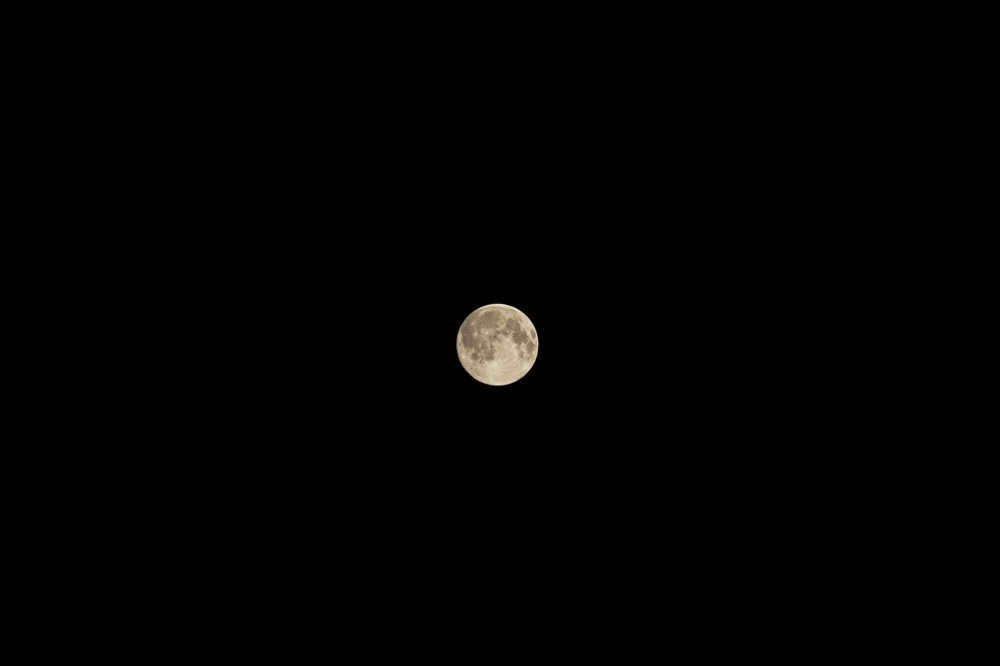
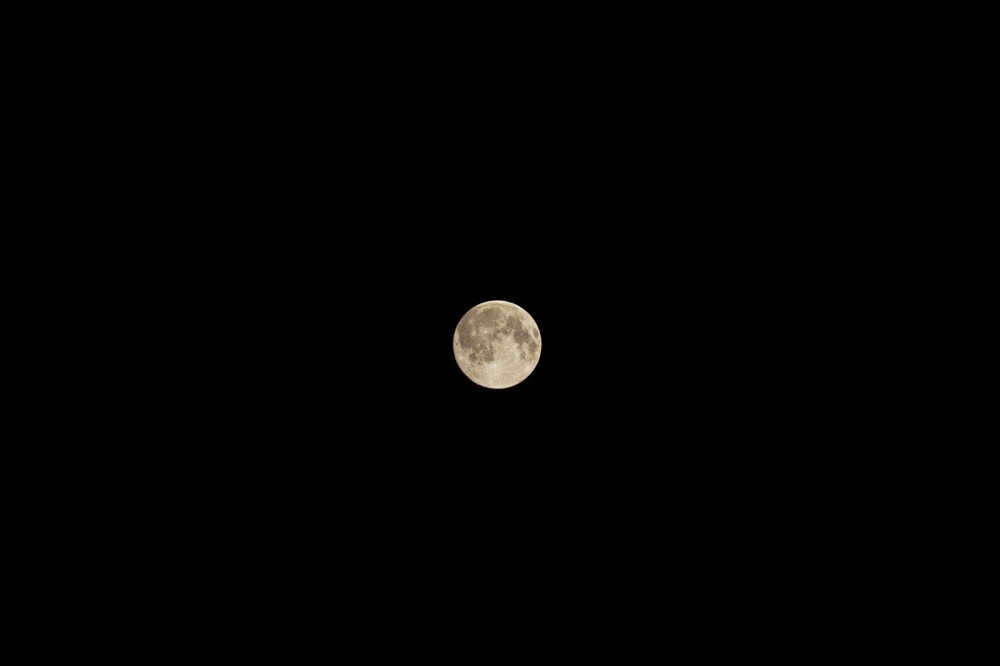
This term was coined by journalists who were hungry for sensational news in 2013. And it’s not necessary to capture photographs of the Moon. If your lens is not sufficiently long and you desire a larger image, it’s preferable to crop the frame during post-processing. The difference in the size of the Moon in the “super moon” compared to the “average” Moon is only 8%. And by cropping, you can “magnify” the Moon multiple times.
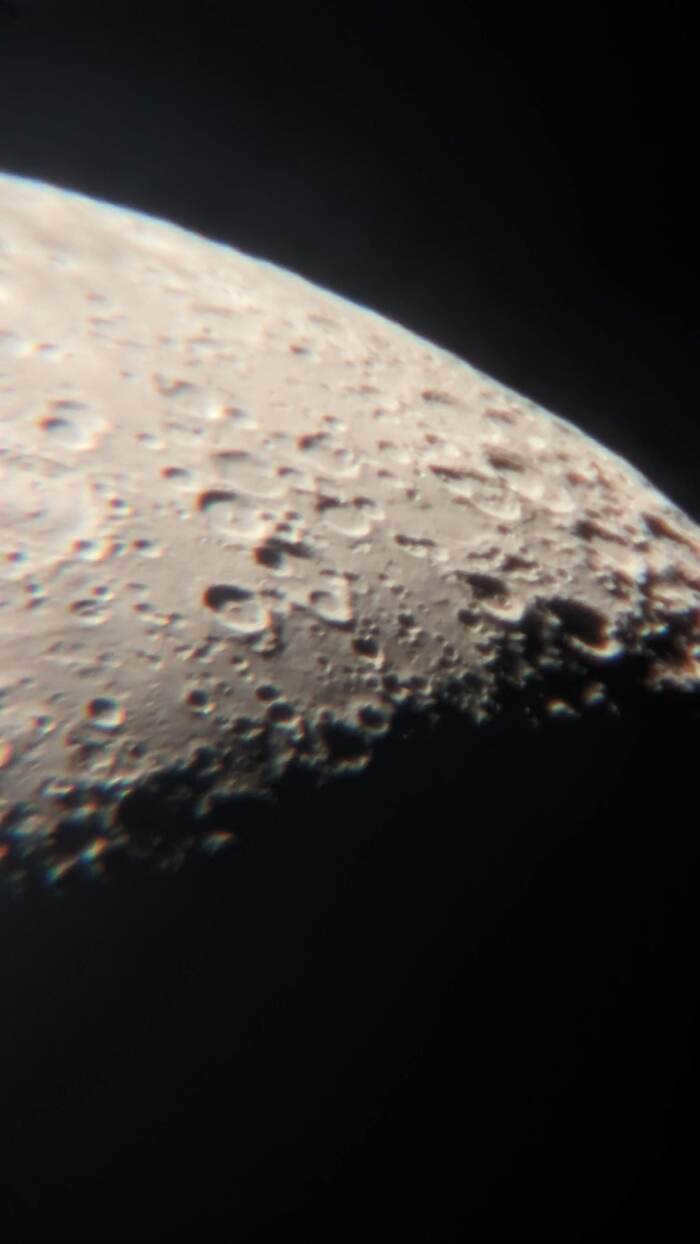
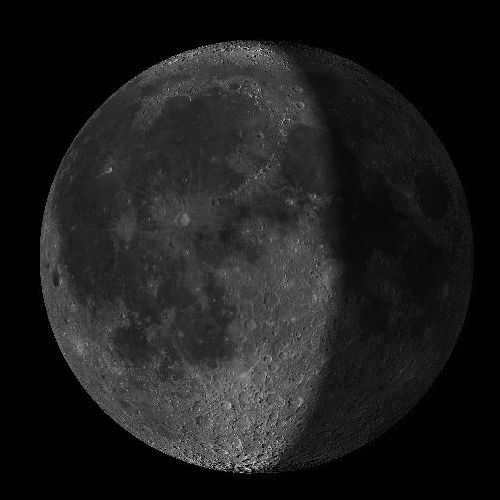
For instance, here’s how the Moon appears through a 200mm lens (APS-C sensor).
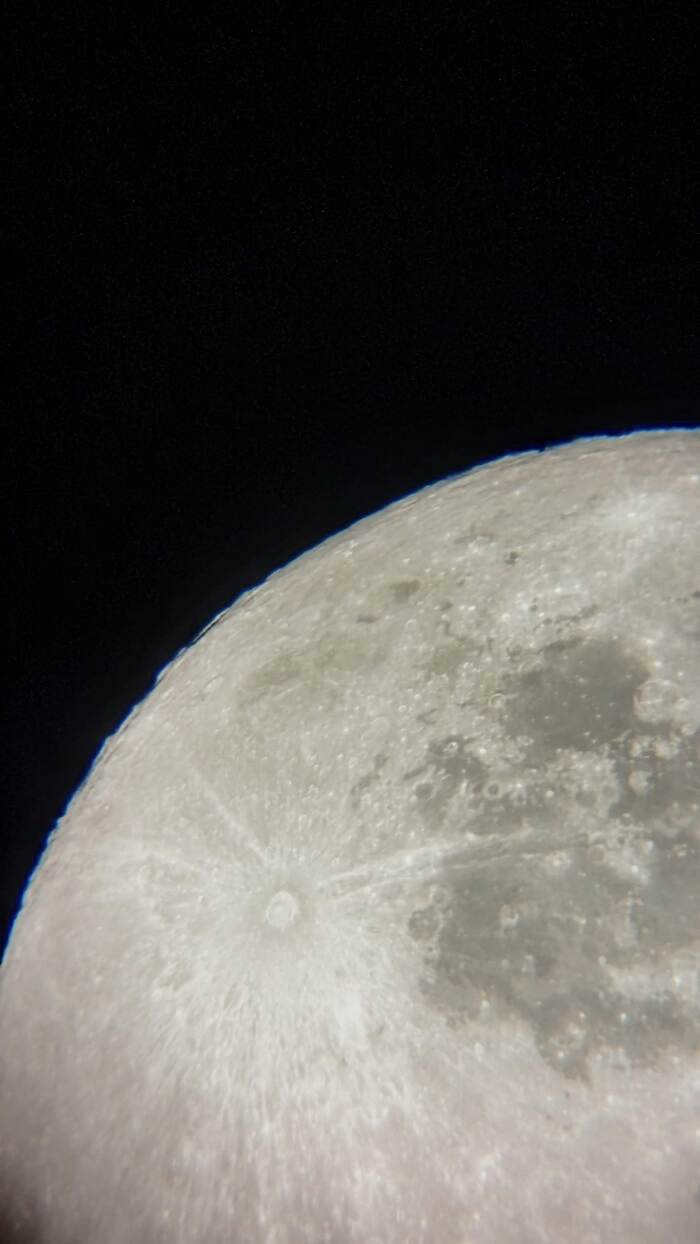
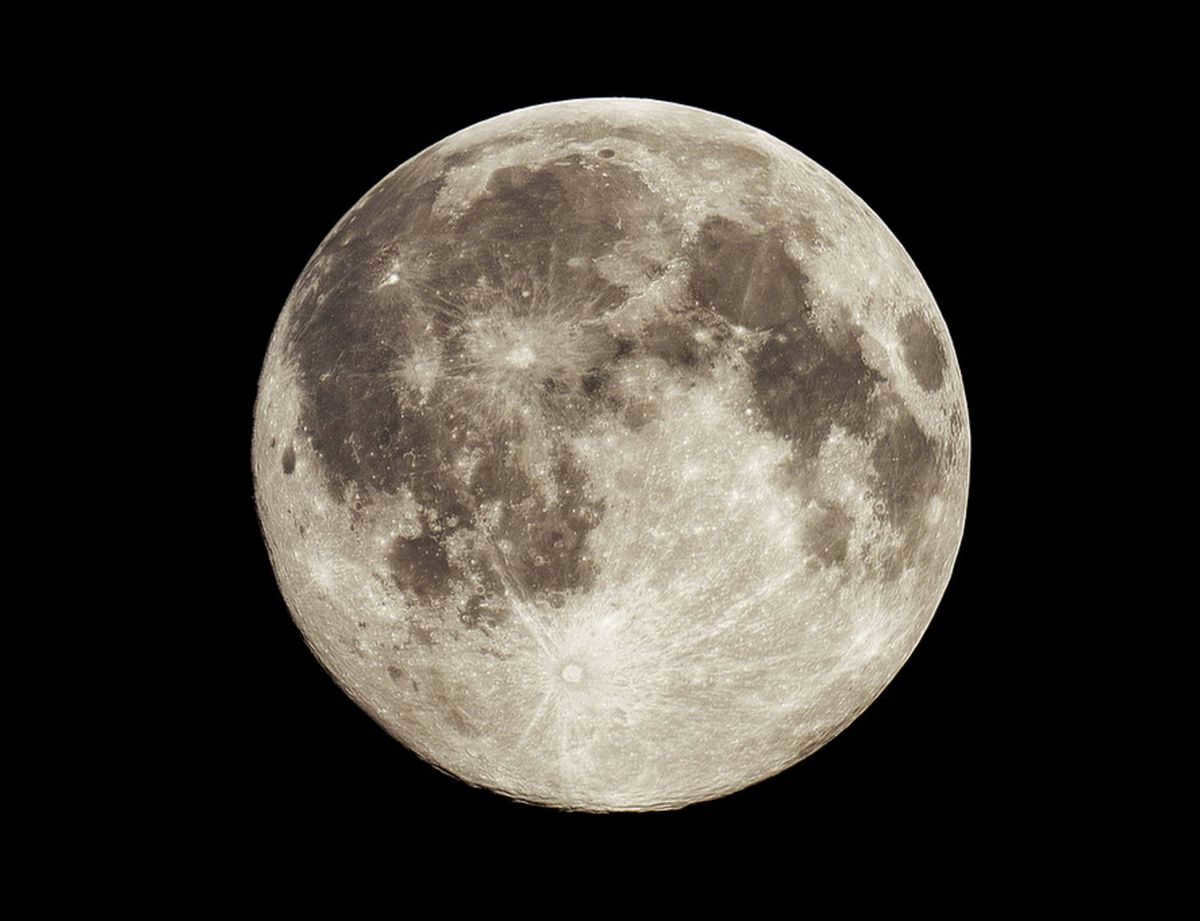
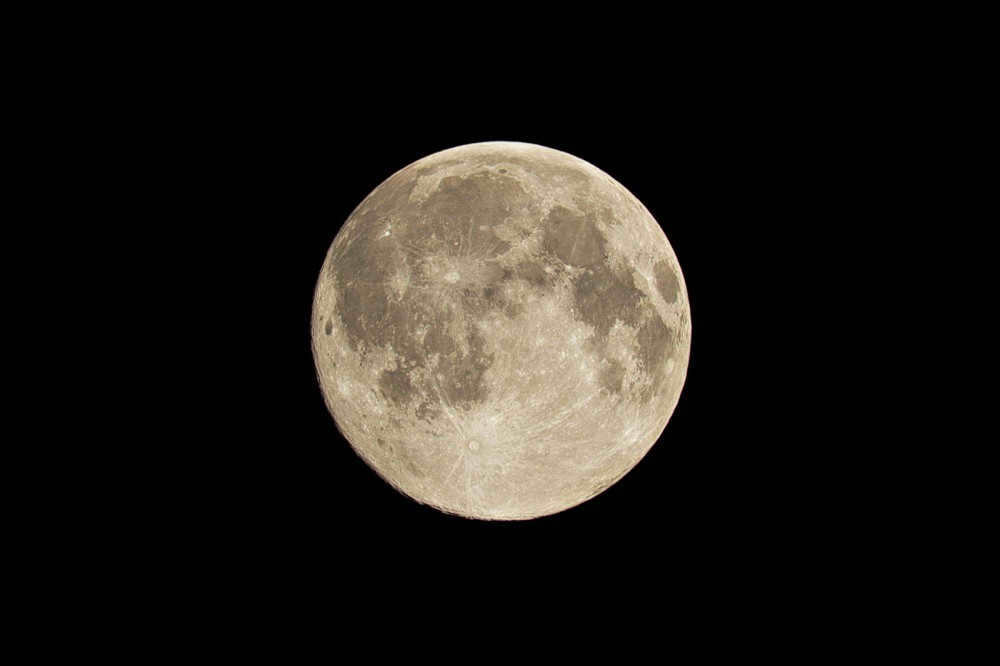
This is how it appears when observed through a telescope:
Furthermore, by eliminating the black background:
Do astronomers, equipped with their ten-meter telescopes, seize the opportunity of the “super moon” to capture a photo that is 8% larger? Surprisingly, they do not. For them, a tranquil atmosphere holds more significance than a mere 8% increase in size.