Describing a star is a relatively straightforward task. Stars are those luminous points that shimmer in the night sky. However, the true definition of a star goes far beyond this simplistic explanation and is as diverse and vibrant as the stars themselves.
The inception of a star
First and foremost, let’s delve into the astrophysical meaning of a star: a colossal, self-illuminating celestial entity composed of gas or plasma, wherein nuclear fusion reactions occur, have occurred, or will occur.
The smallest known object today capable of achieving such remarkable feats is less than 10% of the mass of our Sun. In the distant future, as progressively heavier elements are introduced into the cosmic mixture, contaminating interstellar space, the possibility of thermonuclear fusion in objects with lower mass will emerge. However, this is not a matter of concern for the present time.
Red dwarfs are named as such because they are both red and small. These stars undergo a slow hydrogen burn in their cores, emitting radiation primarily in the infrared portion of the electromagnetic spectrum, which accounts for their faint red hue. Red dwarfs are the most abundant type of star in the Milky Way galaxy, despite their diminutive size and low luminosity. In fact, even our closest neighboring star, Proxima Centauri, cannot be discerned by the naked eye.
Related articles:
The following articles are related:
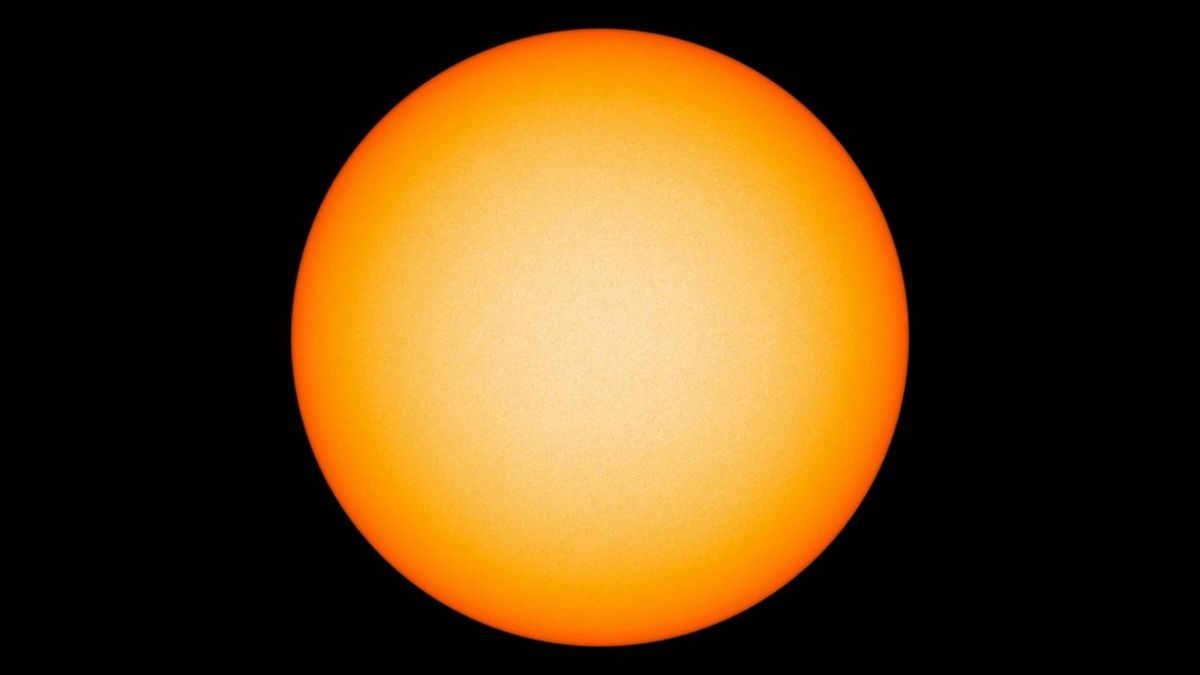
The next group of stars consists of those similar to our Sun. They have an average mass, average brightness, and average lifespan. These stars emit light across the visible spectrum, giving them a white appearance (despite our Sun actually being white, it appears slightly yellow due to our blue atmosphere).
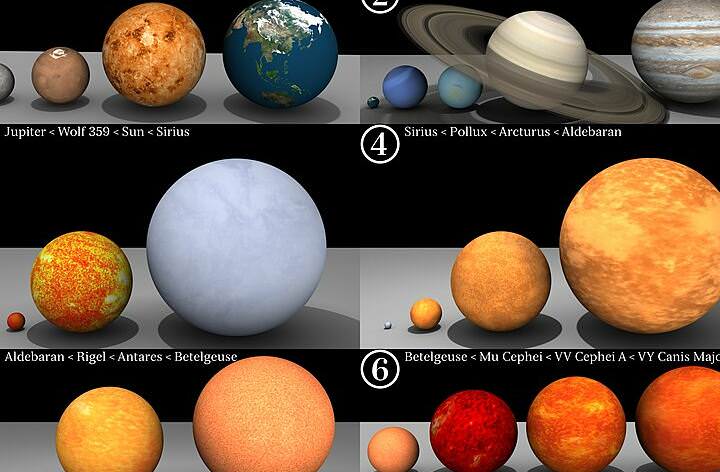
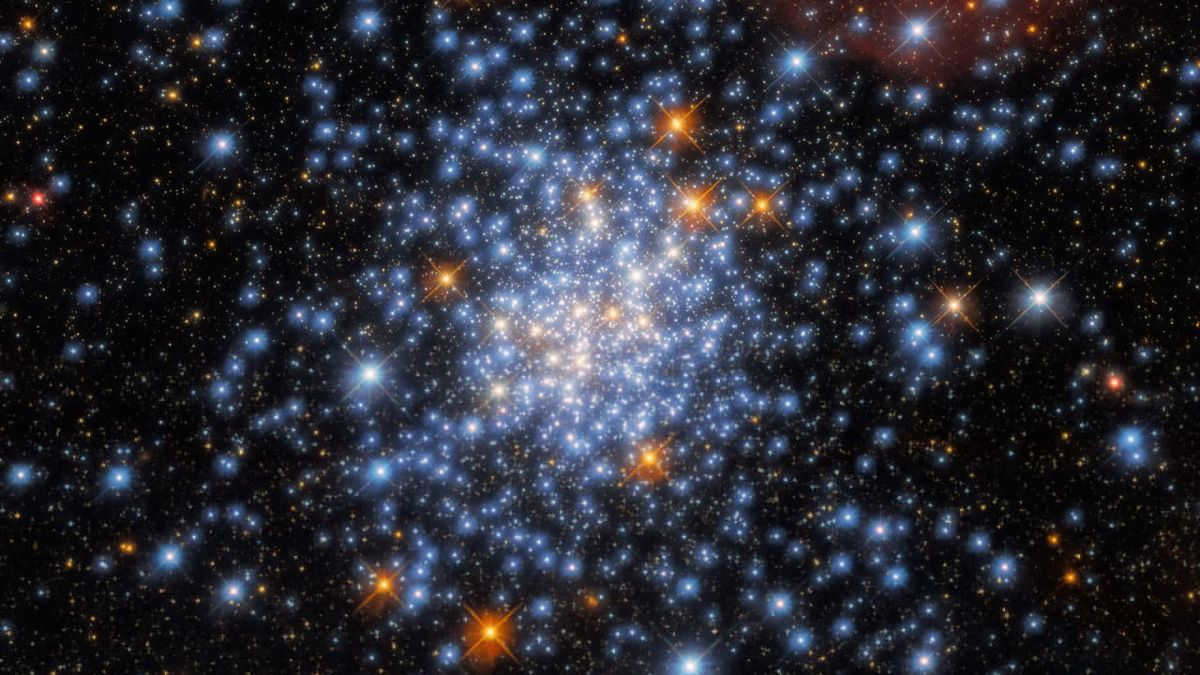
Another category is the giant stars, which are both very large and very rare. However, their brightness makes them easy to spot. For instance, we are able to see the spiral arms of galaxies not because they are more densely populated than the spaces between them, but because they are illuminated by these bright stars.
The majority of stars visible in the night sky are significantly larger than the Sun. During the majority of their lifespan, the largest stars possess a blue hue. This is due to their immense energy output, which causes the radiation they emit to be predominantly in the ultraviolet spectrum, with only a small portion falling within the blue range that is perceptible to us.
Aside from the presence of small red stars, medium white stars, and large blue stars, there exists a multitude of stars that fall in between these categories, as well as some peculiar, sizable, red stars. A century ago, during the initial cataloging of stars by astronomers, the situation was incredibly perplexing, with seemingly no correlation between a star’s color, brightness, and size.
The solution to this enigma came in the form of what is now known as the Hertzsprung-Russell diagram, which serves as the foundation for our comprehension of stellar existence even in the present day. The Hertzsprung-Russell diagram is a visual representation of a star’s temperature (which can be determined by its color) and its brightness.
If you plot the temperature and brightness of a whole group of stars, each represented by a single dot, you will discover something surprising. It appears that stars do not have an infinite number of color and brightness combinations. Instead, the majority of stars are located on a diagonal band. This band extends from the dim red end to the bright blue end.
This band is called the main sequence, and stars that burn hydrogen in their cores (which is the primary fuel source for most stars) will be positioned somewhere on this band. As stars age, they gradually and steadily move along the main sequence, becoming brighter and bluer over time.
The lifespan of stars along this trajectory, where they burn hydrogen in their cores, is determined by their mass. A low-mass red dwarf can exist on the main sequence for trillions of years, while a star larger than our Sun will only last a few million years at most.
When hydrogen fusion ceases in the core of a star, it departs from the main sequence and evolves in different ways. Large stars transform into red giants and occupy specific positions on the Hertzsprung-Russell diagram. Other stars may oscillate between blue and red, as heavy elements attempt to come together deep within their cores.
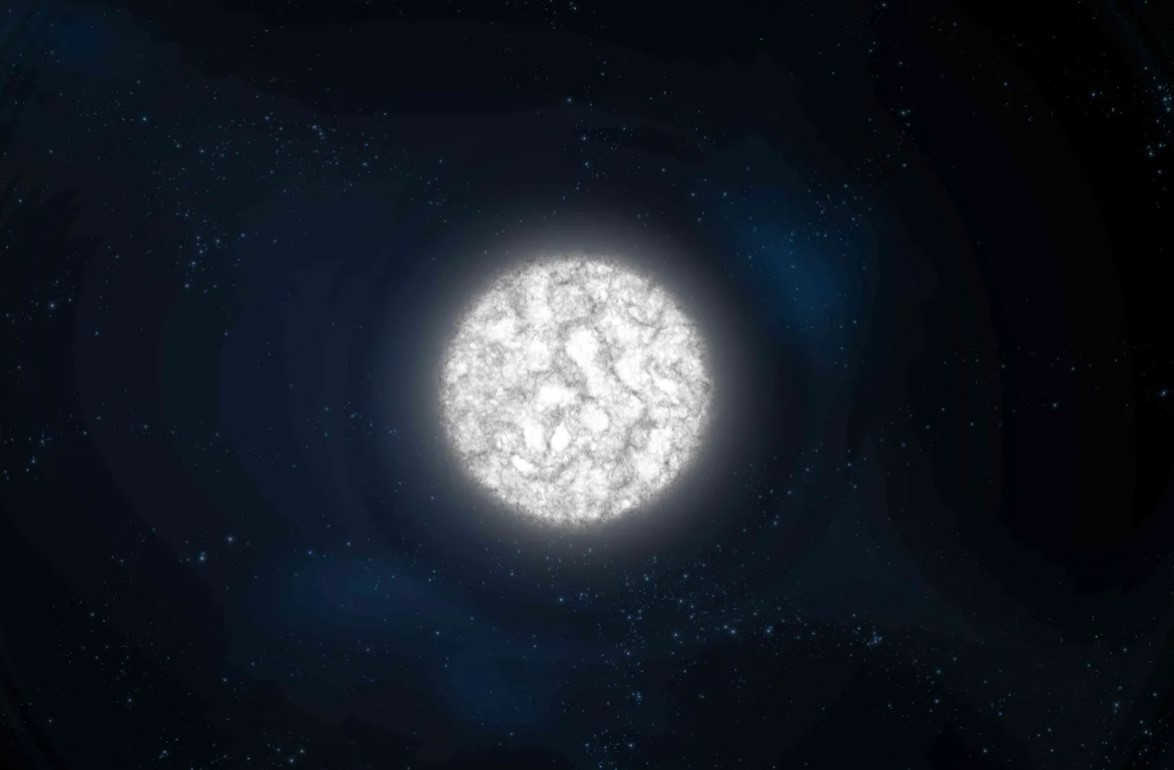
Color Coding
With the utilization of the Hertzsprung-Russell diagram, we are able to discern the true characteristics of a star: it is an entity positioned on the main sequence of said diagram. It is an entity that undergoes the combustion of hydrogen and progresses steadily along a confined range, correlating its luminosity with its temperature. Entities that exist beyond this range are either massive stars attempting to fuse heavier elements in a futile endeavor to sustain their combustion, or lifeless remnants like white dwarfs and neutron stars.
The Hertzsprung-Russell diagram plays a crucial role in the field of observational astronomy. It serves as a valuable tool for astronomers, enabling them to identify stars, determine their brightness and temperature, and accurately assess their position in their life cycle. As a result, scientists are able to make predictions about the future of stars and gain a deeper understanding of their evolution.
While the majority of matter in the Universe exists in the form of thin nebulae, stars stand out as extraordinary entities. They are temporary structures fueled by fusion energy, which makes them surprisingly predictable and comprehensible.
The existence of life on our planet is entirely dependent on the Sun, a fact that is often overlooked. However, it is important to remember that there are countless other galaxies and star systems within the vast expanse of the Universe. Our Sun, though powerful, is merely a small star when compared to the billions of other luminaries scattered throughout the cosmos. In this article, we will reveal the name of the largest star known to humanity, a celestial body that stretches the limits of our comprehension. It is possible that beyond our current understanding, there exist even more colossal stars of unimaginable proportions…
Measuring the Size of Stars
Before we discuss the largest star in the universe, it’s important to understand how we measure the size of stars. Typically, we use solar radii as a unit of measurement, with one solar radius equal to 696,392 kilometers. In our galaxy, there are many stars that surpass the Sun in size. These stars are known as red supergiants, which are massive stars with a dense hot core and a less dense outer layer. The temperatures of red supergiants are lower compared to blue and white stars, ranging from 8000 to 30,000 Kelvin and 2000 to 5000 Kelvin, respectively. Despite being referred to as “cold” stars, the temperature of red supergiants is slightly lower than the maximum temperature found in the Earth’s core, which is approximately 6000 Kelvin.
Many celestial objects do not possess consistent characteristics, such as size, and instead undergo constant transformations. These types of stars are referred to as variable stars, as their sizes fluctuate regularly. This phenomenon can occur due to a variety of factors. Some variable stars are actually comprised of multiple bodies that exchange mass, while others pulsate as a result of internal physical processes, contracting and expanding once again.
What is the name of the biggest star in the universe?
The constellation of Shields, located at a distance of 9,500 light-years from the Sun, is home to the largest star in the known Universe. This constellation was first discovered by the Polish astronomer Jan Hevelius in the late 17th century and was later added to the catalog by German astronomers from the Bonn Observatory in the 19th century. The star, known as UY Shield (Yu-Igrek), was officially identified as the largest star in 2012.
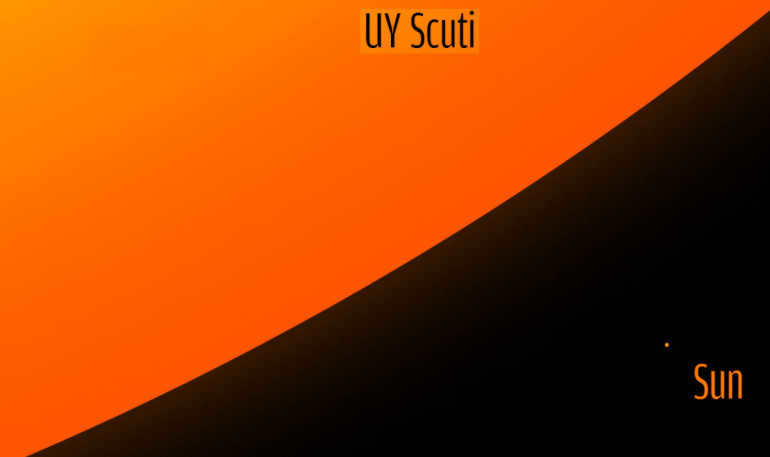
UY Shield is approximately 1700 times larger in radius than the Sun. This red hypergiant is a variable star, meaning it can expand even further. At its maximum expansion, UY Shield’s radius can reach 1900 times that of the Sun. The volume of UY Shield can be compared to a sphere with a radius equal to the distance between the center of the solar system and Jupiter.
Colossi of the cosmos: what are the monikers of the largest stars?
In the adjacent galaxy known as the Large Magellanic Cloud resides the second largest star in the known universe. It goes by the name of WOH G64, which may not be particularly memorable, but it is worth noting that it can be observed in the constellation of the Goldfish, which is visible constantly in the southern hemisphere. In terms of size, it is just slightly smaller than UY Shield, measuring about 1500 times the radius of the Sun. However, what sets it apart is its intriguing shape – a sparse shell envelops the core, creating a spherical structure that more closely resembles a doughnut or a bagel. This shape is scientifically referred to as a torus.
According to an alternate account, the name of the biggest star following UY Shield is VY of the Big Dog, which is currently taking the lead. It is estimated to have a radius of 1420 solar radii. However, the surface of VY Big Dog is extremely rarified, with Earth’s atmosphere being several thousand times denser. Because of the challenge in discerning the true surface of the star and its surrounding shell, scientists are unable to reach a definitive conclusion regarding the size of VY Big Dog.
The most massive stars
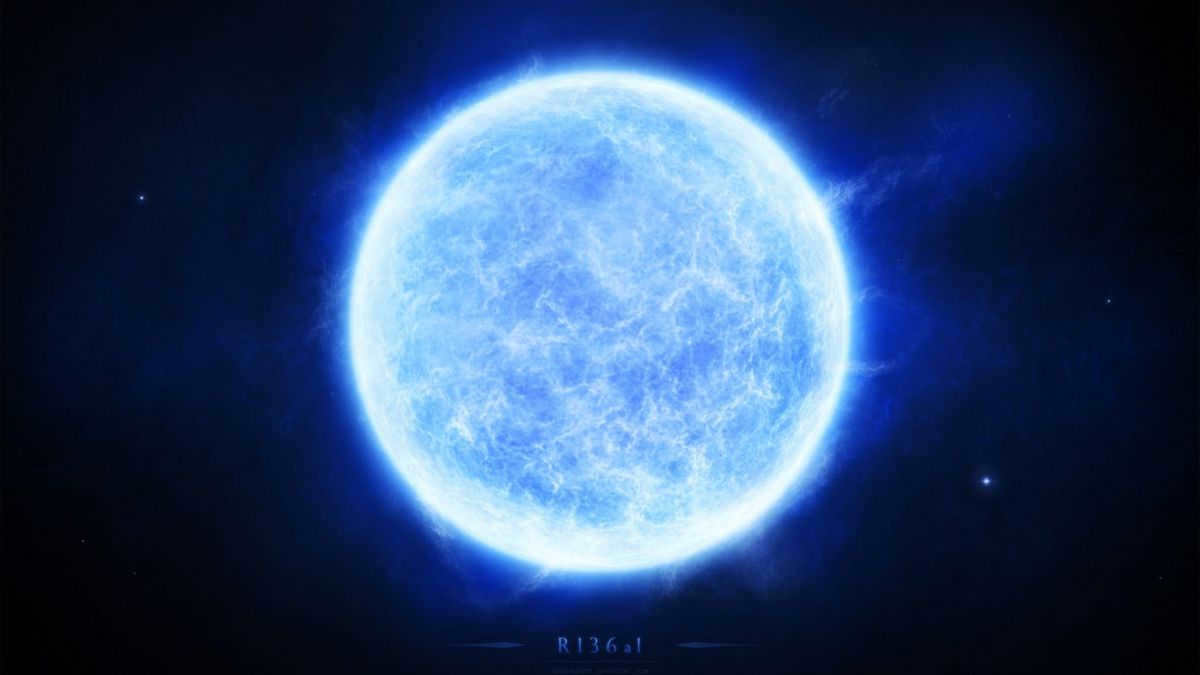
When considering the mass of celestial bodies rather than their radius, the largest star is known by the alphanumeric code R136a1. This star is also situated in the Large Magellanic Cloud, but it falls under the category of blue stars. Its mass is equivalent to 315 times that of the Sun. In contrast, the mass of UY Shield is a mere 7-10 solar masses.
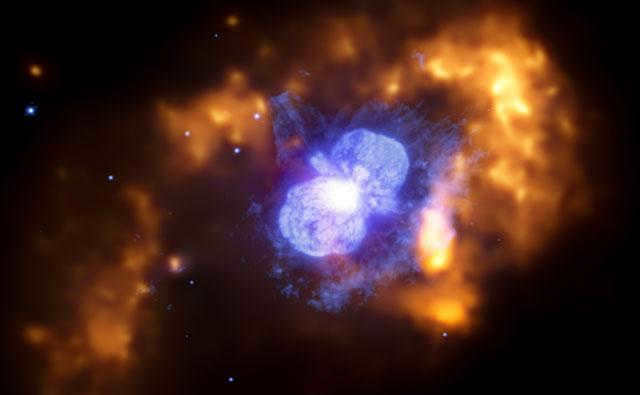
There is another colossal structure known as Eta Keel, which is a binary giant star located in the Keel constellation. In the 1800s, a powerful eruption occurred in this system, leading to the creation of a peculiarly shaped nebula. This nebula was named Homunculus due to its unusual form. Eta Keel possesses a mass equivalent to 150-250 times that of the Sun.
The most enormous stars in the nocturnal firmament
Lurking within the vast expanse of the cosmos, colossal stars remain beyond the reach of the average person’s vision – typically, they can only be observed with the aid of a telescope. During the nighttime hours, the most luminous and proximate entities to our planet – whether they are stars or planets – will manifest as magnificently expansive in the celestial canopy.
Do you know the identity of the largest and brightest star in the sky? It goes by the name of Sirius, and it happens to be one of the stars that is closest to our planet. In terms of size and mass, Sirius doesn’t actually surpass the Sun by much – only about one and a half to two times. However, its brightness is truly extraordinary, being 22 times greater than that of the Sun.
Interestingly, there is another object in the night sky that appears bright and large, but it is not actually a star. It is a planet called Venus, and its brightness outshines many of the other stars. You can see its brilliance more prominently near sunrise or shortly after sunset.
Thanks to the research conducted by astronomers from various countries, we have gained extensive knowledge regarding the progression and evolution of stars throughout recent decades. This wealth of information has been acquired through the meticulous observation of numerous stars during various stages of their life cycles.
The fundamental attributes exhibited by stars include:
- Luminosity, which refers to the total amount of energy emitted by a star within a given period of time (L),
- Surface temperature,
- Mass,
- Radius.
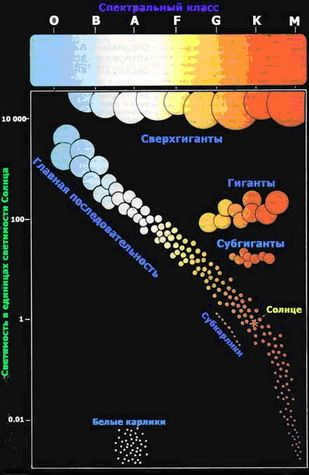
There exists a correlation among all of these characteristics, which is effectively demonstrated within the Hertzsprung-Russell diagram. (The relationship between Spectrum and Luminosity is graphically depicted in the accompanying image.)
By examining this diagram, we can observe that stars generate a specific arrangement. The category of stars that extends from the top left corner to the bottom right corner is referred to as the “main sequence”. In the top right corner, we find cool and massive stars known as red giants. In the bottom left corner, we find white dwarfs, which are extremely hot but also very petite. The Sun is classified as a G2 star.
Now, let’s delve deeper into the fundamental characteristics.
Brightness
The brightness of stars (L) is typically measured in units of the Sun’s brightness (4x erg/s). The brightness of a star is determined by the amount of energy that reaches the Earth, assuming the distance to the star is known. The brightness of stars can vary greatly. The majority of stars are considered “dwarfs”, with their brightness often being insignificant compared to that of the Sun.
One characteristic of brightness is the star’s “absolute magnitude”. There is also the concept of “apparent stellar magnitude”, which is determined by the star’s brightness, color, and distance from Earth. Most astronomers use “absolute magnitude” to accurately measure the size of stars, regardless of their distance. To determine the true magnitude, one simply needs to place the stars at a hypothetical distance (such as 10 parsecs). High brightness stars have negative values. For instance, the sun’s apparent magnitude is -26.8. At a distance of 10,000 parsecs, this value would be +5 (the dimmest stars visible to the naked eye have a magnitude of +6).
Surface temperature
By measuring the wavelength at the peak of blackbody radiation, we can determine the temperature of a body according to the established laws of thermodynamics.
Consequently, if the surface temperature ranges from 3-4 thousand K, the color will appear reddish. For temperatures of 6-7 thousand K, the color will be yellow, while temperatures of 10-12 thousand K will produce a white and blue color. The table provided below displays the wavelength intervals associated with various colors observable within the optical range.
Color and wavelength
The relationship between color and wavelength is fascinating. When light passes through a prism, it is separated into different colors based on its wavelength. Each color corresponds to a specific range of wavelengths, creating a visible spectrum. This phenomenon allows us to see and perceive the world in vibrant colors.
Understanding the connection between color and wavelength has practical applications in various fields. For example, in photography, different colors can be manipulated to create specific moods or convey certain emotions. In design, color schemes are carefully chosen to evoke specific feelings or communicate a brand’s identity.
Moreover, the study of color and wavelength has significant implications in science and technology. It is crucial in fields such as optics, where the behavior of light is analyzed and understood. By understanding how different wavelengths interact with matter, scientists and engineers can develop new technologies and improve existing ones.
In conclusion, the relationship between color and wavelength is a fundamental concept that permeates various aspects of our lives. It not only allows us to see the world in all its beauty but also plays a crucial role in fields as diverse as art, design, and science.
| Color | Wavelength range, A |
| Violet, blue | 3900 – 4550 |
| Blue | 4550 – 4920 |
| Green | 4920 – 5570 |
| Yellow | 5570 – 5970 |
| Orange | 5970 – 6220 |
| Red | 6220 – 7700 |
The classification of stars’ spectral classes is represented by a sequence of spectra acquired through the gradual alteration of their surface layers. This sequence is designated by the letters O, B, A, F, G, K, M (ranging from hottest to coldest). Each of these classes is further divided into 10 additional subclasses (e.g., B1, B2, B3…). The precise classification of stars’ spectral classes is displayed in the provided table.
Stars’ Spectral Classes
| Class name stars | Distinctive feature spectral lines | Temperature surface temperature, K |
| O | Ionized helium | > 30 000 |
| B | Neutral helium | 11 000 – 30 000 |
| A | Hydrogen | 7 200 – 11 000 |
| F | Ionized calcium | 6 000 – 7 200 |
| G | Ionized calcium, neutral metals | 5 200 – 6 000 |
| K | Neutral metals | 3 500 – 5200 |
| M | Neutral metals, absorption bands molecules | < 3 500 |
| R | Absorption bands cyanine (CN)2 | < 3 500 |
| N | Carbon | < 3 500 |
Mass
Stars are also categorized by their mass, although this distinction is not as wide as their luminosity, which can vary by a factor of 1000. The number of stars with masses 10 times greater or smaller than the sun’s mass is very limited.
Scientists analyze the distribution of star masses at the time of their formation, taking into account the lifespan of stars of different masses. They have found that the probability of a star being born with a certain mass is roughly inversely proportional to the square of that mass, as described by the Solpeter function:
This trend is observed across the universe. Many regions lack massive stars, while areas with abundant young stars tend to have fewer low-mass stars. It is believed that the initial stars in the universe were bright, massive, and short-lived.
Stars’ Radius
The size of stars can vary significantly and undergo changes over time. The introduction of spectral analysis has provided insights into the chemical makeup of stars. Stars primarily consist of hydrogen and helium plasmas, with smaller amounts of other elements. For every 10,000 hydrogen atoms, there are 1000 helium atoms, 5 oxygen atoms, 2 nitrogen atoms, 1 carbon atom, and 0.5 iron atoms. The presence of other elements is even less pronounced.
Efforts have been made to develop a theoretical model for the evolution of stars along the main sequence by considering the mass loss of these stars. However, these attempts have not been successful.
The duration of stars’ stay on the main sequence is determined by their initial mass. Stars with greater mass and radiation levels deplete their hydrogen reserves at a quicker rate.
Author: Tatiana Sidorova, update date: 17.05.2018
Reprinting without an active link is prohibited!
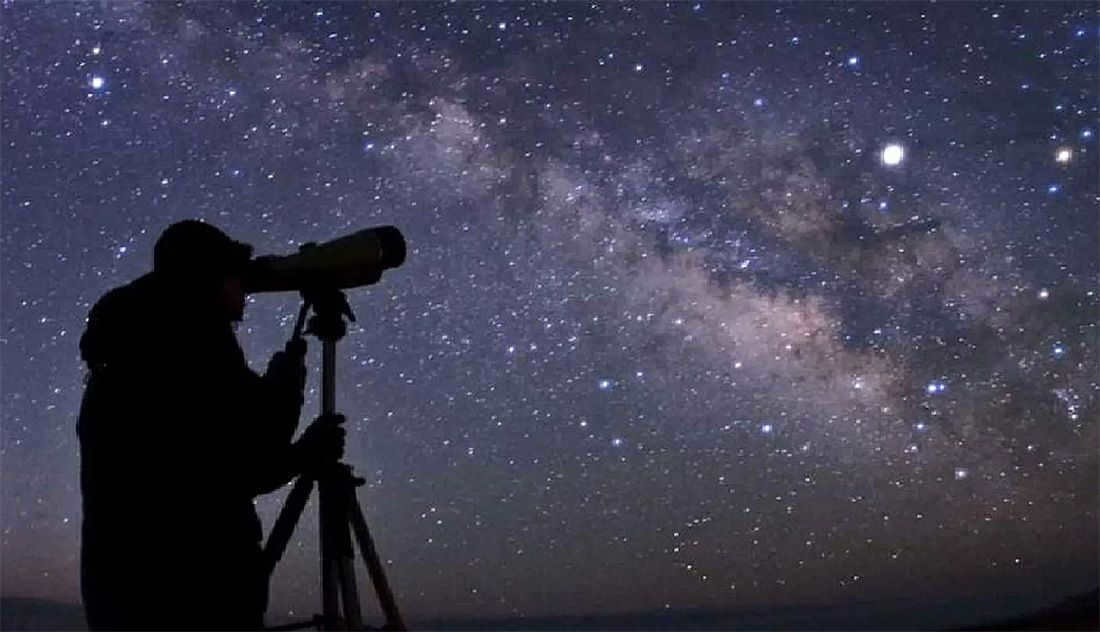
Typically, the journey of a beginner astronomer (and simply a stargazing enthusiast) can be quite disappointing! The night sky is often lacking stars, with constant haze and clouds ruining the experience, while artificial lights only add to the interference… Overall, not the most enjoyable experience.
However, don’t give up too soon, my friends! Patience and the ability to wait are crucial in our field, and it’s important not to forget a few useful techniques for observing the starry sky. You’ll soon realize how the view above your head has transformed – it turns out there’s actually quite a lot to see, and those pesky lights and fog aren’t as much of a hindrance as you thought.
Ultimately, if you wish to witness more stars in the night sky, simply follow these straightforward recommendations.
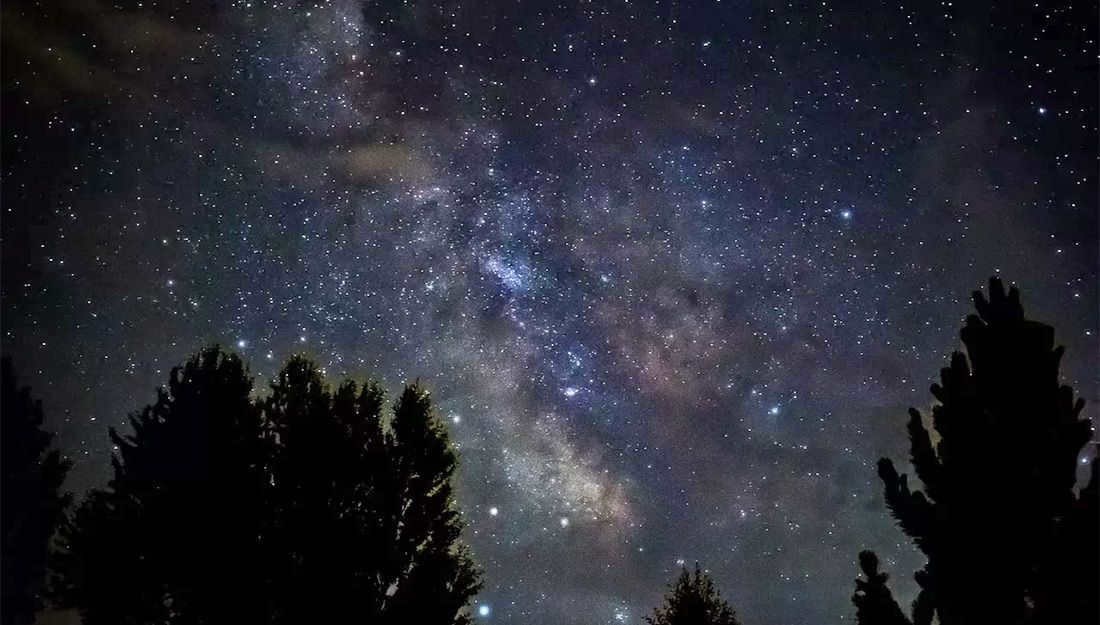
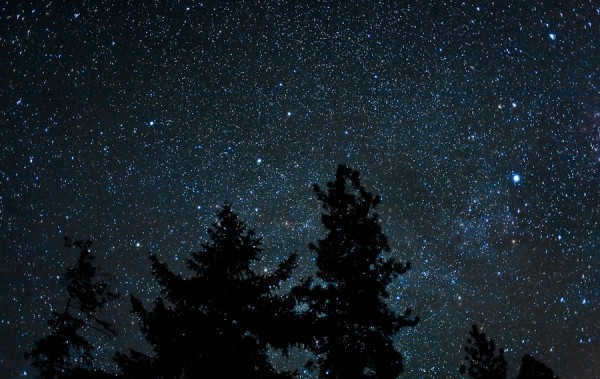
The night sky, the way we always dream of witnessing it… but rarely do we get the chance.
Allow your eyes to adjust to the darkness
Prior to embarking on stargazing, it is crucial for your eyes to acclimate to the darkness. To achieve this, spend at least 40 minutes in a dimly lit room with your eyes open.
After this procedure, your eyes will be primed for perceiving faint traces of light. Be cautious not to expose them to any sudden sources of unnecessary illumination.
Which eye should you use to look through the telescope’s eyepiece?
There is a concept known as the “dominant eye”. The dominant eye is responsible for accurately fixing the position of objects in space, inspecting them quickly, and having better focus. The other eye, known as the non-dominant eye, plays a supporting role, particularly in providing binocular vision.
The leading eye can be either left or right in different individuals, depending on their physiological and psychological characteristics. To identify the leading eye, simply look into the eyepiece first with one eye and then with the other. The eye that provides a more convenient and clear view is considered the leading eye. Most people instinctively use their leading eye when looking through the eyepiece. However, some individuals may not have a preference and can choose either eye to look through the eyepiece, in which case the choice of leading eye becomes a personal decision for the observer.
To accommodate the other eye, it is essential to create a unique “eyepiece” alongside the telescope’s existing eyepiece. This can be achieved by attaching a short black tube that can be sealed at one end. By doing so, the leading eye can comfortably view through the telescope eyepiece without the need to strain or close the subordinate eye manually, preventing fatigue in both the facial muscles and the leading eye.
Put simply, the primary eye should only see the desired light, while the secondary eye should be open but relaxed and see nothing.
Pay attention to the telescope’s eyepiece
In cold weather, the eyepiece may become foggy due to the close proximity and directional heat from the primary eye. It can sometimes happen that the observer, leaning towards the eyepiece, accidentally breathes on the lens, causing a noticeable decrease in visibility of objects, especially those that are already foggy. The observer may mistakenly believe that this is how the objects actually appear: faint and cloudy. It is important to be aware of this phenomenon and occasionally wave the palm of the hand over the eyepiece lens to prevent fogging.
To capture objects that are positioned high above the horizon at a specific moment, a rotating mirror is utilized. This mirror is placed in front of the lens’s focus and redirects the rays at a 90-degree angle. The eyepiece is affixed to the rotary attachment with the mirror, allowing the observer to view the object without exerting strain by squatting or assuming an uncomfortable and tiring position. Instead, the observer can look downward or slightly ahead into the eyepiece.
In general, it is more advantageous to observe while sitting on a chair and leaning against the eyepiece assembly. When observing while standing, it is more convenient to keep your hands behind your back. On the other hand, when seated, it is better to rest your hands on your knees. It is always important to choose a simple and sturdy setup that minimizes head or body movement and provides a comfortable and non-fatiguing position.
Rest your eyes
When observing for long periods of time, your eyes can become tired. It is important to take breaks and look in different directions – left, right, up, and down.
Don’t forget to blink, as this helps wash the cornea with tears and prevent cloudiness in your vision. Once your eyes feel refreshed, you can resume your observations.
What should you do if you are not seeing anything interesting through a telescope or binoculars?
So, you’ve located your object, you’re looking at it through the telescope, your eyes have adjusted to the darkness, but there’s nothing in the field of view. What could be the problem?
Firstly, check if the image is out of focus. Take a look at the visibility of the stars closest to the observed field of view or those that are present in it. Carefully adjust the focus using these stars as a reference. Next, check for any cloud cover. It’s also a good idea to refer to the object’s description and take note of its total luminosity and angular size. This will give you an idea of its apparent surface brightness or, if it’s a diffuse cluster, the average luminosity of its constituent stars.
Thoroughly review the object’s description and carefully examine each piece of information and characteristic. Envision the strength and structure of the radiance or cloud that you will need to observe through your telescope. Next, determine the object’s angular size. To gain a sense of this size, it can be helpful to compare angular sizes larger than 10′ with the average angular size of the Moon (30′), and angular sizes smaller than 10′, up to 10″, to the average diameter of Jupiter (40″).
When using magnifications of 20x-40x, each observer has viewed Jupiter and the Moon multiple times and is familiar with their respective sizes in the field of view at this magnification. Let’s assume that the angular size (diameter) of your object is 3 minutes, which is approximately 4-5 times the diameter of Jupiter. Now, envision the size of a “blob” that would accommodate “four Jupiters” in its diameter, and more than “ten Jupiters” across the entire area of the “blob” like a honeycomb.
Once you have determined the appropriate size for the object to appear in the telescope at 20x-40x magnification, it is important to consider how many objects will occupy the field of view at this level of magnification. In order to accurately assess this, it is necessary to employ two well-known detection methods. However, before proceeding with these methods, it is crucial to double-check that the telescope is indeed pointed in the correct vicinity. It is possible that it may be aimed at a different area of the sky where there should be no objects of interest. If the telescope is still in the same neighborhood, then it is time to thoroughly examine any other potential causes of interference as perceived by the observer. Once these potential causes have been ruled out, the detection techniques can be put into action.
It is common knowledge that the retina’s light-sensitive elements consist of cones and rods. The cones are primarily located in the central region of the retina, specifically in the yellow spot with a central pit, where they are highly concentrated.
This area is known for its exceptional visual acuity. Cones are active during daylight hours and respond to intense light stimuli. They enable color perception and provide excellent resolution for fine details when the light is focused on the central pit of the yellow spot, allowing for direct and close-up vision of these details.
The arrangement of rods in the retina differs from that of cones. While cones are primarily located in the central part of the retina, rods tend to cluster together in the peripheral regions. When the light is dim and cones are no longer responsive, the rods take over. These specialized cells enable us to see in low-light conditions, gradually improving their sensitivity to faint objects and overall low light as our eyes adjust to darkness.
In such dim lighting, the retina’s ability to perceive colors becomes compromised, and the world appears in black and white. This is because the cones, which are responsible for color vision, have minimal or no response to small amounts of light. On the other hand, while rods can detect these dim light signals, they do not possess the natural ability to perceive colors.
For instance, it can be challenging to detect the hue of faint, elongated objects, particularly if their luminosity is unalterable. In the most favorable circumstances, certain planetary nebulae may exhibit a greenish tint, while more frequently, in accordance with the twilight vision, they manifest a bluish-gray shade. It is worth noting that twilight vision not only exhibits its greatest sensitivity towards blue wavelengths, but also elicits a similar perception of bluish-gray color when observing entirely dissimilar faint hues.
Due to the fact that the perceived brightness of stars when viewed through a telescope is typically higher than when seen with the naked eye, and this brightness increases exponentially with the size of the telescope lens, the amount of light from a star that is magnified by the telescope is often enough to intensify the illumination in the area of the retina where the star’s image is located. As a result, the cones in that area start to respond not only to the light, but also to the color of the star, especially if it is bright.
When the size of the telescope lens grows, assuming that the chromatic aberration is undetectable to the human eye, the clarity and purity of star colors become more visible. The visual experience of star colors, whether they are white or silver (which can have various shades as well), leaves a lasting impression. Even without knowledge of the time of day, year, or constellation names, a skilled observer can identify bright stars by their color when using a naked eye or the same instrument under identical conditions.
Observing dim stars: tips and tricks
One method to enhance the visibility of faint stars is to take advantage of our side vision. The outer regions of our retina, which are responsible for side vision, contain a higher concentration of light-sensitive cells called sticks. When light from distant stars reaches these peripheral areas, the sticks in this region send a more powerful nerve signal to the brain compared to the sticks in the central areas of the retina. As a result, the stars appearing in our side vision may appear brighter than those in our central vision, where the stick density is lower. By utilizing this effect, we can improve our ability to observe dim stars and uncover the mesmerizing beauty of the night sky.
During the course of this random examination, you might suddenly realize (and it is important to strive for this) that not every part of the visual field appears equally dark, and there are faint gray patches resembling hazy wisps of smoke in certain areas.
The peripheral vision effect can be utilized in another manner. Once the stars in the telescope’s field of view have been identified with the stars near the object on the search map, it is necessary to only choose those stars that are directly adjacent to the object’s location on the map. Then, while looking through the telescope’s eyepiece at this cluster of stars in the vicinity, slightly shift the gaze upward without reaching the very edge of the field of vision, and observe the desired area of stars using the peripheral vision.
Simultaneously, the eye becomes “frozen” in its current position and diverts its attention away from the area it was previously focused on, shifting it towards the lower edge of the field. It is important to take note of any faint “wisp of smoke” among the stars, keeping in mind the approximate size of the wisp you are searching for. Then, you can slightly raise your gaze and once again survey that particular area of stars using your peripheral vision.
Following this, you repeat the process of shifting your gaze downwards, to the left, and to the right of the stars’ area. Then, you proceed to explore other directions from that area, at varying distances. Throughout this process, it is crucial to fixate your attention on the stars using your peripheral vision, rather than moving your eye itself. The eye will naturally choose the optimal position when the object becomes the brightest and most distinct.
The initial approach to implementing the side view effect is utilized in situations where the surrounding area of the object lacks stars or when the telescope displays numerous dim stars that cannot be identified on the search map.
Seeking out moving stars
Occasionally, even with the utilization of the side view technique, the object remains evasive. In such cases, this method is employed in conjunction with the side-vision effect. While inspecting the entire field of view with side vision, proceed to move the telescope back and forth with an amplitude of up to 20′.
Sequentially inspect the entire field of peripheral vision by first examining only the upper part of the field and moving the telescope, then shifting to the slightly lower and right area and moving the telescope, followed by the right area and making telescope movements, etc. In other words, the eye pauses and fixates its attention on a specific spot (also pausing), while the telescope is moved during this time.
While observing the telescope, you can see that all the stars in the field of view simultaneously shift position, move a short distance, and then return back. However, with peripheral vision, you may notice that along with the movement of the stars, a gray or other shaded foggy spot appears in the depths of the dark sky. It seems as though this spot was quietly sinking into the blackness of the sky and then moved along with the stars on the same path.
When an object is still, it is challenging for the eye to perceive and focus on it, especially with peripheral vision.
During the movement of an object, peripheral vision is more likely to detect its presence, even if it was previously unnoticed. The eye instinctively pays more attention to the object and anticipates its trajectory, making it more noticeable.
How to examine the selected celestial object in detail on the starry sky
The ability to examine a celestial object in detail is influenced by various factors, many of which have been mentioned earlier. Now, assuming that these factors and requirements have been met, and our desired object is within the telescope’s field of view, we need to employ the technique of observing different types of objects. What does this technique entail?
- The first aspect of observation technique involves choosing the optimal magnification for the clearest view of the object.
- The second component is to bring the object to the center of the field of view, utilizing both peripheral and central vision. Each and every object is observed using both peripheral and central vision. Remember: central vision – exceptionally clear vision; it allows for the differentiation of even the smallest structures in the visual field, enabling the perception of object colors. The larger the lens, the more distinct the colors appear. However, it is less responsive to faint light sources. Peripheral vision – monochromatic, unable to distinguish colors, and less sharp than central vision, causing close details to blend together. Peripheral vision is much more effective at perceiving weak light sources compared to central vision. Peripheral vision enables the identification and detection of faint objects, allowing for some level of perception and awareness, even if they are not sharp or in color.
- The third aspect of visual perception involves understanding what to focus on when looking at an object, what details to search for, and what to expect to find.
Over time, this process becomes automatic and second nature. The observer’s eye becomes highly skilled. It is possible to adjust the magnification and reexamine the object.
It would be beneficial to carefully study the description of the object intended for observation. Take note of its overall brightness and size, as well as other distinctive features. Descriptions of objects make it easier to observe, providing hints and familiarizing oneself with the available information to uncover unknown details about various objects, utilizing the general ability to observe.
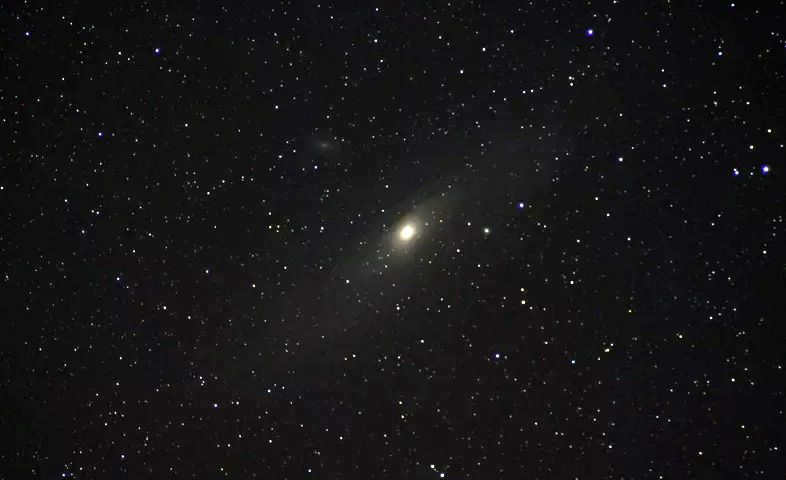
Even though galaxies are incredibly vast in size, their distance from us often makes them appear like ordinary, dim stars.
What is the process for locating galaxies and globular clusters in the sky?
The previously mentioned techniques for detection primarily focus on identifying faraway and dim objects with low surface brightness. These objects can be challenging to see, pushing the limits of observation. However, there are objects with high surface brightness that are not as easy to spot within the telescope’s field of view. This category includes numerous planetary nebulae (the majority of them), select galaxies, and even globular clusters.
A small planetary nebula (10″-50″) at a search magnification of 20x-40x is virtually indistinguishable to the naked eye from regular stars, making it easy to overlook and mistake it for an ordinary faint star.
In this scenario, it becomes necessary to clarify the description of the overall brightness of this nebula. If it is equal to or greater than 9.75w, such a planetary nebula can be identified as an “additional” star amidst the surrounding stars indicated on the search map. This is because all stars brighter than 9.75w are reflected on it, making the “additional” star our target.
Do you remember how easily we can detect a bright planet in a zodiacal constellation? It’s interesting how it distorts its usual appearance by appearing as an “extra” star. Once we adjust the sharpness and observe that the “extra” star is not focused like the others, we can be sure that we have made a correct detection.
If we bring the “extra” star to the center of the field of view, we can increase the magnification (60x – 100x) to get a better view of its extent. This will help us determine if the “extra” star is indeed our target. In case the total luminosity of a small planetary nebula is low (10t, 11t, …), we should carefully examine its surroundings and each star individually at different magnifications (low, medium, and high). This method of detecting faint objects can be quite effective.