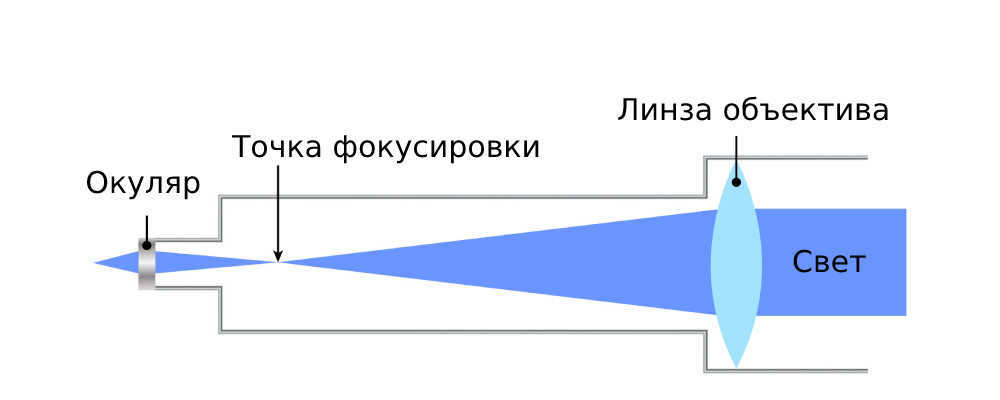
When it comes to telescopes, the debate between refractors and reflectors is a common one. Both types of telescopes serve a similar purpose and operate in a similar manner. A refractor telescope, for example, uses a front lens, known as the objective, to collect and focus incoming light. This light is then refracted through multiple layers of optical glass and directed into the eyepiece, allowing for observation.
Conventional refractor telescopes are well-suited for observing the Moon and studying distant objects on Earth’s surface. However, if you’re specifically interested in observing Mars and Venus, an achromatic model with concave and convex lenses is recommended. For a more detailed study of the distant planets in our solar system, an apochromatic refractor telescope with two convex and one concave lens is necessary to ensure accurate and proportionate image representation.
What kind of telescope should an aspiring astronomer select? Without a doubt, the best choice would be budget refractors priced at 2000 rubles. These telescopes are designed with a sealed enclosure that prevents atmospheric air from entering, ensuring that the image quality remains constant regardless of temperature or weather conditions. However, it’s important to note that refractors with higher magnification tend to be larger, with longer tubes and wider objective lenses. As a result, these telescopes are best suited for observing the closest planets and satellites from the comfort of your own apartment. Amateur telescopes typically offer a magnification range of 100-150x.
Reflectors
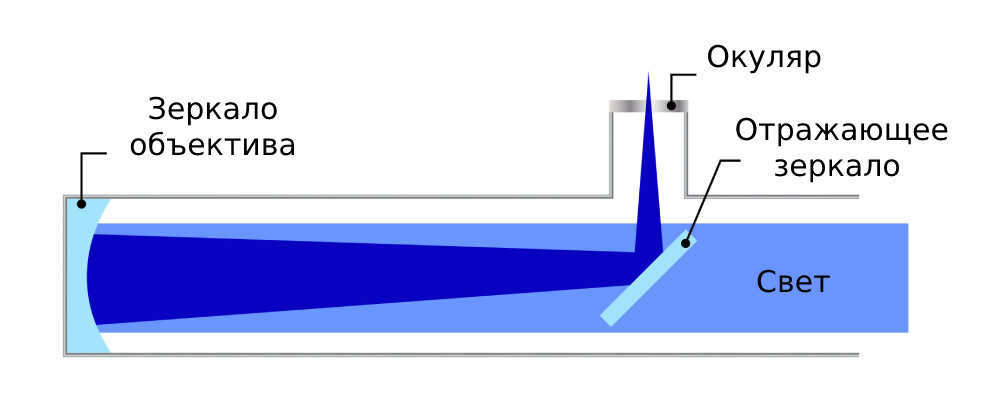
In a reflector telescope, the light is directed towards the lower part of the tube where a large focusing mirror, known as the primary mirror, replaces the lens. This mirror collects the rays and redirects them to a smaller mirror, called the secondary mirror, which takes the place of the eyepiece. From there, the light travels through the top of the optical tube and forms an image with the assistance of a lens.
When selecting a telescope for observations, it is helpful to consider the construction principle. The classic Newton reflector offers image quality comparable to a refractor, but with a smaller optical tube size. A Cassegrain telescope provides high magnification in a compact form. The Ritchie-Cretien Reflector produces a very clear image at high magnification.
If you are interested in selecting a telescope for your residence, then a reflector would be an excellent choice. It boasts a compact and lightweight design. Nonetheless, when utilized outdoors, the image may be compromised by elevated humidity levels and shifting temperatures, necessitating intricate maintenance. Periodically, the mirrors will need to be disassembled, cleaned, and polished. The price range for these models starts at 7000 rubles.
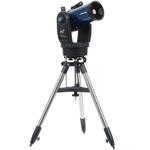
Catadioptric telescopes
Similar to reflectors on the outside, catadioptric telescopes have a lens – corrector – at the front of the tube. This corrector eliminates any distortions before the light reaches the main mirror, resulting in clearer images.
When it comes to choosing a good telescope, the design of the corrector lens is something to consider. In the Schmidt-Cassegrain scheme, a convex lens provides a wide field of view, perfect for observing the starry sky. On the other hand, Maksutov-Cassegrain telescopes use a concave lens, which offers better detail, higher magnification, but with a narrower field of view.
For professionals looking to observe distant and dim objects, catadioptric telescopes are a great choice. They provide a good image quality while maintaining compact dimensions. However, they can be more prone to damage during transportation. Additionally, these telescopes are less affected by weather conditions. Keep in mind that catadioptric telescopes usually have a higher price tag, starting from 40,000 rubles.
To determine the maximum magnification of a telescope, you can divide the focal length of the main mirror (lens) by the focal length of the secondary mirror (eyepiece). This information can usually be found in the instrument’s manual or passport. For instance, if a telescope has a main mirror with a focal length of 200 millimeters and an eyepiece with a focal length of 10 millimeters, the magnification would be 20 times.
What is the optimal telescope selection?
- To view terrestrial objects, a magnification of 10-25x is sufficient;
- For examining the craters of the Moon, a magnification of 50x is recommended;
- To observe Mars and Venus, a magnification of 100x is ideal;
- To search for Jupiter’s satellites and Saturn’s rings, a magnification of 150-200x is recommended;
- For studying deep space objects, a magnification of 250x or higher is necessary.
Choosing the Right Effective Magnification for Your Telescope
When searching for a telescope, one of the most important factors to consider is the effective magnification. This feature allows you to observe faint objects that reflect minimal light, such as asteroids, comets, and certain planetary satellites. The effective magnification is determined by the aperture, which refers to the diameter of the front lens or main mirror of the telescope.
To determine the minimum effective magnification, simply divide the aperture by 6. On the other hand, to find the maximum effective magnification, multiply the aperture by 2. For instance, if the telescope has a 100 mm mirror, the minimum magnification would be 30x, while the maximum would be 200x. By using these magnification settings, you can achieve a clear image with accurate colors. If the image appears blurry or distorted, it may be necessary to replace the lenses or mirrors.
Luminosity
Demonstrates the capacity of the telescope to handle the brightness of celestial objects. When exploring telescopes for astronomy enthusiasts, the selection of the appropriate model relies on the relative aperture of the optics. This parameter is determined by the ratio of the aperture to the focal length of the lens or primary mirror. For instance, if you have a lens with a diameter of 200 mm and a focal length of 1000 mm, the relative aperture would be 200/1000=1/5.
- For the purpose of observing faint stars, far-off galaxies, nebulae, comets, and asteroids, a telescope with a magnification of up to 1/6 is recommended.
- To study the distant planets of our solar system and their satellites, a telescope with a magnification ranging from 1/6 to 1/8 is ideal.
- For the purpose of studying Mars, Venus, and the Moon, a telescope with a magnification of 1/8 to 1/10 is recommended.
- A telescope with a magnification of 1/10 to 1/16 is suitable for observing celestial bodies against the backdrop of the Sun.
- If the goal is to study objects on Earth’s surface, a telescope with a magnification of less than 1/16 is recommended.
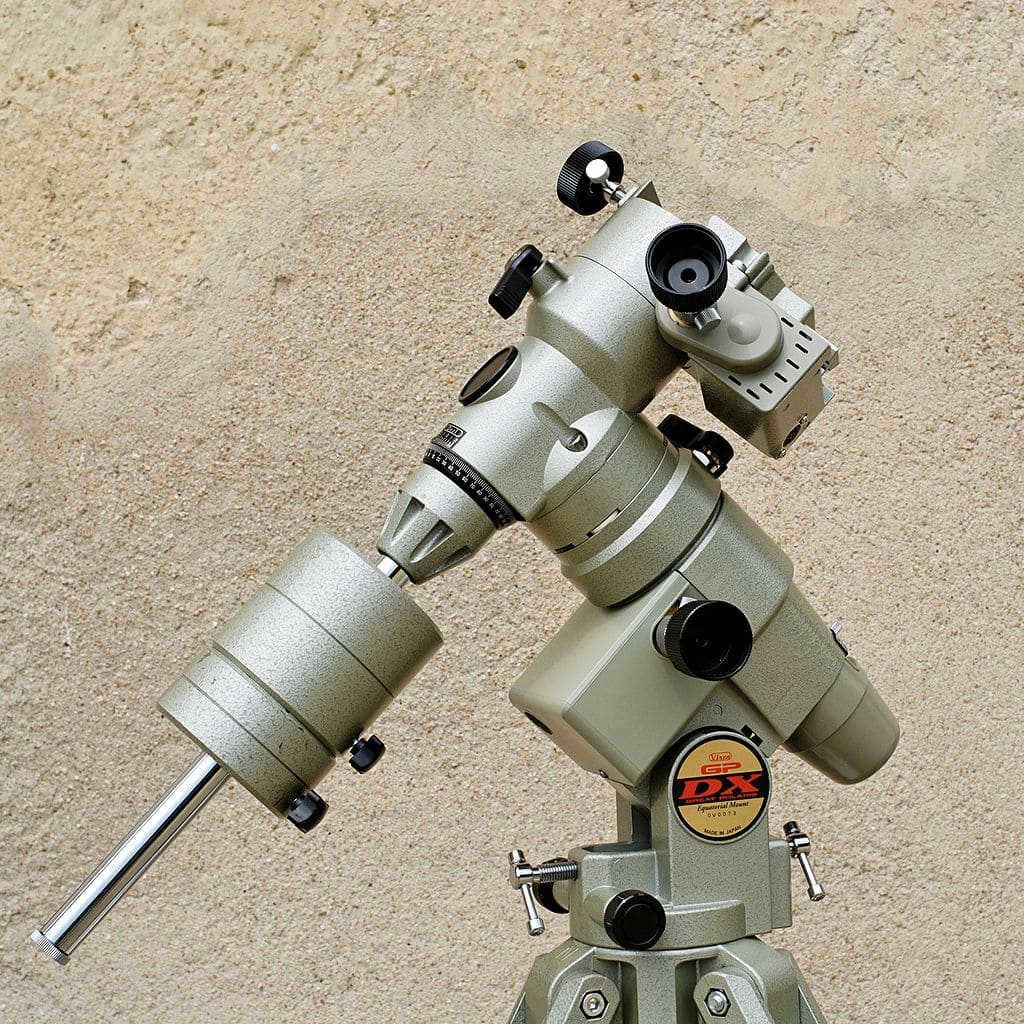
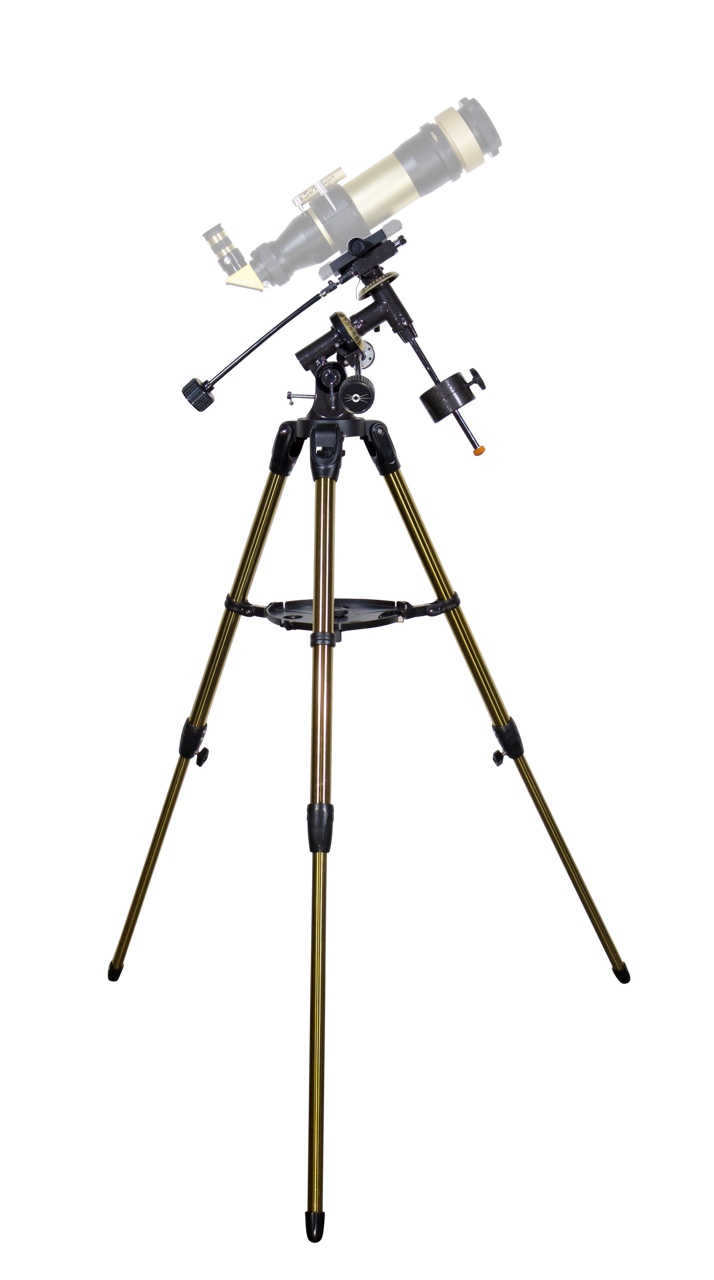
Telescope mount
This is the support system for the optical tube.
Alt-azimuth mount
Similar to a camera tripod with a movable head, the alt-azimuth mount allows for both vertical and horizontal rotation of the telescope. It is a simple, compact, and affordable option, with tripods and mounts starting at around 2000 rubles.
However, it does require more precise adjustment, as you need to take into account the Earth’s rotation and geographic coordinates in order to keep objects in the telescope’s field of view. If you are unsure about choosing a telescope for beginners, consider an alt-azimuth mount.
Equatorial
The Equatorial mount is designed to easily adjust parallel and perpendicular to the Earth’s axis of rotation. It is a perfect choice for both experienced astronomers and amateur astrophotographers.
However, this mount is more expensive compared to other options, with the tripod alone starting at a price of 5000 rubles. It is important to note that disassembling the mount yourself is strictly prohibited, as it requires calibration in a specialized workshop during reassembly.
Motorized
If you are in search of a telescope suitable for a child, it is crucial to consider the type of mount to opt for. A motorized tripod enables the lens to automatically point in the desired direction without the need for manual adjustments. The package might come with either a remote control or a USB cable. If it’s the former, you will have to browse through the catalog to locate the specific object number, whereas with the latter, you can search for stars or planets by their names.
Explorer
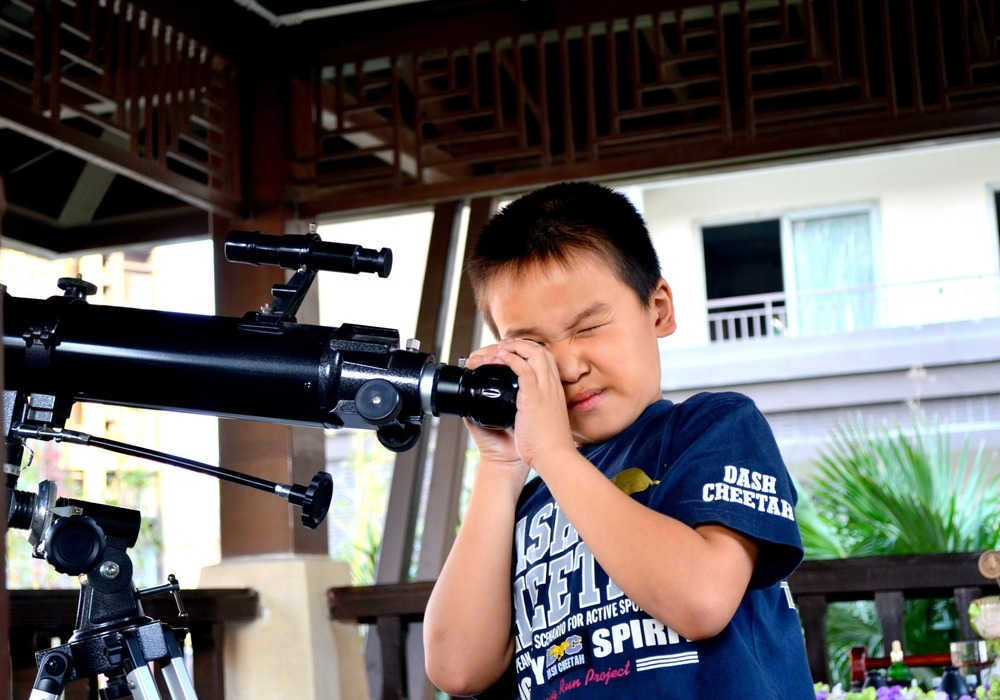
If you are interested in discovering the perfect telescope for a child, pay close attention to the Red Dot mechanism. Although it doesn’t offer any magnification, it enables quick focusing on the Moon’s surface and nearby planets. It may not provide any magnification, but it does allow for swift focusing on the surface of the Moon and the closest planets. For more advanced observing purposes, an optical finder is necessary – a compact telescope that provides a magnification of 3-5x.
The Huygens eyepiece is appropriate for observing nearby planets due to its minimal distortion level or for examining the surface of the Sun. There is no adhesive present that can disperse intense light.
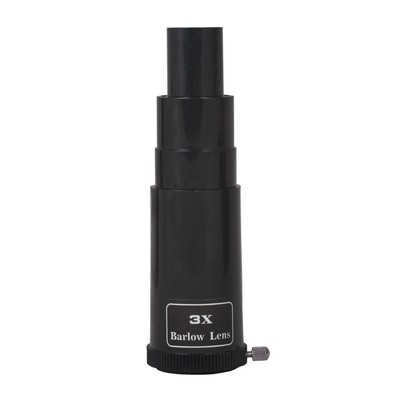
The Barlow lens enhances the magnification, such as by a multiplier of 1.5, 2, or 3.
Light filters eradicate interference caused by atmospheric effects and surface reflections. If you are pondering how to select a telescope for an amateur, the assortment should incorporate filters for the Moon, Mars, and Venus. Seasoned astronomers will require accessories for studying the Sun, Mercury, Jupiter, and Saturn.
An adapter for your camera or smartphone enables you to capture photos with your current equipment.
A fine-motion mechanism on the mount shifts the lens a fraction of a millimeter to track the movement of a star, satellite, or asteroid.
A tripod-mounted shelf comes with the telescope and can be used to hold various accessories, such as interchangeable optics, a smartphone, and a star map.
When it comes to storing and transporting the telescope, you have two options: a soft case or a rigid tube. The soft case is a more affordable choice, starting at 500 rubles, while the rigid tube offers greater durability and protection.
By understanding how to select the right telescope, you’ll soon be able to locate all the planets in our solar system and the closest stars in the night sky. At Eldorado, you can find a wide range of telescopes from brands like Celestron, Bresser, and Levenhuk.
When it comes to selecting your initial telescope, the process can feel overwhelming. With a wide array of models available, each boasting unique features and characteristics, it’s understandable that those unfamiliar with astronomy may feel confused. Star gazing is a hobby that is undeniably rewarding, but it requires patience, research, and dedication – starting with the selection of your first telescope.
So, before you make your purchase, let’s explore the essential factors you should consider.
How to choose your first telescope
We’ve made the decision to split this guide into two distinct sections: the initial section addresses the overall factors you should take into account prior to purchasing a telescope. The subsequent section is intended to provide you with information regarding the technical features of a telescope. By striking the perfect balance between these two aspects, you’ll be sure to be satisfied with your acquisition. Let’s delve into the crux of the matter!
You have a choice to make: visual observation or visualization
There is a distinct difference between the type of telescope needed for observing the planets within our solar system and the type needed for capturing images of deep space objects like galaxies or nebulae. Some telescopes are specifically designed for visual observation, while others are geared towards deep space imaging. Not only do these telescopes differ in their optical systems, but they also vary greatly in price. Astrophotography, in particular, is a more expensive and challenging endeavor that may not be suited for beginners.
Typically, amateur astronomers start by visually observing easier targets like Jupiter or Saturn and familiarizing themselves with their telescope. As they gain more experience, they may become interested in photographing deep space objects and thus opt for a telescope that is better suited for astrophotography.
Determining Your Budget
By selecting a budget, you can simplify your search for a telescope by narrowing down the options available to you. Additionally, this will encourage you to carefully consider your choices and aim for the telescope that offers the best value for your money.
If this is your first time purchasing a telescope, it is advisable to opt for an entry-level or user-friendly model rather than a more advanced and sophisticated one. Investing in a telescope that costs 100,000 – 200,000 rubles may leave you feeling overwhelmed and frustrated during the learning process, as you may not know how to make the most of its features.
It is important to take your time, become proficient with a beginner telescope, and expand your knowledge of stargazing before upgrading to a higher-end telescope.
Astronomy is indeed an expensive pastime, but that doesn’t mean you can’t find affordable equipment (telescope + mount) on a tight budget.
Conduct thorough research
With the wide range of telescopes available, it can be challenging to make a decision. Moreover, it can be a significant financial commitment. Some telescopes even cost hundreds of thousands of rubles. Therefore, it’s crucial to thoroughly research each telescope model, brand, and the quality of materials used. Ultimately, you want a telescope that will last you for many years.
An excellent way to gather information about a specific telescope is by turning to online forums. These forums are populated by experienced astronomers who discuss various technical aspects of telescope performance.
Undoubtedly, these individuals possess extensive knowledge regarding telescopes and are capable of providing valuable insights on whether a specific model performs admirably and fulfills your requirements. These enthusiasts of amateur astronomy are exceptionally amiable and eager to assist, so feel free to inquire about any queries you may have concerning the telescope you are contemplating.
If you are an amateur in the field of telescopes, it is advisable to refrain from purchasing a second-hand telescope
A telescope is a complex instrument, but it is also extremely delicate. Being a novice, you are likely unfamiliar with the proper techniques for identifying concealed defects in a previously owned telescope:
- Even a minor scratch on the lens can significantly impair a telescope’s light-collecting capabilities;
- The tiniest flaw in the tripod can lead to a constant vibration, thereby making it exceedingly challenging to obtain a stable image.
If you don’t have experience in amateur astronomy or a knowledgeable friend in the field, it would be advisable to avoid purchasing used equipment. Opting for a new telescope ensures that you can trust it to be defect-free and still covered by warranty.
Set realistic expectations
Many telescope manufacturers market their products as a “window to space” or a tool for exploring the universe. Although this may sound appealing, it doesn’t guarantee that your future telescope will have the same capabilities. Why are we mentioning this?
There is a plethora of photographs available on the internet that capture extraordinary views of galaxies, planets, and other celestial objects in deep space. Many individuals inquire about the possibility of seeing these phenomena through a small telescope. The answer is negative. These images have been meticulously crafted by skilled astrophotographers and do not accurately depict what one would observe through the eyepiece of an amateur telescope.
The images one will see while observing planets through a telescope will be considerably less awe-inspiring compared to a processed image. However, it is important to bear in mind that these are “live” representations of celestial bodies located millions of kilometers away. Nevertheless, observing planets such as Mars or Saturn from the comfort of your own backyard is an incredibly remarkable experience. It is an encounter that everyone should have at least once in their lifetime.
This is the challenging aspect that many individuals often struggle with. When you encounter terms such as aperture, focal length, usable magnification, and so on, it can be overwhelming to navigate through all of this knowledge. Nevertheless, all of these attributes collectively shape the capabilities of your forthcoming telescope and dictate what you can or cannot observe with it.
Types of Telescopes
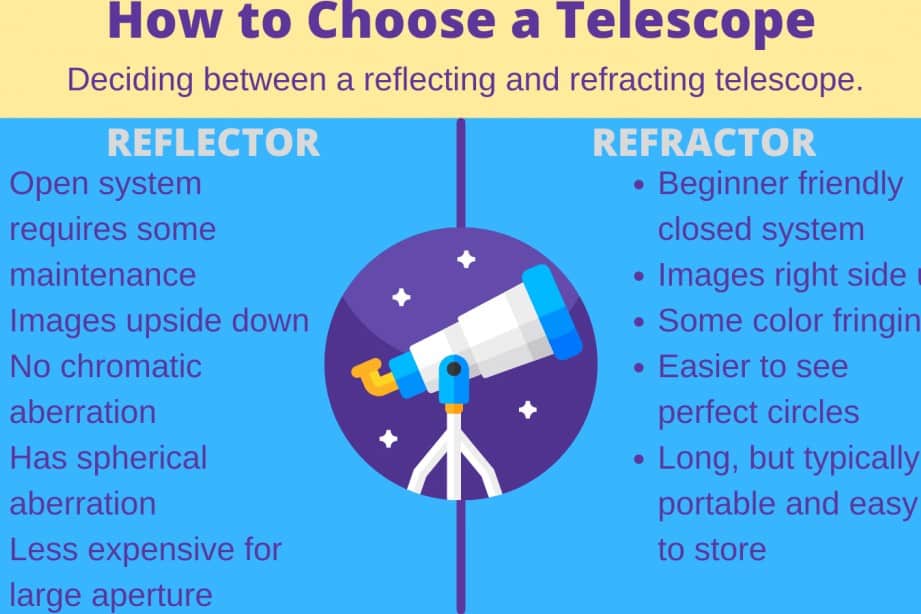
There are over 17 different types of telescopes available. However, for our purposes, we will focus on two main types: the refractor telescope and the reflector telescope.
Refractor Telescope

The refractor telescope is user-friendly and low-maintenance, as it does not require collimation. It can be used right out of the box and is effortless to set up. These telescopes gather light using optical lenses, which typically makes them more costly compared to reflector telescopes that utilize mirrors. They are especially well-suited for observing bright celestial objects like the moon and planets. For those interested in capturing images of deep space, a refractor with a wide aperture and short focal length is the ideal choice to begin with.
Reflectors, also known as reflector telescopes, are an optical instrument that utilize curved mirrors to reflect and focus incoming light onto a flat secondary mirror positioned inside the optical tube. The primary advantage of reflectors over refractors is their cost-effectiveness, as mirrors are less expensive to manufacture. This makes reflectors a popular choice for those seeking a telescope with a large aperture and long focal length without breaking the bank. Unlike refractors, reflectors do not suffer from chromatic aberration, which can affect image quality. However, it is important to note that reflectors still require regular collimation to ensure optimal performance. One type of reflector telescope, known as Dobson telescopes, are particularly well-suited for observing and resolving planets in fine detail, even in areas with high levels of light pollution.
Size of the aperture
The size of the aperture, measured in inches or millimeters, refers to the dimensions of the part of the telescope that gathers light and directs it to the focal point. The composition of this optical component differs depending on the specific type of telescope being considered. A larger aperture enables a greater amount of light to be collected, leading to improved image resolution. It is important to note that the cost of a telescope also rises exponentially as the size of the aperture increases. For beginners, telescopes with apertures ranging from 50mm to 150mm serve as a solid starting point.
Focal length
The measurement of the focal length is determined by the distance, in millimeters, that light travels within the telescope. It spans from the point of entry, also known as the aperture, to the point of exit, otherwise referred to as the focus. The focal length plays a significant role in influencing both the size of the field of view and the level of magnification power that the telescope can achieve. When it comes to observing celestial objects such as nebulae, large clusters, and vast galaxies like Andromeda, shorter focal lengths prove to be more advantageous. On the other hand, longer focal lengths are typically preferred for observing planets or the Moon.
Mount for Telescope / Tripod
Many people are unaware, but the telescope mount is a crucial component of a telescope kit. If you buy a tripod that is constructed with inexpensive materials and lacks the necessary strength to consistently support the weight of your telescope tube, you will end up with an unstable setup. The stability of your telescope is vital for both observing and capturing images of celestial objects. It is important to carefully consider the material used to make the mount, the quality of the mounts, the strength of each leg, and the load capacity.
There are two main types of telescope mounts:
- Alt-azimuth mounts enable movement of the tube in an up/down and left/right motion. They are ideal for observing the Moon and planets.
- Equatorial mounts are utilized for tracking celestial objects and compensating for the Earth’s rotation. Once you have completed the process of polar alignment, you will be able to continuously track your target in the sky. These types of mounts are particularly suitable for astrophotography, but they can be quite expensive.
Eyepieces and Accessories
Eyepieces are essential accessories that allow you to fully utilize the capabilities of your telescope. In simple terms, an eyepiece enables the focused light to reach your eyes without excessive focusing. Without this accessory, you would not be able to see any images.
It is crucial to ensure that your eyepieces are crafted with high-quality optical elements, as they greatly impact the magnification power and field of view of your telescope.
A Barlow lens is an excellent tool for increasing the focal length and enhancing the magnification capabilities of your telescope.
Where can I find a high-quality telescope for purchase?
There are numerous online retailers that offer telescopes for sale. One of the most popular options is Amazon, which provides convenience and user-friendly navigation. However, it’s important to note that Amazon may not provide the same level of customer service as specialized astronomy stores. If you’re in the market for a telescope for kids or beginners, Amazon is a great choice.
On the other hand, if you require a more advanced telescope, it’s advisable to visit an astronomy store. These stores typically carry equipment from reputable brands such as Omegon, Celestron, and Skywatcher. The staff at these stores are knowledgeable and can assist you with any inquiries you may have, ensuring you select a telescope that meets your specific needs.
Are you unsure about how to select a telescope? This guide will provide you with all the necessary details to make a successful purchase and discover the wonders of the universe. We will inform you about the various types of optical instruments available, what features to consider, and how to find the perfect telescope for your specific needs. As a bonus, we will also provide a review of the top beginner-friendly models as recommended by expert astronomers.
Different Types of Telescopes
The choice of optics is determined by the components that form its structure. There are three main types available:
- Refractors – devices with lenses.
- Reflectors – devices with mirrors.
- Combined telescopes, which incorporate both a lens and a mirror. They are also known as catadioptric telescopes.
Each type of optical device possesses unique characteristics that determine its field of application and level of convenience.
Derived from the word “refract,” these telescopes possess a slender cylinder featuring a small lens at the apex (typically up to 130 mm). Refractors bear resemblance to sizable telescopes. The initial refractor was constructed by the renowned physicist Galileo Galilei in 1609. He drew inspiration from the Dutch telescope’s blueprint and devised his own apparatus, primarily for astronomical observations.
Among the merits of lenticular designs, users commend their reliability and ease of maintenance. Refractors’ tubes are air-tight, thereby preventing the accumulation of dust particles that hinder visibility. Consequently, there is no need for frequent surface cleaning.
Refractor models provide a clear and sharp image, and they are also affordable. For those who are new to observing planets, it is important to note that a traditional refractor telescope produces a mirrored image. This is something that beginners looking for celestial objects should consider. If it is important for you to see a non-mirrored image through your telescope, then choose a model that has a wraparound eyepiece.

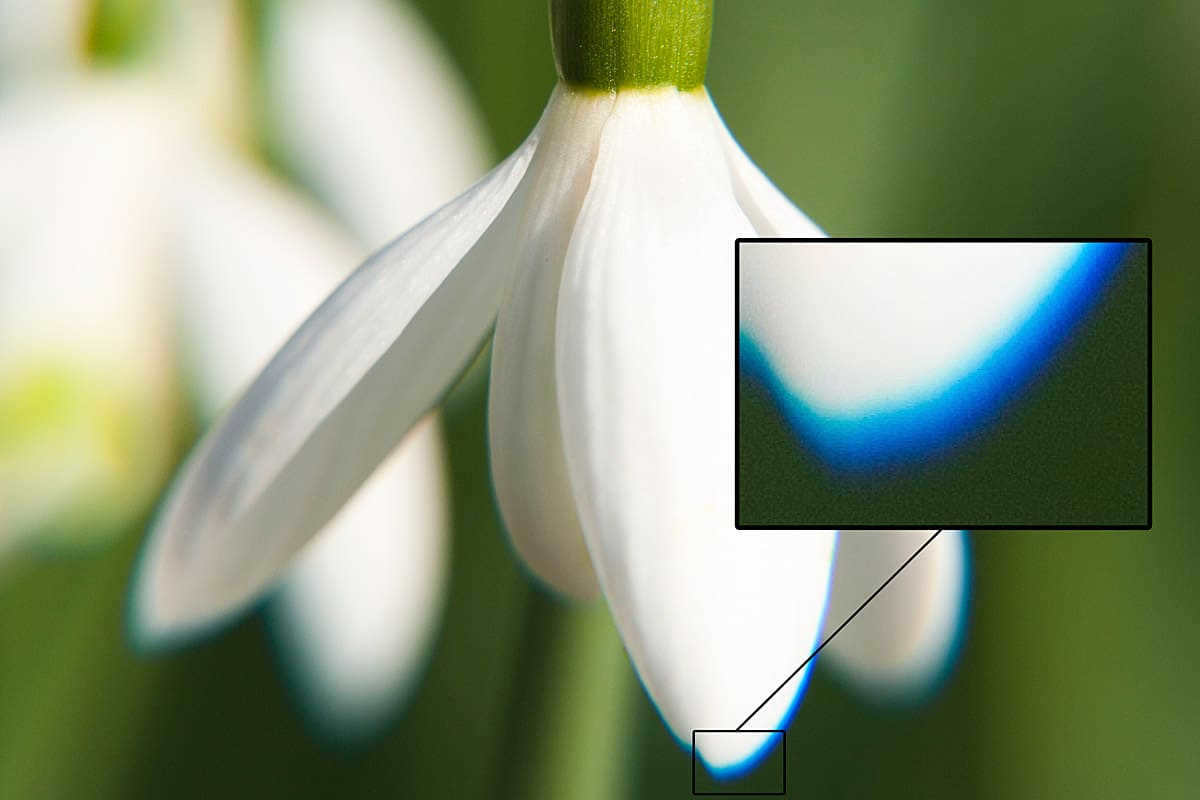
And now let’s discuss the drawbacks. The primary disadvantage of refractor instruments is known as chromatic aberration. These distortions manifest as a colored halo around planets or other observed objects. To address this issue, manufacturers have introduced special lenses – achromatic and apochromatic. Telescopes of the former kind are equipped with two lenses: one for gathering light and the other for dispersing it. These lenses are made of materials with different refractive indices to minimize distortion. Apochromatic devices, on the other hand, utilize a complex system of lenses or different types of glass elements to eliminate the halo effect.
For observations requiring high magnification, it is advisable to opt for apochromatic devices. This choice ensures a superior image quality.
If you’re looking to select the perfect telescope, it’s important to weigh the advantages and disadvantages of various types of astronomical optics.
- They offer a clear and sharp image with excellent contrast.
- Perfect for observing planets and the Moon.
- Equipped with a sealed tube, which means less frequent cleaning.
- Portable and reliable.
- May produce halos and distortions.
- Provide a narrower field of view compared to other telescopes.
- Typically have smaller lenses, making it challenging to observe nebulae and distant objects in space. Models with larger diameters tend to be expensive.
- Require a longer time to adapt to changes in air temperature.
Derived from the Latin word “reflexio”, which means “reflection”, reflector telescopes use a curved mirror instead of a lens. This unique feature allows reflectors to transmit light without any distortion, although the resulting image is inverted. While this may not be a significant issue when observing planets, it can distort the perception when studying terrestrial objects.
The credit for inventing reflector telescopes goes to Isaac Newton, who constructed the first mirror-based telescope in 1668. Newton’s objective was to eliminate the aberrations caused by lens-based telescopes, and he successfully achieved this goal.
One of the primary advantages of reflector telescopes is their ability to eliminate chromatic distortion, which is commonly seen in lens-based telescopes.
Furthermore, mirror optics offer a broader range of possibilities, allowing observers to marvel at even the most distant celestial objects, such as galaxies and nebulae.
The reflex apparatus differs from a telescope in that its eyepiece is located on the side. Additionally, the care of the device is different. The tube is open, allowing dust to accumulate inside. Therefore, it is necessary to periodically clean the optics and adjust its parameters.
- Allows for viewing distant space objects, not just planets and the moon.
- Does not cause color distortion.
- Relatively affordable, even with large lenses.
- Quickly adapts to changes in air temperature, eliminating the need for a long waiting time before observation.
- Requires regular cleaning and adjustment of mirrors (alignment).
- Due to the mirrors, there is a loss of light (about 30%). This is insignificant for amateurs but can be important for professionals.
- Has astigmatism and coma (aberrations in the form of spots and streaks).
- They are bigger than other varieties.
Telescopes that combine catadioptric lenses and mirrors
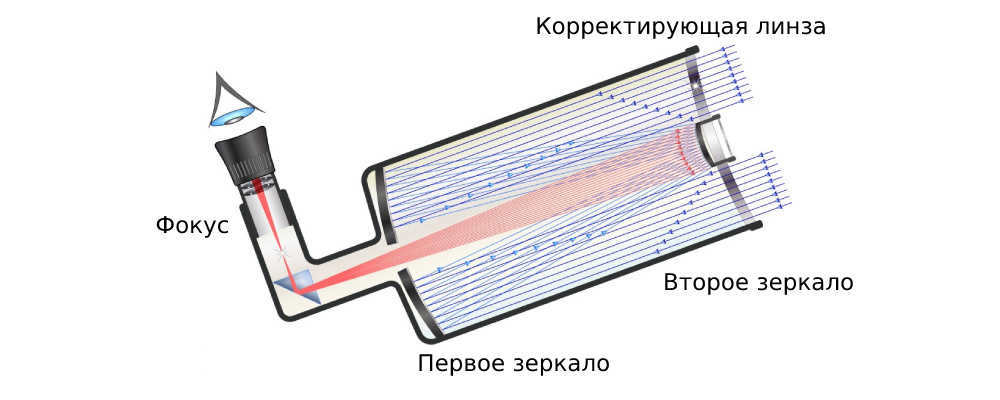
These devices incorporate both lenses and mirrors simultaneously. The primary benefit of these devices is their compactness. The combined telescope can easily be installed on a balcony or desk in a small room, and it can even be transported on public transportation.
Opting for catadioptrics provides the opportunity to obtain the highest quality image, although the contrast and brightness of the picture in combined telescopes are slightly weaker compared to refractive devices. It is important to note that combined devices, like refractors, do not display a direct image – it is mirrored here.
There are several mirror-lens systems known in the field of science. One of these systems was invented by a notable compatriot, D. D. Maksutov. In 1941, he successfully eliminated coma and astigmatism in telescope images by utilizing a meniscus lens, which is a corrective concave-convex lens. This groundbreaking discovery led to the development of meniscus analogs for all advanced telescopes.
Currently, the Maksutov-Kassegren and Schmidt-Kassegren types of compound telescopes are highly sought after. The former has a longer focal length, making it ideal for studying the Moon and the surfaces of planets. The latter, on the other hand, has proven to be a convenient apparatus for capturing photographs of the starry sky.
Advantages of compound telescopes
- Enable the observation of objects within different ranges.
- Compact and portable.
- Equipped with a closed tube, eliminating the need for regular cleaning.
Drawbacks of compound telescopes
- Compound telescopes are not as sharp and contrasted as lenticular devices.
- Compound telescopes tend to be more expensive than other types.
- Compound telescopes take longer to adapt to changes in air temperature.
In order to make an informed decision, it is not sufficient to simply be aware of the different types of telescopes available. It is crucial to understand the specific characteristics of telescopes used for observing planets and to be able to compare the parameters of different models.
Maximum beneficial enlargement
Indicates the highest level of magnification at which optimal image quality remains intact. The calculation is straightforward: multiply the lens diameter (in millimeters) by 2. For instance, if the aperture measures 130 mm, the maximum beneficial enlargement will be 260x. It is important to note that exceeding the maximum magnification may result in diminished optical performance.
Lens aperture size
Novice stargazers often mistakenly believe that the primary factor in a telescope’s performance is its magnification capability. However, this is a misunderstanding. The size of the lens or mirror is actually more crucial, as it directly impacts the clarity and brightness of the resulting image. A larger lens will gather more light rays, resulting in a greater amount of visual information.
Luminosity
Determines the level of brightness that will be observed by space enthusiasts. It is calculated using the following formula:
focal length / aperture = luminosity
If the focal length is 2,000 mm and the aperture is 200 mm, the aperture ratio will be 1:10. Aperture ratios of 1:8, 1:10, and 1:12 are recommended for planetary observations, while ratios of 1:4, 1:5, and 1:6 are suitable for observing galaxies and other distant celestial objects.
Accessories for Astronomical Instruments
Every telescope requires, at the very least, a mount and tripod. While tripods are relatively similar, there are two types of mounts: azimuthal and equatorial. It is important to know which type you need before making a purchase, as each type has its own limitations. Azimuthal mounts are simple and do not require adjustments, but they restrict your ability to observe objects directly overhead, as the telescope will bump into the tripod. On the other hand, equatorial mounts do not have this limitation, but they are more expensive and heavier. Using an equatorial mount also requires some skill in adjustment.
In addition to mounts and tripods, other accessories such as magnifying eyepieces, filters (such as lunar and solar filters), and a Barlow lens can enhance your experience in space exploration. These small additions can make your observations more informative and also safer for your eyes.
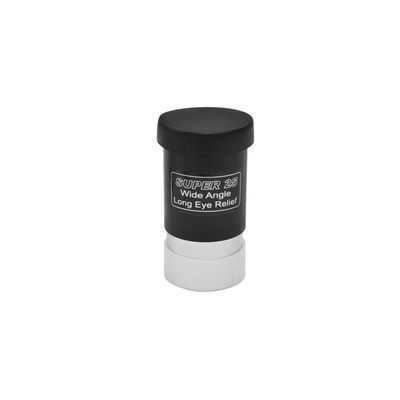
Super Kellner Eyepiece, 25mm, 1.25″
Discover the incredible Super Kellner Eyepiece, available in a 25mm size and designed for use with a 1.25-inch eyepiece holder. This high-quality eyepiece offers exceptional clarity and precision, allowing you to experience the wonders of the universe in stunning detail. Whether you’re a seasoned astronomer or just starting out, the Super Kellner Eyepiece is a must-have addition to your telescope accessory collection. Don’t miss out on this opportunity to enhance your stargazing experience. Order your Super Kellner Eyepiece today!
Criteria for Selection
To successfully purchase a telescope, it is important to answer three essential questions. Without doing so, any articles providing advice on how to choose a telescope will be of little help.
Purpose of the Telescope
Observing Planets and the Moon
When observing these celestial objects, a clear and high-contrast image is necessary. Refractors are able to provide just that. They are convenient and require minimal maintenance. However, in terms of price, they are more expensive compared to reflectors with the same aperture size.
While it is possible to view planets with a lens diameter of 75 mm, experts recommend choosing a telescope with a lens diameter in the range of 150-200 mm. With such a device, you will be able to observe clouds and twilight phenomena on Venus, as well as other details that are not visible with an aperture smaller than 100 mm.
It is not recommended for amateurs to purchase a lens that is too large. This can lead to significant optical distortions and is unlikely to justify its high price.
Another important factor to consider is the type of mount. For observing planets, an equatorial mount is considered a suitable choice. These celestial objects are viewed at high magnification, causing them to quickly move out of the field of view. However, with an equatorial mount, you only need to adjust one knob to keep the planet in sight. While automatically guided mounts offer even more convenience, they require a significant investment.
For the purpose of deep space exploration
If your goal is to explore distant objects such as nebulae, galaxies, or star clusters, opting for a large aperture telescope is a wise decision. Only telescopes with powerful lenses will enable you to observe such celestial bodies.
Among enthusiasts of deep space observation, Newtonian mirror telescopes are highly popular. They are more affordable compared to other types of telescopes with the same aperture. However, you will need to find a balance, as the price, size, and weight of the device increase along with its diameter. Look for telescopes with a lens size of 150-250 mm in order to enjoy observing faint objects in the universe.
Less frequently, potential buyers are in search of telescopes for these types of observations, although it does occur occasionally. A lenticular or compound instrument would be useful for viewing city panoramas or mountain peaks. The selection of reflective devices is not justified due to the placement of their eyepiece on the side of the cylinder, which obstructs the object being observed.
To fully enjoy the experience, telescopes with a wide field of view are recommended. These models typically have a moderate focal length. Opt for models ranging from 400 to 800 mm and indulge in breathtaking views during both daylight and nighttime hours.
Where do you intend to utilize the device?
The selection of telescope models for home use and field research will vary significantly. The size of the telescope is crucial for home use, while weight and mobility are important for field research.
For planetary observation at home, any type of telescope will suffice. However, it’s worth noting that reflector telescopes require a lot of space and may not be the best choice for small apartments or desks. On the other hand, refractor telescopes are more compact and suitable for limited spaces.
A versatile option is a combination telescope, which is lightweight, portable, and enables observation of various celestial objects.
The cost of a telescope is determined by various factors such as the size of the lens, the materials used, the brand, and more. However, in general, SLR telescopes are considered to be the most affordable option. Lensed instruments are also typically reasonably priced, although they can become quite expensive for larger apertures. On the other hand, catadioptric telescopes are the most expensive, but their higher cost is justified by their superior performance.
What kind of device is suitable for a child?
Children typically require a less advanced optical device compared to adults, as their main goal is to explore and become familiar with the space rather than engage in in-depth study. An inexpensive option for a first telescope would be to consider lenticular devices with a diameter ranging from 50 to 90 mm, Newtonian reflectors with a maximum diameter of 130 mm, or Maksutov-Kassegren apparatuses with an aperture of 90-100 mm. Opting for any of these choices will provide the child with an exciting journey through the starry sky and allow them to explore distant objects on Earth.
Review of the top models for beginners based on the rankings
For beginners, it can be challenging to navigate through the numerous options available. That’s why we have compiled a list of three recommended devices for those starting out in the field of observing celestial bodies. These telescopes eliminate the dilemma of how to select the right one and can now be easily ordered.

A lifetime warranty is provided by a reputable manufacturer for this refractor. It is suitable for novice astronomers as well as children. With this telescope, you will have the opportunity to observe both terrestrial objects and the planets of our solar system, as well as the moon. It is not just a toy, but a genuine instrument for astronomical exploration.
With the telescope, you will receive a table tripod and an azimuthal mount that is easy to use. Additionally, an eyepiece is included that corrects the image orientation, providing a straight view instead of an upside-down image.
Furthermore, the kit also features a microscope, allowing you to examine plant and animal cells, as well as insects.
A sleek mirror device mounted on a tabletop Dobsonian mount. It boasts a larger aperture and higher maximum useful magnification than its predecessor, allowing you to observe even more intricate details.
Designed for observing the planets within our solar system, this device also allows for the study of clusters M13 and M92 in the constellation of Hercules.
This telescope provides a clear image without any chromatic aberrations and stands out among other reflectors for its compactness. It is easily transportable, making it perfect for stargazing adventures away from the interference of atmospheric conditions.

The telescope in question is the preferred option for individuals seeking a suitable model for astrophotography. While sharing many similarities with its predecessor in terms of features, this particular device stands out due to its inclusion of a special adapter. This adapter enables users to capture images directly on their mobile phones, eliminating the need for costly additional equipment. Additionally, the device is equipped with an azimuthal mount and a comprehensive range of accessories. Notably, a convenient tray is also provided at the center of the tripod to accommodate these accessories.
Comparison of Telescope Characteristics
This table presents a clear overview of the different features found in each model. Utilize this data to compare the telescopes and select the one that best suits your needs.
Telescope 1: Sky-Watcher Dob 76/300 Heritage
- Table tripod
- Azimuthal mount
- Wraparound eyepiece
- 50x magnification
Telescope 2: Dobson table mount, Super, 10 and 25 mm eyepieces, 1.25″
- Dobson table mount
- Super eyepiece
- 10 and 25 mm eyepieces
- 1.25″ barrel diameter
Telescope 3: Azimuth mount, tripod with accessory table, Kellner eyepieces, 4 and 20 mm, Barlow lens, 3x, universal smartphone holder
- Azimuth mount
- Tripod with accessory table
- Kellner eyepieces
- 4 and 20 mm eyepieces
- Barlow lens, 3x magnification
- Universal smartphone holder
Now that you have all the necessary information, you can confidently make a decision. Simply browse our catalog and order the telescope that will allow you to explore the wonders of the universe.
Comments ( 0 )
Guidelines for commenting on articles
OOO TD “Sima-land” reserves the right to independently select comments for publication without prior notice to users. We do not publish comments that contain the following:
- Information that goes against the laws of the Russian Federation;
- Profanity or offensive statements;
- Irrelevant information that is not related to the subject of the article;
- Links to other online stores, as well as references to specific sellers and importers of goods;
- Statements that defame the honor, dignity, and business reputation of third parties, including stores, manufacturers, and importers of goods;
- Materials that violate the rights of third parties, including the rights to intellectual property and means of individualization.
We are not responsible for informing users about the reasons for rejecting publication and deleting previously published comments.
By leaving a comment, replying to a comment, or asking a question, the user agrees to receive notifications about new replies to their comments.
- All news
- Auto and Moto
- Accessories
- Bath and sauna
- Costume Jewelry
- Home appliances and electronics
- Household chemicals
- Bicycles
- Garlands
- Garlands and holiday lighting
- Children’s goods
- Home and Garden
- Winter goods
- Zootovary
- Toys
- Tools
- Interior
- Interior light
- Stationery
- Books
- Beauty and Health
- Summer goods
- Support for marketing
- Furniture
- Our development
- New Year
- Business and production equipment
- Clothing and footwear
- Clothing, Shoes, and Accessories
- Lighting
- Tableware
- Holidays
- Food
- Promotional items
- Garden and vegetable garden
- Plumbing
- Certificates for services
- Our own production
- SP: organizers
- JV: participants
- Sports and tourism
- Construction and repair
- Souvenirs
- Creativity
- Creativity and hobbies
- Textiles
- Goods for adults
- Products with your favorite characters
- Packaging
- Household goods
- Sewing supplies
- Electrical goods
If you are interested in astronomy and don’t know where to begin, here’s a simple tip: start by observing the stars without any optical aids. All you need for this is a small pocket flashlight (preferably with a red light to avoid blinding your eyes) and a star map (also known as a “planisphere” or a “moving map of the starry sky”), which you can purchase from a store or find in an astronomical calendar (it doesn’t have to be for the current year). There are also many useful apps available for smartphones and tablets, such as SkySafari, Star Chart, Sky Map, and SkEye Astronomy. If your smartphone has GPS, it can help you identify the constellations or planets you are currently looking at. Familiarizing yourself with the patterns of constellations and the names of the brightest stars will greatly assist you in locating astronomical objects in the future, once you acquire your first telescope. Otherwise, searching for most deep space objects can become a frustrating and likely unsuccessful endeavor.
If you’re looking to take the next leap, consider purchasing a pair of binoculars. It may come as a surprise, but even budget-friendly binoculars (like the Meade Travelview 8×25) that you typically bring along to a sports match or theater performance can be perfectly adequate for stargazing.
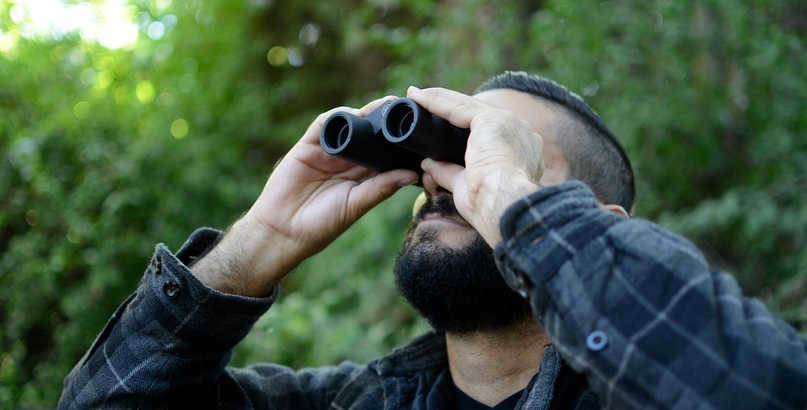
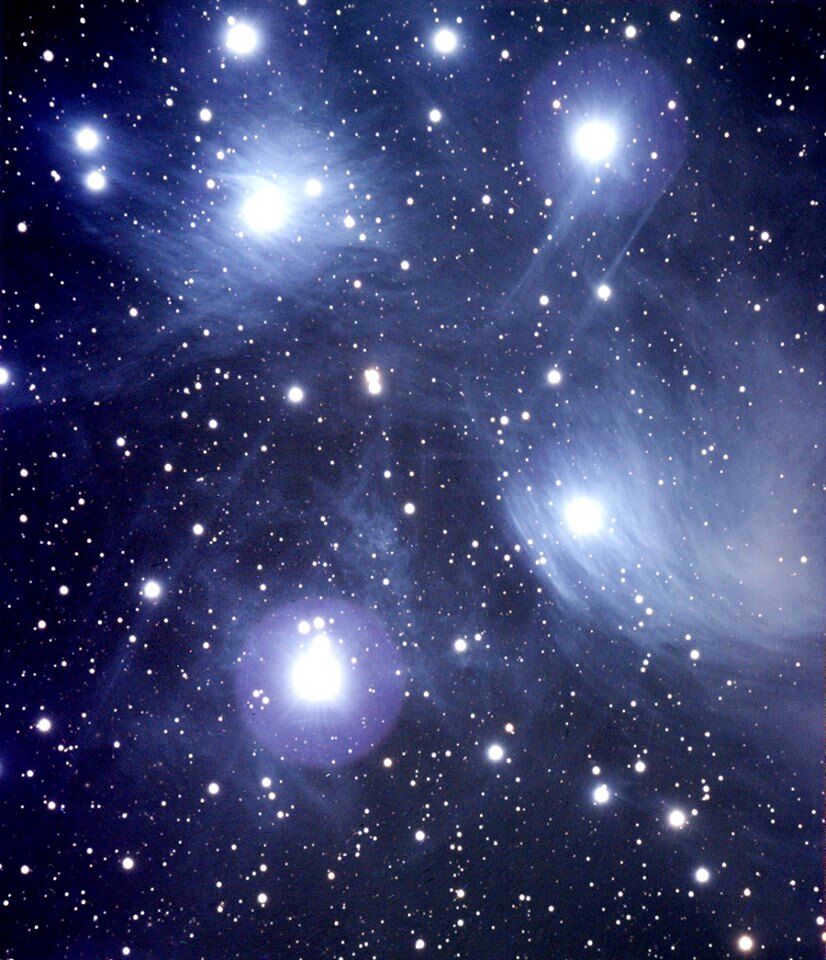
Using these binoculars, you have the opportunity to observe the famous Andromeda Galaxy, the Pleiades, the Crèche, the Great Orion Nebula, and numerous other celestial objects. Additionally, the binoculars reveal intricate details of the lunar surface that are typically invisible to the naked eye. Once you have mastered locating celestial objects with binoculars, you will be well-prepared to purchase your first telescope.
Before purchasing a telescope, we suggest obtaining a high-quality star atlas or planetarium software for your computer. Although astronomy apps for smartphones and tablets may not offer the same level of detail and extensive databases, they serve as a good starting point. Additionally, we recommend exploring magazines, websites, and social media groups dedicated to astronomy. These resources will provide information on fascinating celestial objects and phenomena, such as planets, comets, eclipses, and meteor showers, that you can observe in the near future.
To start with, let’s talk a bit about basic knowledge. Every telescope has two main functions. Firstly, it collects light from faraway celestial objects, and secondly, it enlarges the image of those objects. There are numerous telescope designs available, but they all operate on the same principle – a lens or mirror (or both) captures light so that the resulting image can be observed through the eyepiece. The question – “which function of the telescope is more significant?” is answered without any doubt: collecting light. Having a high magnification is not nearly as crucial as commonly believed. Consider this – when we want to see a small object in a dimly lit room, we need more light, not a magnifying glass, right?
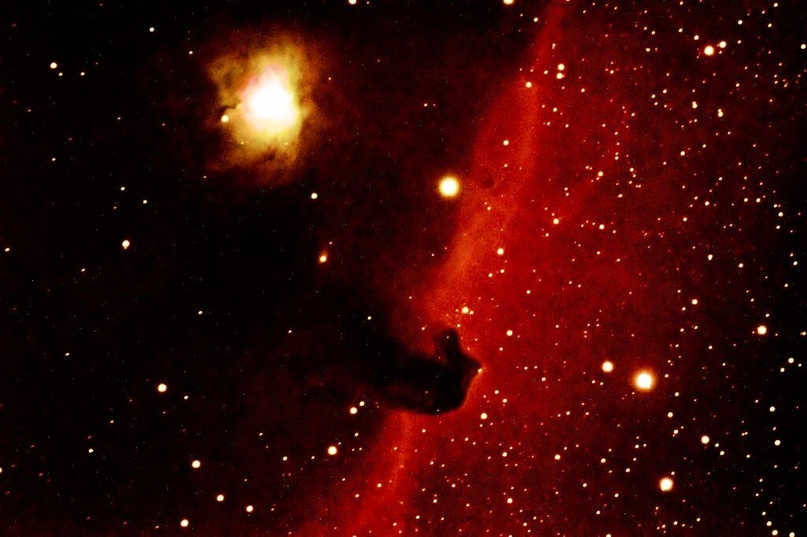
It might come as a surprise, but there are many celestial objects that require little to no magnification! Take the well-known Andromeda Nebula (M31 galaxy) for example, it spans over 3 degrees, which is 6 times the diameter of the full Moon. Do you really need strong magnification to observe an object of this size? The answer is no. With the naked eye, we can only see the small bright core of this galaxy. To observe the Andromeda Nebula in its entirety, we need to gather as much light as possible, without relying on high magnification. Magnification becomes crucial when observing bright objects that are closer to us, such as the Moon and planets. Of course, it is possible to solely focus on observing planets and the Moon, but why limit ourselves?) Therefore, when selecting your first telescope, don’t get caught up in pursuing high magnification! Yes, celestial objects may appear larger in this case, but it also amplifies things that shouldn’t be magnified, like vibrations in the telescope tube or distortions caused by atmospheric turbulence. It’s crucial for novice astronomers to understand how to determine the optimum magnification for each celestial object, which means finding the magnification that allows for the greatest amount of detail while minimizing loss of image quality. Almost all optical and mechanical characteristics of a telescope (such as magnification limit, resolving power, size, and weight) are directly dependent on its aperture, i.e., the diameter of the main mirror or lens. For optical parameters, the relationship is directly proportional: the larger the aperture, the better the ability to observe faint objects and apply higher magnification. Therefore, when faced with a choice between two telescope models that have identical characteristics, always opt for the one with the larger aperture.
CRUCIALOpting for a larger aperture results in a substantial increase in the dimensions and mass of the telescope. 40 or even 60 kilograms – a significant amount of weight. If you are not prepared for this – the acquisition of such a potent instrument can easily deter your interest in astronomy. Additionally, storing a large telescope may necessitate a considerable amount of space in your apartment. For beginner stargazers, it is advisable to select a telescope model with an aperture ranging from 3 to 8 inches (70 to 200 mm).
Directing and managing
Next step: make a decision regarding the type of telescope mount. A telescope mount is similar to a tripod for a camera or binoculars, but it holds much greater importance. While you can use a camera or binoculars without a tripod, it is impossible to observe through a telescope without a mount. Imagine trying to precisely point the telescope at an object and hold it in place for several minutes, especially if the tube has a diameter of 10 cm, is 1 meter long, and weighs 3 kg! And this is considered a small telescope! Typically, the mount is purchased as part of a set with the telescope tube, but it can also be bought separately. There are two main types of mounts: alt-azimuthal and equatorial. An alt-azimuth mount (such as the Coronado AZS Mount) allows you to rotate the telescope around two perpendicular axes: the vertical (azimuth) axis and the horizontal (zenith) axis. Since the starry sky slowly rotates around the Earth, it is necessary to constantly adjust the position of the tube in both axes using micrometer screws in order to track the object. With Dobsonian telescopes, this adjustment is made manually. The advantages of alt-azimuth mounts are their simple construction, easy assembly, effortless operation, and lightweight design. An alt-azimuth mount is likely the best choice when purchasing a telescope for a child.
Motorized alt-azimuthals or equatorials with a computerized pointing system (such as the Meade LX 65 Audiostar) are the latest and most advanced mounts. They have the ability to automatically point to objects selected by the user from a database and then track them continuously at a specified rate (stellar, lunar, or solar). This feature is incredibly convenient and enables users to easily locate even the most elusive objects in the sky. With computer-controlled motorized mounts, star charts or atlases are no longer necessary, making it a great option for both beginners and experienced amateur astronomers. These mounts also offer the exciting opportunity to embark on “star tours.” However, it is important to note that there are some drawbacks to these mounts:
– To automate the process, one must acquire the necessary skills in making the primary binding, as it is an essential component. – The power supply issue, including batteries, accumulators, or a mains adapter, needs to be addressed.
Irrespective of the mount type, it must possess sturdiness and stability. Even the finest optics would be rendered ineffective if mounted on an unbalanced or shaky mount that reacts to slight breezes or accidental touches. To ensure comfortable observations, the mount should have a weight equal to or greater than that of the telescope tube. If engaging in astrophotography, it is advisable for the mount to be several times heavier than the tube.
What are telescopes?
All telescopes that use optics can be classified into three major groups: refractors (also known as lenticular telescopes), reflectors (also known as mirror telescopes), and catadioptrics (also known as mirror-lens systems). It may come as a surprise, but when it comes to determining which type is better, the answer is none!
It’s a fact that there are no perfect designs for telescopes. Each design has its own strengths and weaknesses. There are numerous models that vary from one another. The sky is filled with thousands of different objects, and no single telescope can provide equally good views of all of them. For instance, refractors are excellent for observing bright objects like the Moon and planets at high magnification, but they are not as effective for spotting dim nebulae and galaxies. On the other hand, large aperture reflectors gather a significant amount of light and are ideal for observing distant nebulous objects beyond the solar system. It’s important to determine what you want to see the most and then select the optical instrument that can best display those objects of interest. Are you captivated by the planets in our solar system? Do you dream of seeing Saturn’s colorful rings, Jupiter’s satellites in their ceaseless dance, Mars’ dust storms that cover half the planet, or the mountains and valleys of the Moon? In that case, a refractor telescope like the Meade StarPro AZ 90 would be the ideal choice for you. Does your heart beat faster when you hear names like “Orion Nebula,” “Lagoon,” or “Fishing Net”? Do you want to witness firsthand the light that has traveled to us from the farthest corners of the Universe? If so, the optimal optical instrument for you would be a reflector telescope with a large aperture, such as the Meade Lightbridge Plus 12 Dobsonian.
Done!
Have you made a decision? Please, take your time! When you open the desired box at home, the first thing you should do is carefully read the manual. Begin your observations with the simplest and most familiar celestial (or even terrestrial) objects. If your telescope offers additional options and accessories (there is a wide range to choose from), do not feel pressured to buy them all at once. You can always make those purchases later. Take the time to learn about your telescope and its capabilities gradually, one observation at a time. Eventually, it will become your best and most reliable companion for exciting journeys through the starry sky.
The table provided below summarizes the objects that can be seen through each type of telescope, along with their respective quality.
| Telescope type | Solar System Objects | Stars | Deep Space Objects |
| 60-70 mm refractor with a magnification of 25 – 120x | Sunspots (with a solar filter); phases of Venus; lunar craters up to 5 miles in diameter; several cloud belts on Jupiter and its 4 Galilean satellites; rings of Saturn (with Cassini slit under exceptionally good observing conditions) | Double stars with component distances of no more than 2 seconds of arc under good observing conditions; faint stars up to 11.5 magnitude | Large globular clusters; some bright nebulae; under good observing conditions, most objects in the Messier catalog with minimal detail |
| 80-90 mm refractor, 110 mm reflector, or 90 mm mirror-lens telescope with a magnification of 30 – 250x | Sunspot structure (with a solar filter); phases of Mercury; lunar craters up to 3 miles in diameter; polar caps and large dark surface details on Mars; additional cloud belts on Jupiter; Cassini slit in Saturn’s ring + 4 or 5 satellites; Uranus and Neptune as very small disks | Double stars with component distances of no more than 1.5 seconds of arc under good observing conditions; faint stars up to 12 magnitude | Many globular clusters, gas and planetary nebulae, galaxies; all objects in the Messier catalog and the brightest objects in the NGC catalog under good observing conditions. Some nebulae show traces of internal structure |
| 150 mm reflector or mirror-lens telescope with a magnification of 30 – 300x | Details of lunar surface less than 2 miles across; details of Mars disk details; cloud belt structures on Jupiter under good observing conditions; faint cloud belts on Saturn; faint comets and bright asteroids | Double stars with component distances of no more than 1 second of arc under good observing conditions; faint stars up to 13 magnitude | Hundreds of globular clusters, nebulae, and galaxies (some galaxies show traces of spiral structure); The structure of globular clusters and some nebulae is visible |
| 200 mm reflector or mirror-lens telescope with a magnification of 50 – 400x | Details of the Moon’s surface with a cross-section of less than 1 mile; large clouds and dust storms on Mars; 6 or 7 satellites of Saturn; Jupiter’s Galilean satellites as disks at high magnifications; faint asteroids | Double stars with component distances of less than 1 second of arc under good observing conditions; faint stars up to 14 magnitude | Some globular clusters are resolved down to the nucleus; under good observing conditions, galaxies and nebulae show numerous details of their internal structure |
Below is a summary of the astro instruments that are most suitable for observing specific celestial objects:
| Refractor | Observations of the Moon and planets | Observations of deep space objects and comets | Moon and Planet Photography | Photography of deep space objects and comets | Ground observations |
| On an alt-azimuth mount | Recommended | Limited capabilities | No | Good | |
| On equatorial mount | Highly recommended | Possibilities are limited | Recommended | Possibilities are limited | No |
| Reflector | Observations of the Moon and planets | Observations of deep space objects and comets | Moon and planetary photography | Deep space and comet photography | Ground-based observations |
| 80 – 120 mm Newton on equatorial mount | Good | Acceptable | Recommended | Acceptable | No |
| 150 – 200 mm Newton on equatorial mount | Good | Recommended | Highly recommended | No | |
| 200 mm and more Newton on Dobson mount | Acceptable | Highly recommended | Possibilities are limited | No | |
| Mirror-lens telescope | Observations of the Moon and planets | Observations of deep space objects and comets | Photography of the Moon and planets | Deep space and comet photography | Ground observations |
| 90 mm Maxutov on a motorized AA mount | Recommended | Limited capabilities | Recommended | Limited capabilities | Acceptable |
| 200 mm Schmidt-Cassergren on motorized AA mount | Highly recommended | Recommended | Very recommended | Acceptable | |
| Binoculars | Observations of the Moon and planets | Observations of deep space objects and comets | Photography of the Moon and planets | Deep space and comet photography | Ground Observations |
| Binoculars 10×50 | Limited capabilities | Acceptable | No | Highly recommended |
The design and operating principles of the two main types of telescopes differ.
A refractor is also known as a lenticular telescope and is based on the principle of light refraction. These devices use lenses to refract light, resulting in optical magnification.
The design of refractors is relatively simple, which means they can be more affordable compared to other telescopes, without considering individual nuances and characteristics.
When purchasing a telescope as a gift for a beginner amateur astronomer who is just starting to familiarize themselves with the night sky, a great option would be models in the entry-level price range (up to 10,000 rubles). These models are refractor type telescopes with a lens diameter (aperture) ranging from 50 to 70 mm and come with either an equatorial or azimuthal mount. Opting for this choice will allow you to captivate a child with the wonders of studying the stars without having to spend too much money, while also allowing an adult amateur astronomer to determine the necessary functionality of the telescope.
The tube of this lens telescope is completely enclosed on both ends, protecting the lens and eyepiece from dust and moisture. The construction is sturdy and requires minimal maintenance or care. It is an excellent choice for beginners, children, and also for taking on long trips in the car trunk.
Reflector telescopes, also known as mirror telescopes, are optical instruments that are built using reflecting, or mirror, elements. Typically, they consist of one concave mirror and one diagonal mirror. While this design can be more challenging than a refractor telescope, it offers several advantages.
One of the main drawbacks of a refractor telescope is chromatic aberration, which causes observed images to have a colored effect. This occurs because different colors, ranging from blue to red, are refracted differently. As a result, when we look through the eyepiece, we see objects with their images split into different colors: the red parts do not align with the blue and violet parts.
Mirror telescopes, due to their unique design, are completely immune to chromatic aberration, resulting in a crystal-clear image without any color anomalies or artifacts. Additionally, the image produced by a mirror telescope is notably brighter and more contrasty, making it ideal for observing faint objects. Despite having the same technical characteristics as other telescopes, mirror telescopes are also more compact in size.
However, it is important to handle a mirror telescope with care, as it lacks protection against dust and other foreign particles. Furthermore, mirror telescopes are more fragile compared to other types, making them less suitable for travel. These telescopes are best suited for detailed observations and are typically preferred by experienced astronomy enthusiasts. It is recommended to follow the instructions provided:
Optimal choices in the mid-price range (between 10,000 to 20,000 rubles) are telescopes that utilize a reflector-style optical design with an aperture diameter ranging from 110-120 mm, and are equipped with either an azimuthal or equatorial mount. These telescopes can serve as reliable companions for amateur astronomers in various stargazing scenarios and provide opportunities for skill development in celestial observation.
These telescopes are perfect for “contemplative” observation and for capturing images of the celestial sky and celestial bodies, but they are not suitable for novices or young astronomers.
If space explorers are interested in a telescope with added functionalities, they may want to consider purchasing a catadioptric telescope. This type of telescope is ideal for individuals who enjoy going out of town or even traveling with their telescope.
Specifications
When selecting a telescope, it is important to consider not only its construction but also its characteristics. Key factors to pay attention to include magnification, aperture, relative aperture, and the focal length of the lens.
All other factors being equal, a higher maximum useful magnification is generally preferred as it allows for more detailed observations. However, it is worth noting that achieving higher magnification may come at the expense of other features or exceed the planned budget for the telescope.
It is important to note that when using high magnification to point at specific objects, you will also need a viewfinder with a wide field of view in order to locate and point at the desired object. The rotation of the Earth causes the objects in the sky to appear to move, so if they are outside the field of view of the telescope, they will move out of sight more quickly. Furthermore, a telescope with high magnification will require a sturdy mount to prevent vibrations (which can cause image blur) even with slight touches.
The lens’s focal length is directly determined by a related factor – the relative aperture (also known as the aperture power). The lens’s magnification is also influenced by this factor. A smaller focal length, with the same lens diameter (i.e., a larger aperture), allows the telescope to better observe faint objects. Conversely, a longer focal length results in greater magnification. When choosing a focal length, it is important to maintain a balance with other characteristics, as a high magnification will be ineffective at a low aperture.
Type of mounting and drive availability
A mounting is a device used to direct the telescope tube. Two types of mountings are available, each with its own way of directing the telescope: azimuthal and equatorial. Both types have distinct advantages.
The azimuthal mounting allows for vertical and horizontal guidance, similar to a camera on a tripod. It is simple, stable, and intuitive, making it ideal for beginners. Additionally, it is compact, which is advantageous for transportation. However, its drawback is the inability to track objects along one axis as they move across the sky due to the Earth’s rotation. Simultaneous guidance on both axes is required. Despite this limitation, the azimuthal mounting is highly convenient for travel and is more affordable. However, it does constrain the possibilities of long exposure photography.
An equatorial mount enables the telescope to rotate around a single axis, making it convenient for accurately pointing at specific celestial objects based on their coordinates for further tracking. This type of mount is particularly useful for planetary observations. Unlike other mounts, the equatorial mount does not rotate the field of view, allowing for high-quality astrophotographs even at slower shutter speeds. However, these mounts can be challenging for beginners to operate due to their complexity and weight. Additionally, they require a counterweight and are generally more expensive compared to other mounts.
In addition to manually tracking observed objects as they move across the field of view due to the Earth’s natural rotation, an electric drive can be used. Electrically driven mounts, although more expensive, offer the advantage of being able to fix the position of celestial bodies at specific points in the field of view, which is crucial for photography purposes. Furthermore, they enable auto-targeting at pre-determined coordinates to a selected object, greatly simplifying surveillance and saving time in the process of object searching.
These are the factors that need to be considered, assuming everything else is equal.
Weight and size. When selecting a telescope, it is important to consider the length of its optical tube and its weight, depending on the intended purpose. For instance, larger telescopes are ideal for stationary observations but not practical for travel. On the other hand, telescopes with high magnification and aperture tend to be heavy, while lightweight and compact telescopes are not suitable for astrophotography.
The viewfinder is a helpful tool in aiming the telescope at specific objects. Typically located on the outside of the telescope body, it plays a crucial role when using high magnification. This is because at high magnification, the field of view becomes narrow, making it challenging to locate a particular object. There are two types of viewfinders: optical and collimator. Collimator viewfinders are often referred to as red dot viewfinders.
Optical viewfinders are small telescopes mounted externally on the telescope tube. They have low magnification and provide a parallel view of the object. On the other hand, collimator viewfinders do not magnify the image. Instead, they display a dot or crosshair indicating the position of the telescope axis. One advantage of collimator viewfinders is that they can be viewed from any angle without rotating or reflecting the image of the sky.